Best Of
Homeworld 3: Best Formations

Splitting ships into many control groups is a very common aspect of the Homeworld 3 gameplay. It enables players to strategize on attacks and focus on specific enemy ships’ weaknesses by amplifying the damage dealt. At the same time, splitting optimizes certain ships’ strengths and minimizes their weaknesses.
Formations are the basis of your attack strategies and are especially crucial in PvP fights. To set your ships in diverse formations, press the forward slash on your keyboard. Unfortunately, formations are not clearly explained in the game, despite being crucial to winning battles. This article discusses the six best formations in Homeworld 3.
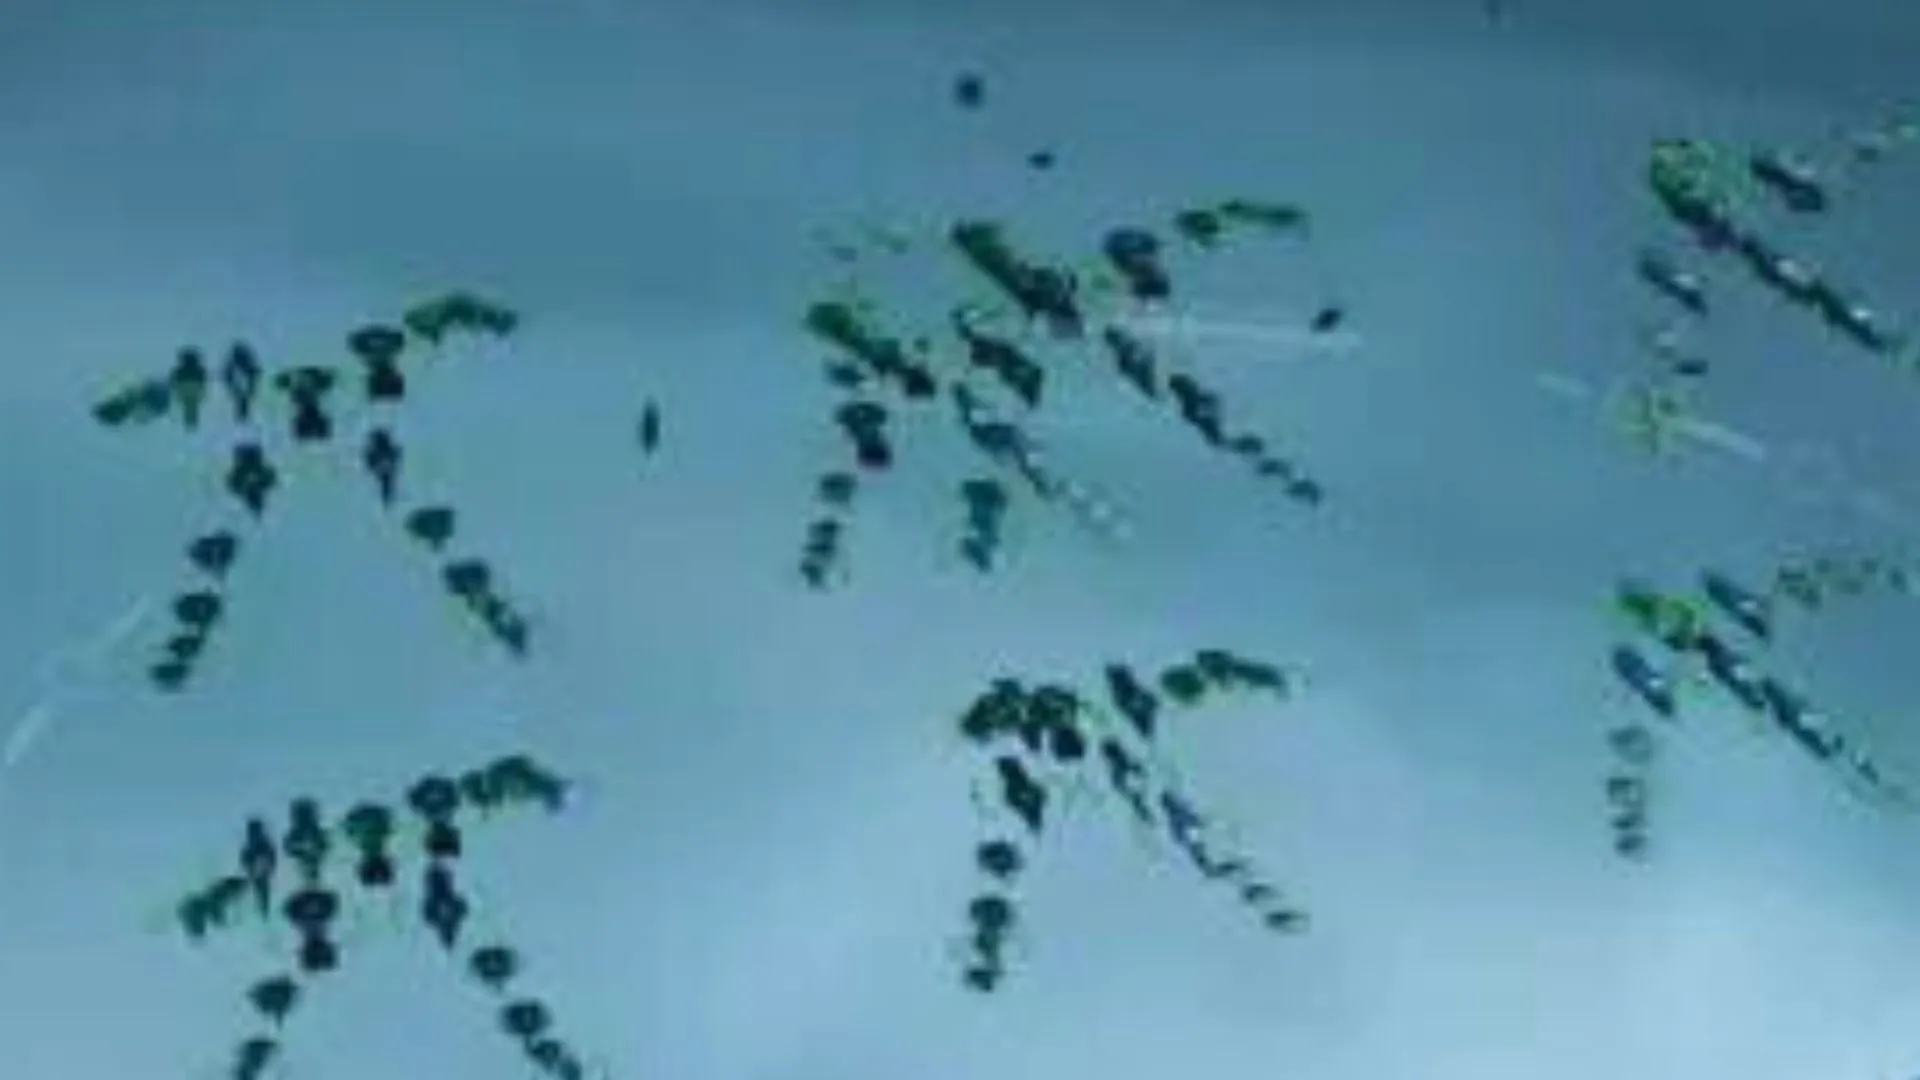
6. Delta Formation

The Delta formation aligns your ships in a chevron shape. It works especially well with Strikecraft ships, which move fast to hit enemies quickly and evade attacks. Strikecraft include the Recon, Interceptor, and Fleet Bomber. It is worth noting that Fleet Bombers are the best Strikecraft ships, as they specialize in attacking large, slow-moving ships in swarms. Interceptors are effective against corvettes and other enemy Strikecraft, while Recons are only effective against weak, unarmed ships.
This formation maintains even spaces between ships, enabling them to avoid AOE attacks that can take out multiple ships. This is crucial, considering that all Strikecraft have relatively weak defense capabilities and can be easily destroyed. Recons and Interceptors are easily destroyed, while Fleet Bombers have limited defense capabilities. However, the even spacing between ships in a Delta formation doesn’t compromise their damage output.
Interestingly, you can use the Delta formation with other ships besides Strikecraft. The idea is to take advantage of its low susceptibility to AOE attacks without necessarily striking. For example, you can set a bunch of Assault Frigate ships in Delta formation when approaching enemies to avoid damage and then switch to a Wall or Claw when you come within striking distance.
5. Wall Formation

The Wall Formation resembles a long, slow-moving wall, with ships flying equidistant from each other. The ships are densely packed in a flat, vertical shape resembling a wall. The idea is to concentrate overwhelming firepower on specific targets to maximize damage output. The formation is ideal for larger capital ships, such as Ion Frigates and Assault Frigates. Interestingly, it is also most effective against other large, slow-moving ships.
While the Wall formation enables ships to concentrate their firepower, maneuvering to dodge attacks is difficult. Your ships can thus take considerable damage if you come under heavy attack. Notably, this is one reason why it is recommended for capital ships with reliable defense capabilities, as Strikecraft are easy to destroy.
The Wall formation’s vulnerability to heavy attacks limits its use to two ideal scenarios. The first scenario entails wiping out most of the enemy ships and turrets, crippling the enemy’s attack capabilities. The second scenario involves engaging in long-range attacks that enable you to maintain a safe distance between your ships and the enemy’s ships.
4. Sphere Formation

The Sphere formation arranges ships in an orbit, resembling a sphere, surrounding a target ship from all sides. Your ships move in a geo-synchronous fashion when the target moves to maintain a relative position. The objective is to cut off a ship’s escape routes and overwhelm it with concentrated firepower. Notably, your ships fire at the target ship at the maximum possible rate to maximize damage output.
This formation works best with Strikecraft ships and is especially efficient against large capital ships. However, capital ships can unleash powerful shock waves when they blow up, taking out multiple ships. As such, you should be ready to order them away from the blast radius.
However, it is worth noting that your ships don’t perform any evasive maneuvers when in the Sphere formation. To this end, this formation is inefficient against other Strikecraft ships with good anti-strike weapons.
Besides offense, the Sphere formation is also efficient for defense. You can form Spheres around your capital ships to protect them against bombers. It is especially ideal for protecting Resource Controllers and AI ships.
3. Cross (X) Formation

The Cross formation is dubbed the ‘X’ formation because ships fly in a flat X shape. It is one of the most versatile formations, and you may find yourself applying it more often than other formations. It works best with Strikecraft ships that have high speeds and deadly weapons.
The ‘X’ formation is ideal for concentrating your firepower in a wide area. Notably, it is especially effective against large, slow-moving ships, as your ships can strike quickly, maneuver to evade attacks, and then get back into position to strike again.
2. Claw Formation
Most of the fights in Homeworld 3 involve Strike craft, which can cause considerable damage to your ships. Fortunately, the Claw formation is a reliable defense against enemies’ Strike craft attacks. Interestingly, the Claw formation looks like a distorted X formation, with two arms extending forward like a claw.
Unlike most other formations, the Claw formation works well with different ship types. Ideally, you should use it with Strikecraft and larger ships like Corvettes and Frigates at a ratio of five-to-one. The large ships are placed at the back and center to protect them from enemy Strikecraft, making this formation ideal for escorting valuable ships or positioning them for strategic attacks.
Interestingly, the Claw formation works especially well with ships set in an Aggressive stance, which can be difficult to control. However, it is worth noting that the Aggressive stance isn’t always recommendable. It sets your ships to focus entirely on attacking enemy ships at all costs, disregarding defense or strategy.
1. Wedge Formation

Like the Claw formation, the Wedge formation is ideal for different ship types. It resembles a wedge, with large ships placed at the center and smaller ships placed at the edges. It is like a cross between the Trail and Wall formations, being neither too densely packed nor stretched out.
The Wedge formation comes in handy later in the game, with battles becoming densely packed with ships. It incorporates many ships and reduces your need to micromanage different groups.