Best Of
GroundedYeni Başlayanlar İçin En İyi 10 İpucu
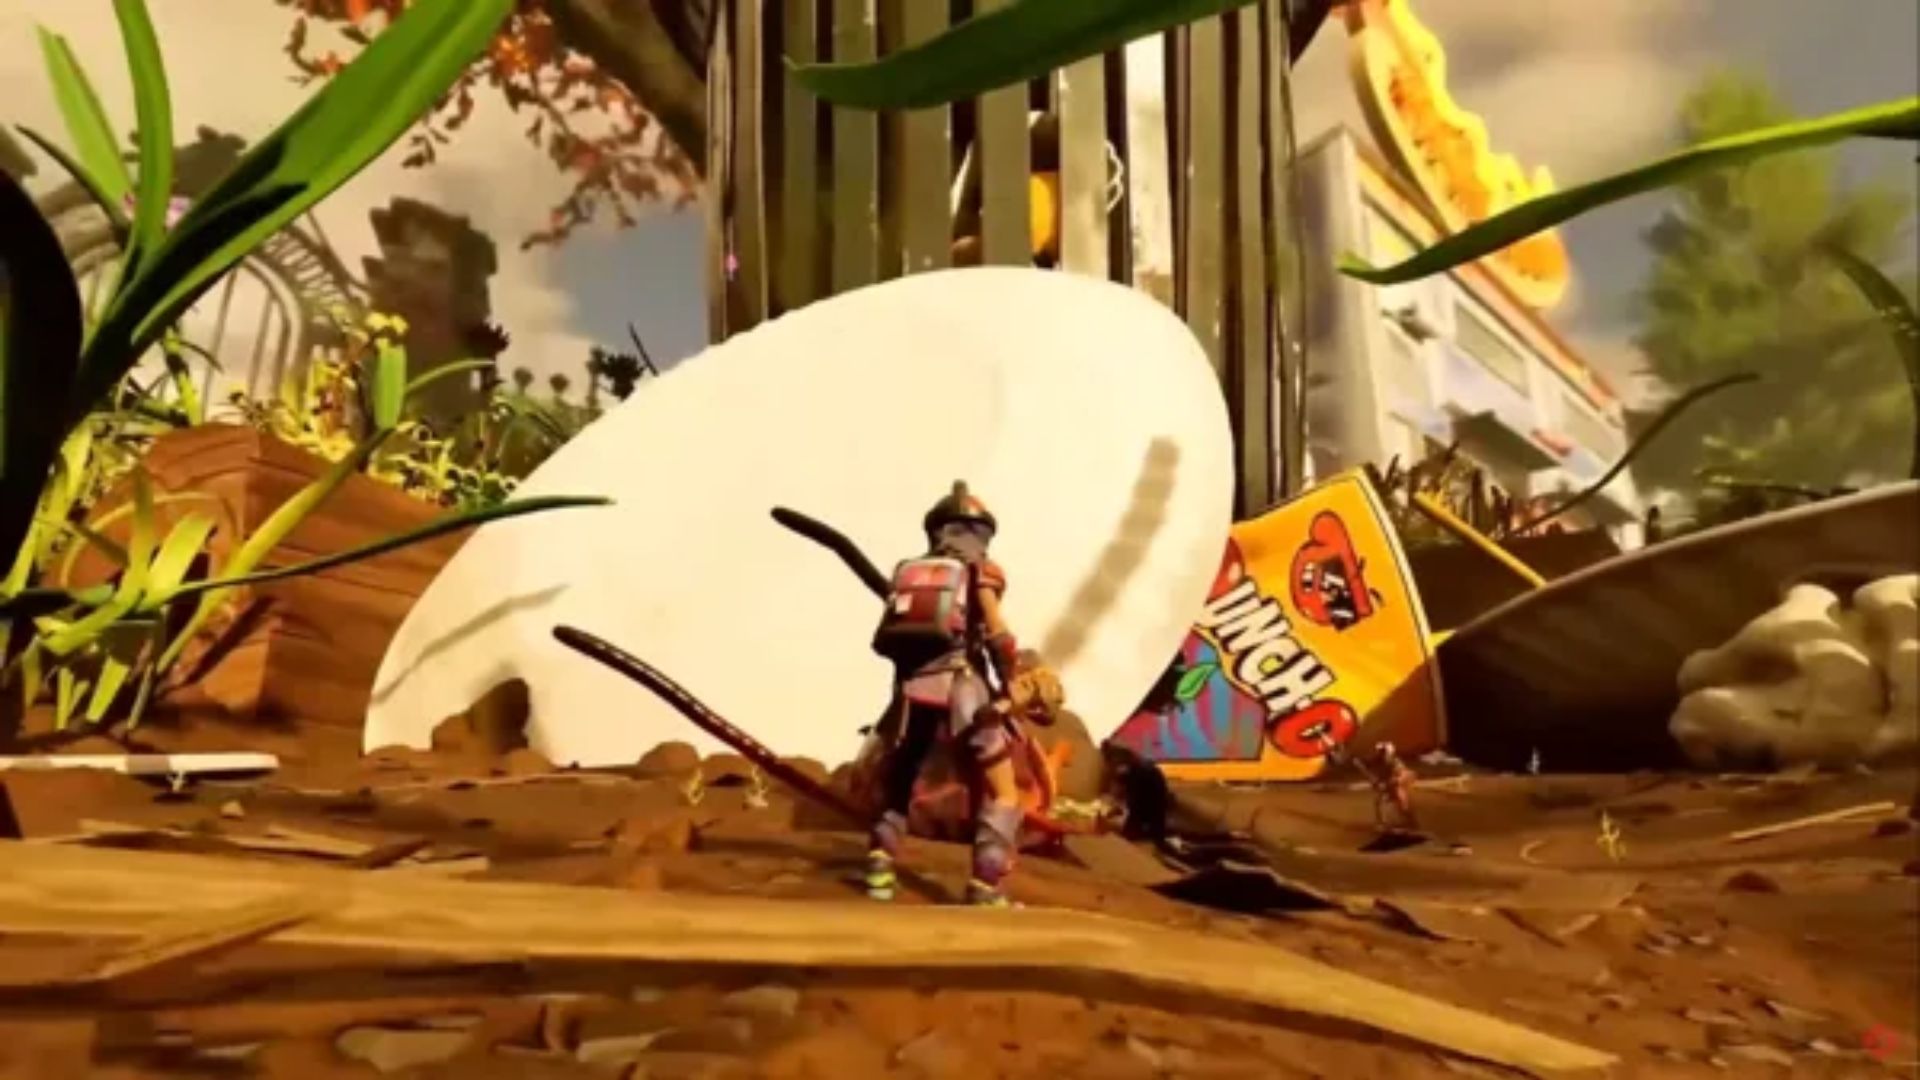
Brook Hollow Park, bir karınca boyutunda olduğunuzda ve etrafınızdaki her şey sizi öğle yemeği olarak istediğinde, sıradan bir park gezintisi değildir. Grounded 2, daha büyük bir harita, yeni sistemler ve bolca sürprizle orijinal hayatta kalma macerasının üzerine inşa ediyor. İster tamamen yeni ister arka bahçe gazisi olun, bu ipuçları hayatta kalmanıza, gelişmenize ve belki yol boyunca birkaç böcekli arkadaş edinmenize yardımcı olacak. İşte yeni başlayanlar için en iyi 10 ipucu.
10. Omnitool’u Erken Öğrenin
Grounded 2‘de alacağınız ilk yükseltmelerden biri, eski ayrı alet koleksiyonunun akıcı bir yedeği olan Omnitool’dur. Baltaları, çekiçleri, kürekleri ve anahtarları idare etmek yerine, artık yükseltmelerine bağlı olarak işlev değiştiren tek bir aletiniz var. Temel inşaat için ot, kuru ot ve karahindiba kesmenize izin veren Omni Baltası ile başlayacaksınız.
İlerledikçe, daha sert malzemeleri kırmak için Omni Çekici’yi, kazmak için Omni Kürek’i ve sonunda tamir etmek için Omni Anahtar’ı açabilirsiniz. Tüm yükseltmeler Ranger İstasyonlarında gerçekleşir, bu yüzden kaynakları toplayın ve onları düzenli olarak ziyaret edin. Dördünü de ne kadar erken açarsanız, malzemeleri o kadar hızlı toplayabilir ve gelişmiş projeler üzerinde çalışabilirsiniz.
9. Her Şeyi Analiz Etmek İçin Ranger İstasyonlarını Kullanın
Ranger İstasyonları sadece alet yükseltmeleri için değildir; aynı zamanda yeni tariflerin kilidini açmak için gerekli olan Analizörleri de barındırır. Oyuncular bir kaynağı veya böcek parçasını tarayabildikleri her seferde, o malzemeye bağlı eşyalar için planlar elde ederler. Bu, yapı parçalarından zırh setlerine kadar her şey olabilir. Analizörler bir şarj sistemiyle çalışır, tam şarj olduğunda dört öğeyi taramanıza izin verir. Bir istasyon boşsa, başka birine gidin, çünkü her biri bağımsız olarak şarj olur. Tarama aynı zamanda beyin gücünüzü artırır, bu da seviye atladıkça önemli tariflerin kilidini açar.
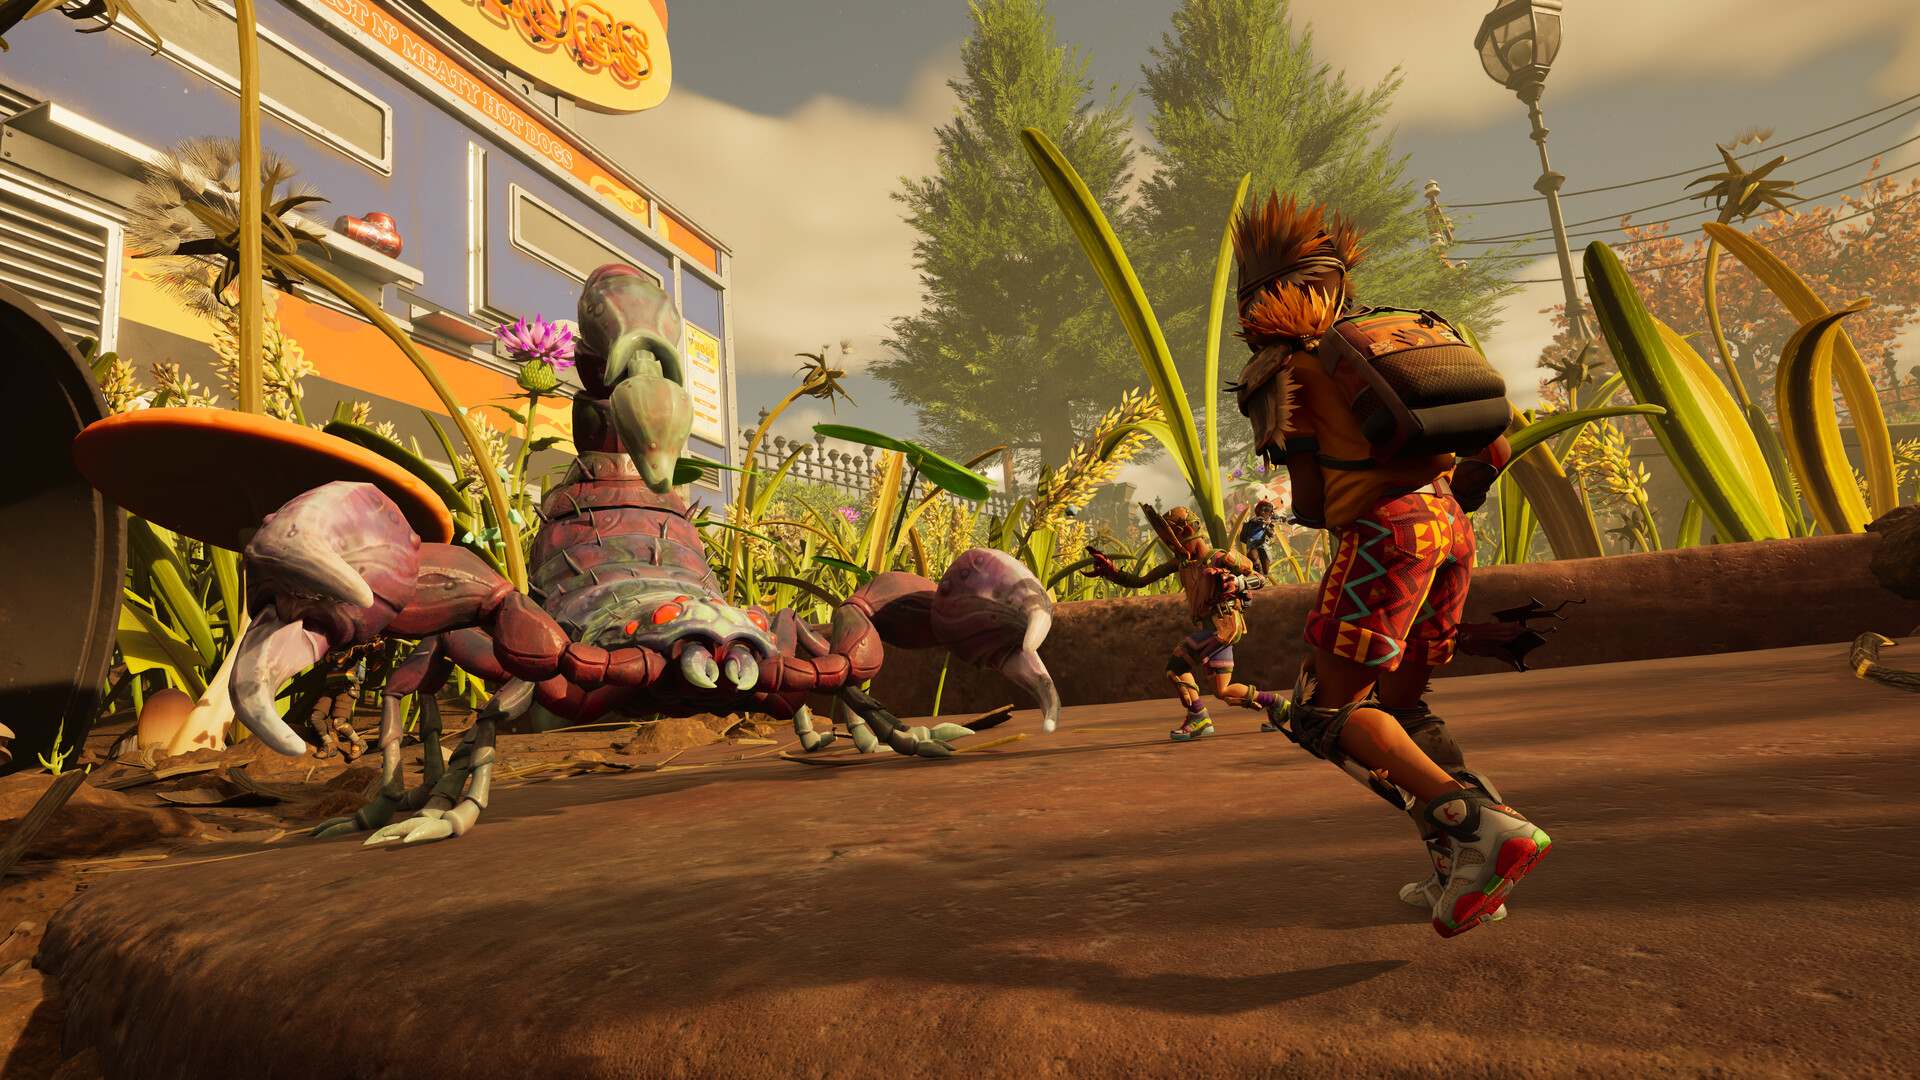
8. İlk Gün Ana Görevi Takip Edin
Başladığınız anda etrafta dolaşmak cazip gelebilir, ancak Grounded 2 hazırlıksız yakalandığınızda acımasızdır. İlk gününüzde, Omni Baltası’nın kilidini açana kadar ana görev hattına bağlı kalın. Görev yolu sizi erken karşılaşmalara, önemli NPC’lere ve ilk optik diskinize yönlendirecektir. Erken bir kilometre taşı, Snack Bar Karınca Yuvası’na ulaşmak ve ilk Kırmızı Asker Karınca’nızı yenmektir. Bu, Kuluçkahane ve Çok Katlı Üsler gibi çok önemli üretim seçeneklerinin kilidini açan Snack Bar Turbo Optik Disk’ini verir. Kuluçkahane’yi önceliklendirin, çünkü bu bir böcek yoldaşını evcilleştirmeye yönelik ilk adımınızdır.
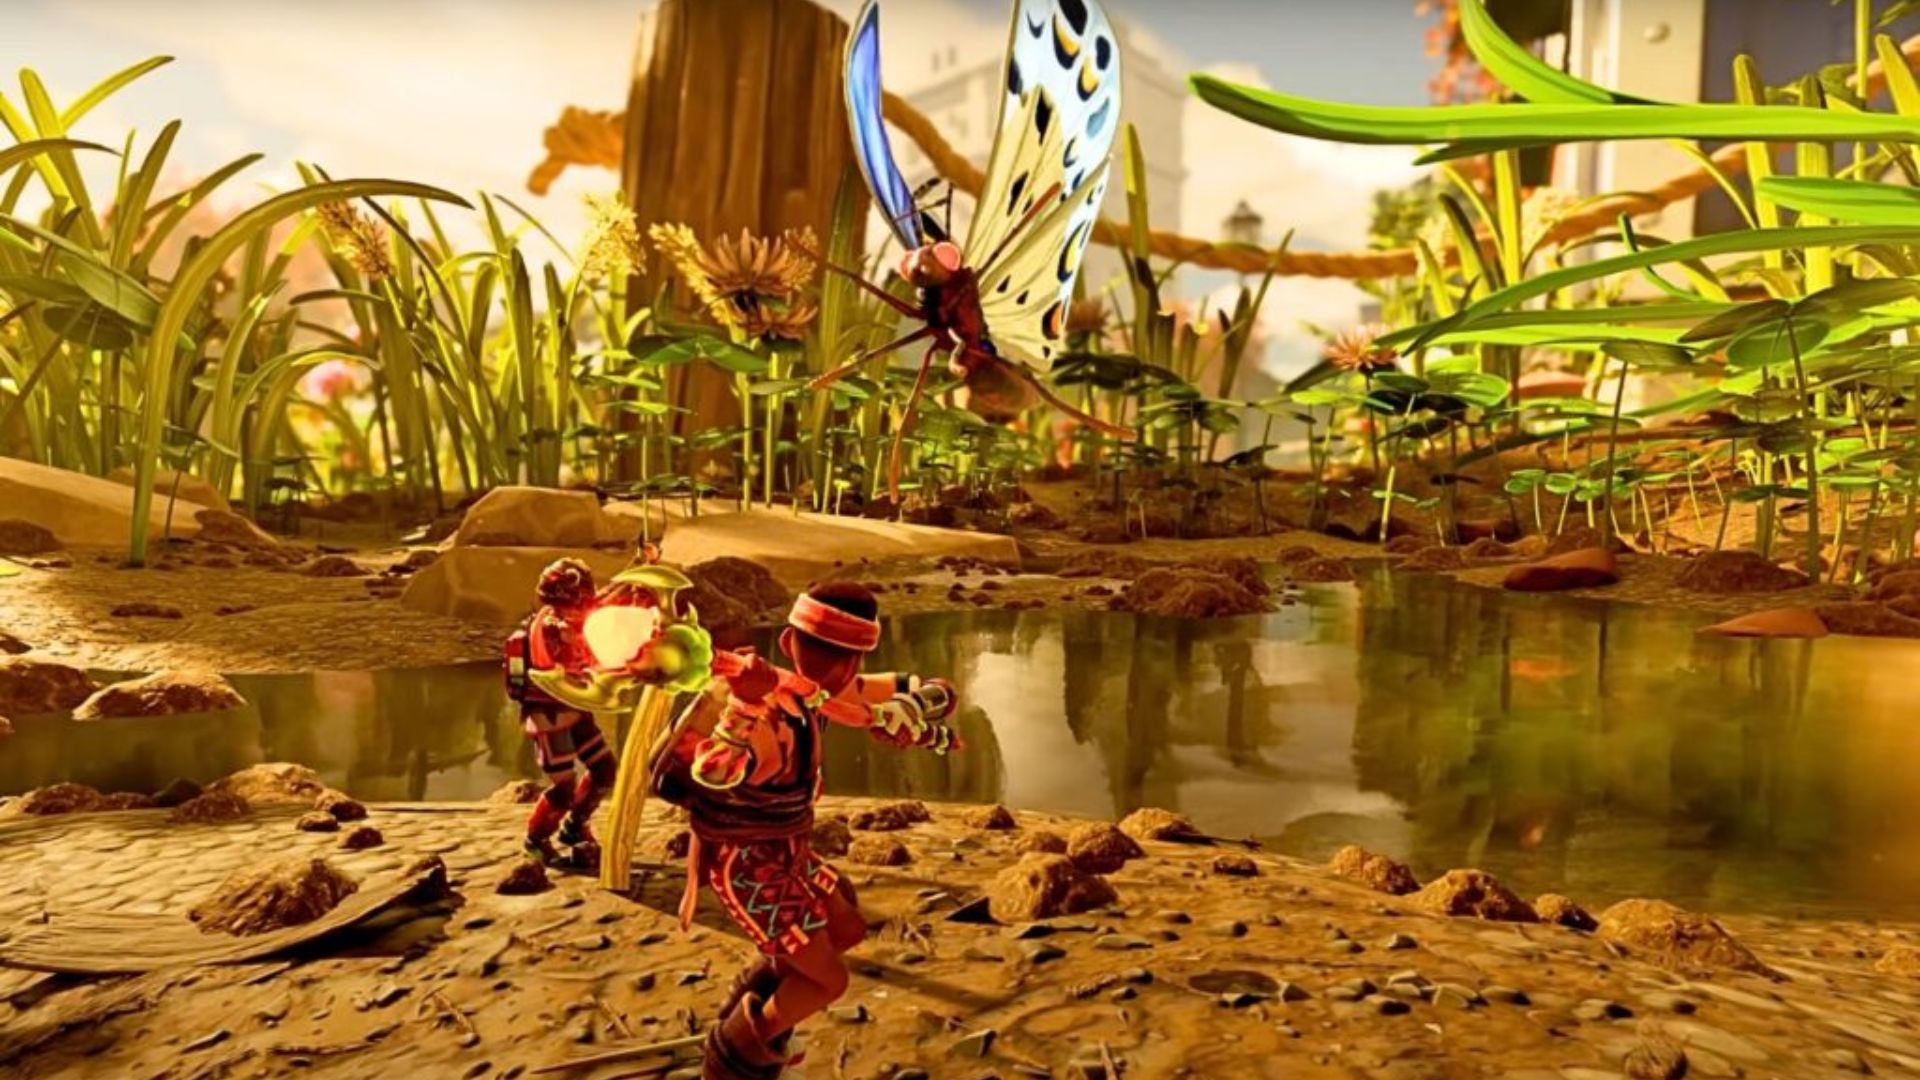
7. İlk Böceklinizi Edinin
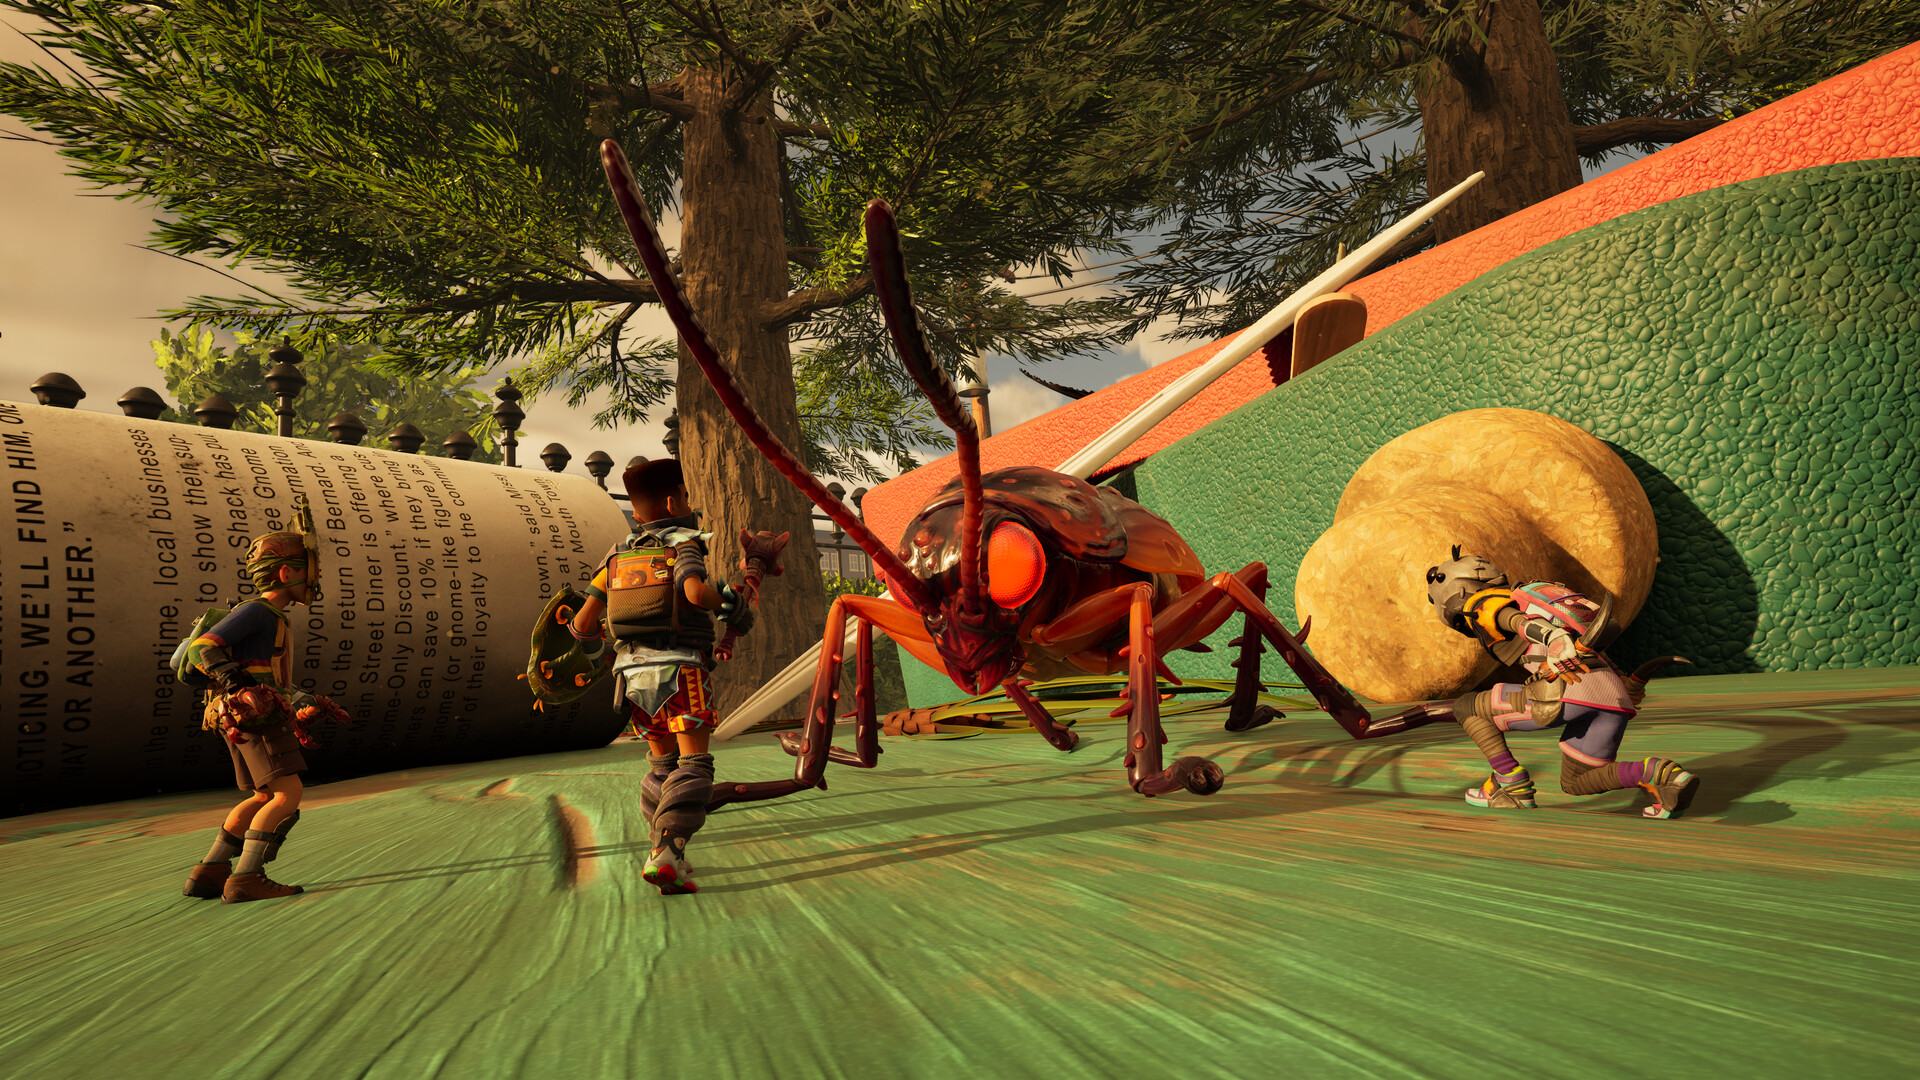
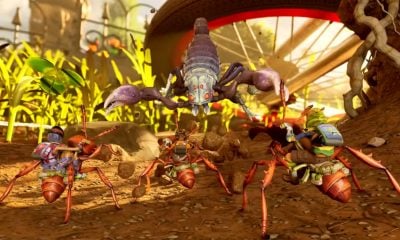
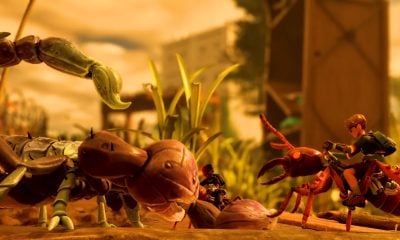
Böcekliler, Grounded 2‘de yeni ve heyecan verici bir özelliktir ve sadece binek hayvanından fazlasıdırlar. Daha hızlı seyahat etmenize, sizinle birlikte savaşmanıza ve hatta kaynak taşımanıza yardımcı olabilirler. İlk böcekliniz muhtemelen Kırmızı Asker Karınca olacak ve bir tane edinmek biraz hazırlık gerektirir.
İlk olarak, optik diskten Kuluçkahane planına ihtiyacınız olacak. Kuluçkahanenizi doğrudan zemine inşa edin (döşeme üzerine değil) ve ayrıca bineğinizi depolamak için bir karınca yuvası oluşturun. Ardından, Kuluçkahane Karınca Yuvası’na girip bir Kırmızı Asyer Karınca Yumurtası toplayın. İşte püf noktası şu: Onu elinizle dışarı taşımanız gerekecek, yani onu tutarken savaşamazsınız. Karanlık tüneller için zırh, en iyi silahlarınızı ve meşaleleri getirin. Kuluçkalandıktan veya uyuyarak anında yumurtadan çıktıktan sonra, karıncanız hızlı bir seyahat arkadaşı ve bir savaş müttefiki olacak.
6. Üs Konumunu Akıllıca Seçin
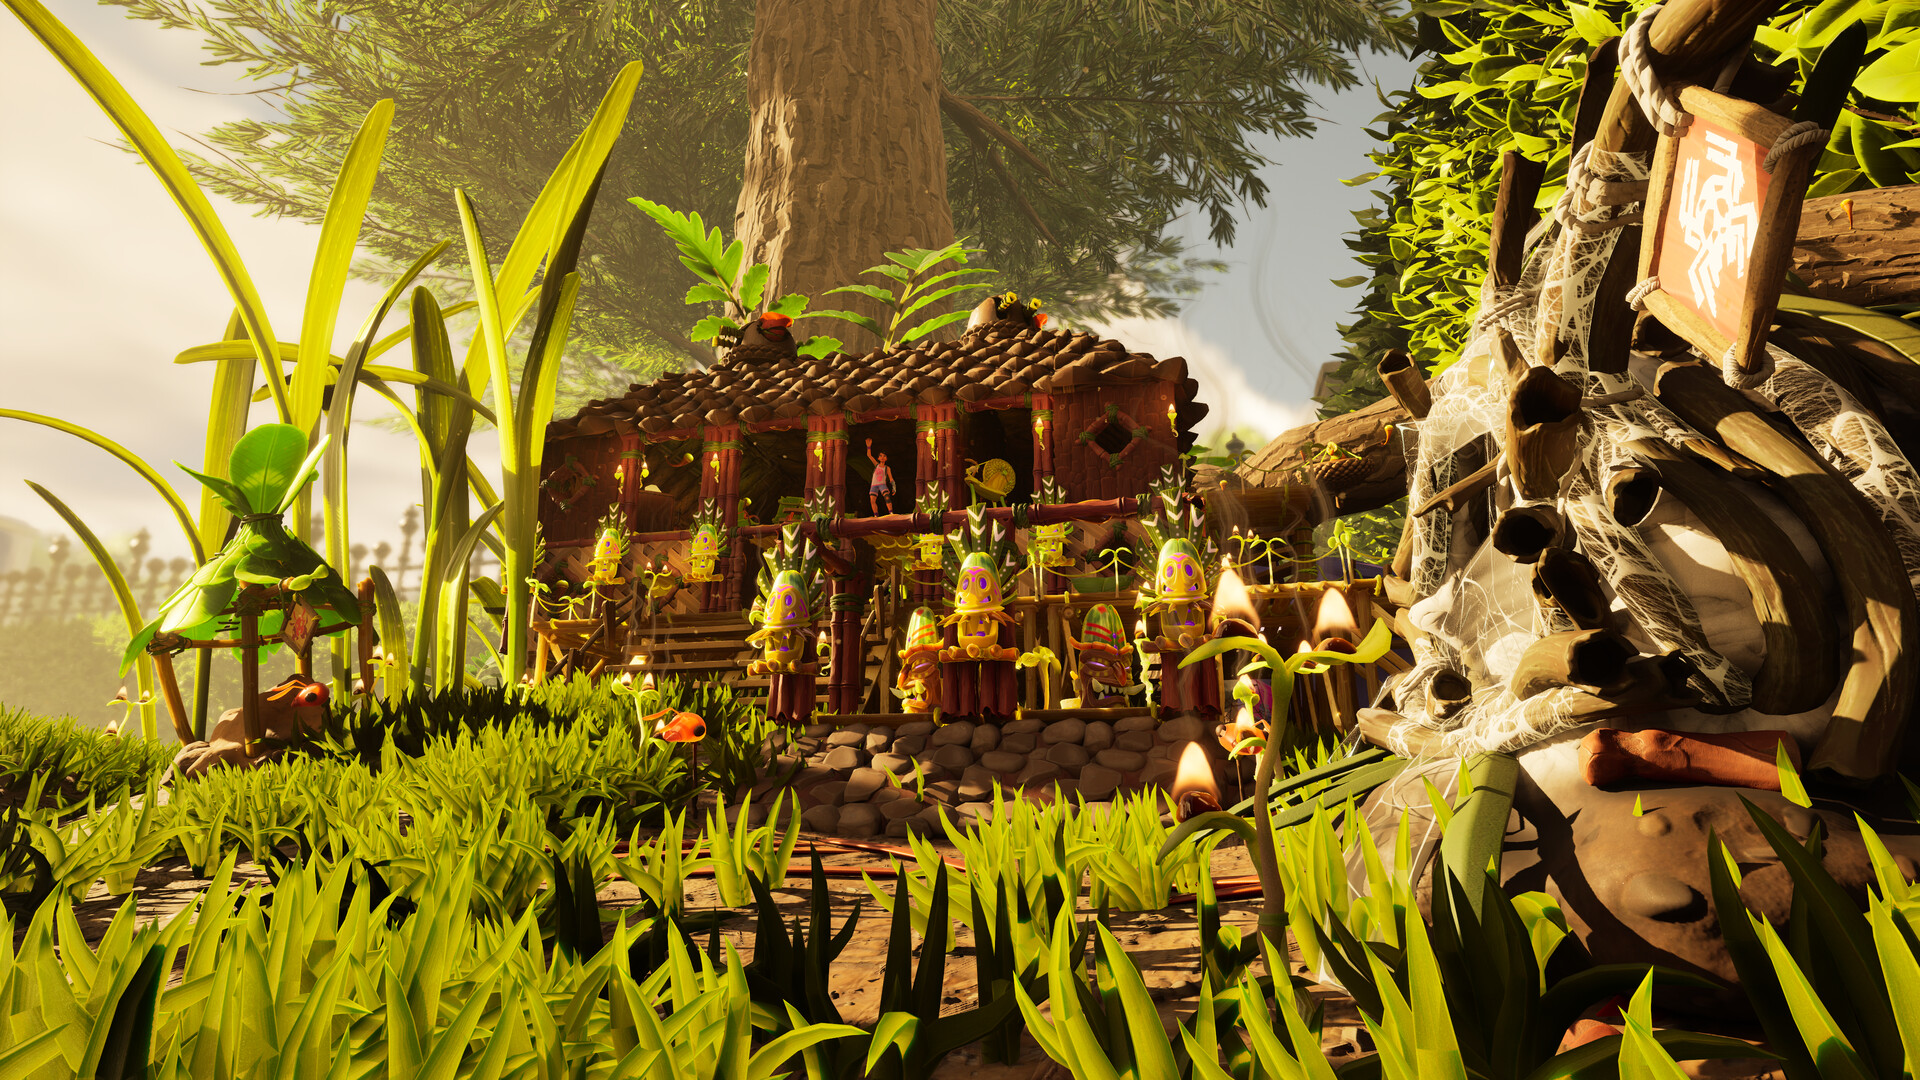
Brook Hollow Park devasadır ve oyuncuların üslerini nereye inşa ettikleri hayatta kalmalarını büyük ölçüde etkileyecektir. Grounded 2, evinize koordineli böcek saldırıları içerdiğinden, konumlandırma kritik öneme sahiptir. En iyi savunma yüksekliktir. Üssünüzü kayaların, kütüklerin veya yükseltilmiş platformların üzerine inşa edin. Bu, düşman erişimini tek bir giriş noktasıyla sınırlar ve savunmayı çok daha kolay hale getirir.
5. Büyük İnşaata Geçmeden Önce Yükseltin
Ground 2
Hemen heyecanlanıp devasa kaleler inşa etmeye başlamak kolaydır, ancak Grounded 2‘deki kaynaklar alet yükseltmelerine bağlıdır. Düşük seviye malzemelerle inşa etmeye acele ederseniz, daha sonra onları daha güçlü seçeneklerle değiştirerek zaman ve emek israf edersiniz. Önce tüm Omnitool’ların kilidini açmaya, gelişmiş inşaat kaynakları toplamaya ve daha iyi duvar ve zemin planları keşfetmek için keşfe çıkmaya odaklanın. Bunlar elinizde olduğunda, sürekli yeniden inşa etmeden daha büyük, daha kalıcı üs projelerine bağlanabilirsiniz.
4. Üretim İstasyonlarını ve Sandıkları Yakın Tutun
Grounded 2‘de, üretim öğeleri yakındaki depolardan otomatik olarak çeker, ancak sadece belirli bir menzil içinde. Bu nedenle, malzemeler için ileri geri koşmamak için sandıklarınızı çalışma tezgahlarınıza yakın tutmak önemlidir. Organizasyon da en az o kadar önemlidir. İhtiyacınız olan parçaları hızlıca bulabilmek için sandıklarınızı depolama arayüzünde adlandırın. Envanter düzinelerce farklı böcek parçası, lif ve bitkiyle doldukça, baştan organize kalarak kendinize çok fazla hayal kırıklığından tasarruf edersiniz.
3. Ekipmanınızı Tanıyın
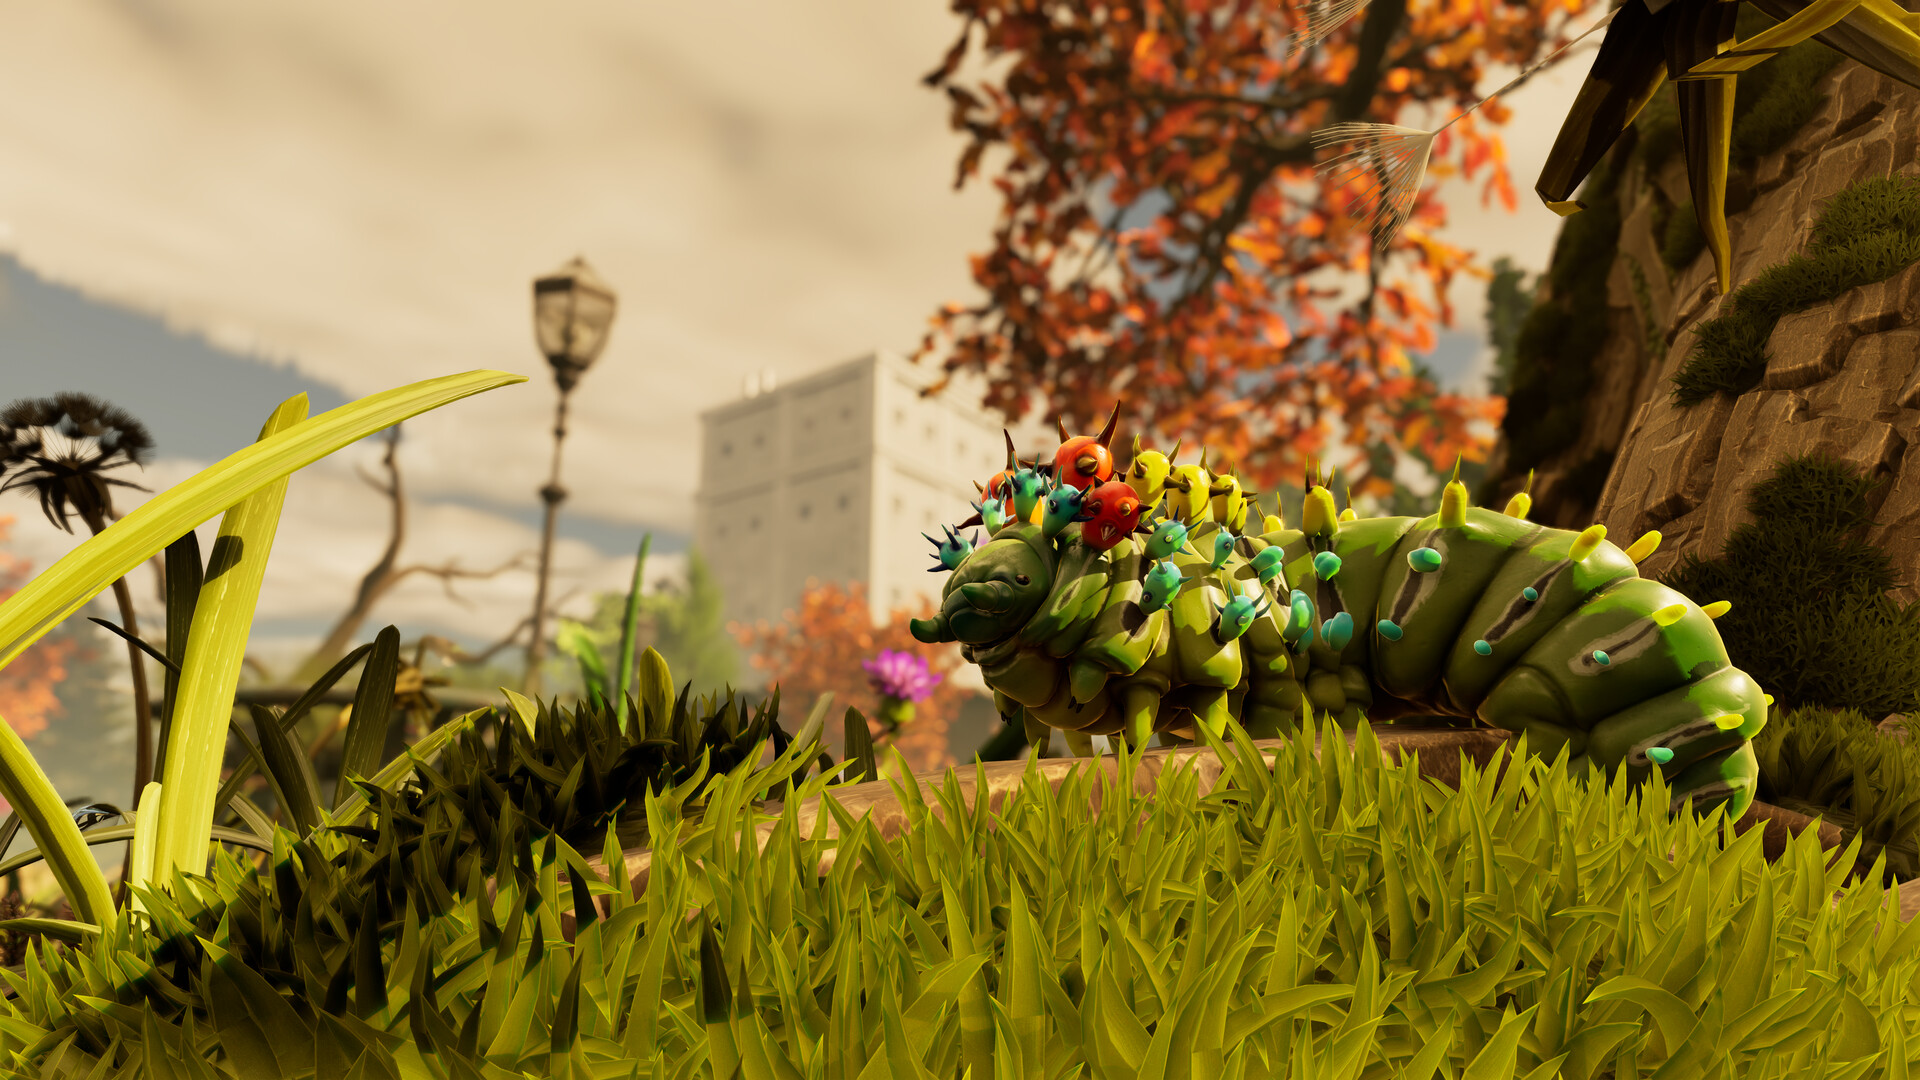
Grounded 2‘deki en büyük değişikliklerden biri, her setin belirli bir role odaklandığı RPG tarzı zırh sistemidir. Kırmızı Karınca Zırhı, kritik şansını artırır ve karınca tabanlı silahlarla dayanıklılık maliyetini düşürür, bu da onu hırsız benzeri yapılar için ideal kılar. Uğur Böceği Zırhı, tehdit oluşturmayı artırır ve bloklarken dayanıklılık tükenmesini azaltır, tank oyuncuları için mükemmeldir. Kurtçuk Zırhı, zayıf nokta hasarını artırır ve şarjlı saldırıları hızlandırır, hassas savaşçılara uyar. Son olarak, Kelebek Zırhı, büyü değneği saldırıları için dayanıklılık maliyetini düşürür ve mükemmel bloklarda geçici kalkanlar oluşturur, bu da onu büyücü tarzı oyuncular için harika bir seçim yapar.
2. Ekstra Güç İçin Tılsımlar Ekleyin

Tılsımlar, seçtiğiniz oynanış tarzını geliştiren aksesuarlardır. Bazıları mevcut güçlerinizi yükseltirken, diğerleri tamamen yeni yetenekler ekler. Örneğin, Uçucu Kapasitör tüm yakın dövüş saldırılarına şok hasarı ekler ve ekstra etkiler için belirli böcekleri aşırı yükleyebilir. Keşfederken tılsımlara göz kulak olun. Doğru olanı kuşanmak, iyi bir yapıyı ölümcül bir yapıya dönüştürebilir, size hem savaşta hem de hayatta kalmada bir avantaj sağlar.
1. Üssünüz İçin Mükemmel Bir Savunma İnşa Edin

Böcek sürüleri üssünüze saldırdığında, iki şey fark yaratacaktır: hızlı tamirat için bir Omni Anahtar ve ağır savunma için bir Palamut Kulesi. Şimdi, kuleyi çalıştırmak için bir oyuncu gerekir, ancak düşman dalgalarını hızla parçalar. Maksimum koruma için, kulelerinizi yaklaşan düşmanların üzerine ateş yağdırabileceğiniz açılı platformlara yerleştirin. Yükseltilmiş bir üs ve tek bir giriş noktasıyla birleştiğinde, bu savunmalar en çılgın sürüleri bile durdurabilir.


Best Of
Grounded10 Καλύτερες Συμβουλές για Αρχάριους
Το Brook Hollow Park δεν είναι μια συνηθισμένη βόλτα στο πάρκο, ειδικά όταν είσαι στο μέγεθος ενός μυρμηγκιού και όλα γύρω σου σε θέλουν για μεσημεριανό. Το Grounded 2 χτίζει πάνω στην πρωτότυπη περιπέτεια επιβίωσης με έναν μεγαλύτερο χάρτη, νέα συστήματα και πολλές εκπλήξεις. Είτε είσαι απόλυτος αρχάριος είτε βετεράνος της αυλής, αυτές οι συμβουλές θα σε βοηθήσουν να επιβιώσεις, να ευδοκιμήσεις και ίσως ακόμα και να κάνεις μερικούς φίλους από έντομα στο δρόμο. Οι 10 καλύτερες συμβουλές για αρχάριους.
10. Κατακτήστε το Omnitool Νωρίς
Μία από τις πρώτες αναβαθμίσεις που θα λάβεις στο Grounded 2 είναι το Omnitool, μια απλοποιημένη αντικατάσταση της παλιάς συλλογής ξεχωριστών εργαλείων. Αντί να χειρίζεσαι τσεκούρια, σφυριά, φτυάρια και κλειδιά, τώρα έχεις ένα ενιαίο εργαλείο που αλλάζει λειτουργία ανάλογα με τις αναβαθμίσεις του. Θα ξεκινήσεις με το Omni Axe, που σου επιτρέπει να κόβεις γρασίδι, ξερό χορτάρι και αγριοραδίκια για βασική κατασκευή.
Καθώς προχωράς, μπορείς να ξεκλειδώσεις το Omni Hammer για να συνθλίβεις σκληρότερα υλικά, το Omni Shovel για σκάψιμο και τελικά το Omni Wrench για επισκευές. Όλες οι αναβαθμίσεις γίνονται στα Ranger Stations, οπότε συλλέγετε πόρους και επισκεφτείτε τα τακτικά. Όσο νωρίτερα ξεκλειδώσετε και τα τέσσερα, τόσο πιο γρήγορα μπορείτε να συλλέξετε υλικά και να εργαστείτε σε προχωρημένα έργα.
9. Χρησιμοποιήστε τα Ranger Stations για Ανάλυση των Πάντων
Τα Ranger Stations δεν είναι μόνο για αναβαθμίσεις εργαλείων· φιλοξενούν επίσης Analyzers, που είναι απαραίτητα για το ξεκλείδωμα νέων συνταγών. Κάθε φορά που οι παίκτες μπορούν να σκανάρουν έναν πόρο ή ένα τμήμα εντόμου, κερδίζουν σχέδια για αντικείμενα συνδεδεμένα με αυτό το υλικό. Αυτό μπορεί να είναι οτιδήποτε, από μέρη κατασκευής έως σετ πανοπλίας. Οι Analyzers λειτουργούν με σύστημα φόρτισης, επιτρέποντάς σας να σκανάρετε τέσσερα αντικείμενα όταν είναι πλήρως φορτισμένοι. Αν ένας σταθμός είναι άδειος, πηγαίνετε σε άλλον, γιατί ο καθένας φορτίζεται ανεξάρτητα. Το σκάναρισμα ενισχύει επίσης τη νοητική σας δύναμη, που ξεκλειδώνει σημαντικές συνταγές καθώς ανεβαίνετε επίπεδο.
8. Ακολουθήστε την Κύρια Αποστολή την Πρώτη Μέρα
Είναι δελεαστικό να ξεφύγεις τη στιγμή που ξεκινάς, αλλά το Grounded 2 είναι αμείλικτο αν δεν είσαι προετοιμασμένος. Την πρώτη σου μέρα, μείνε στην κύρια σειρά αποστολών μέχρι να ξεκλειδώσεις το Omni Axe. Η διαδρομή της αποστολής θα σε οδηγήσει σε πρώιμες συναντήσεις, σημαντικούς NPCs και το πρώτο σου οπτικό δίσκο. Ένα πρώιμο ορόσημο είναι η επίτευξη του Snack Bar Ant Hill και η ήττα του πρώτου σου Κόκκινου Στρατιώτη Μυρμηγκιού. Αυτό αποφέρει τον Snack Bar Turbo Optical Disc, που ξεκλειδώνει κρίσιμες επιλογές κατασκευής όπως το Hatchery και τις Πολυώροφες Βάσεις. Προτεραιοποίησε το Hatchery, καθώς είναι το πρώτο σου βήμα προς την εξημέρωση ενός συντρόφου εντόμου.
7. Αποκτήστε το Πρώτο σας Buggy
Τα Buggies είναι ένα νέο και συναρπαστικό χαρακτηριστικό στο Grounded 2, και είναι κάτι περισσότερο από απλά μεταφορικά μέσα. Μπορούν να σε βοηθήσουν να ταξιδέψεις πιο γρήγορα, να πολεμήσουν μαζί σου και ακόμα και να μεταφέρουν πόρους. Το πρώτο σου buggy πιθανότατα θα είναι ο Κόκκινος Στρατιώτης Μυρμήγκι, και η απόκτησή του απαιτεί κάποια προετοιμασία.
Πρώτα, θα χρειαστείτε το σχέδιο Hatchery από τον οπτικό δίσκο. Χτίστε το hatchery σας απευθείας στο έδαφος (όχι σε δάπεδο), και επίσης δημιουργήστε μια φωλιά μυρμηγκιών για να αποθηκεύσετε το μεταφορικό σας μέσο. Στη συνέχεια, εισέλθετε στο Hatchery Ant Hill για να συλλέξετε ένα Αυγό Κόκκινου Στρατιώτη Μυρμηγκιού. Τώρα εδώ είναι η παγίδα. Θα πρέπει να το βγάλετε έξω με το χέρι, που σημαίνει ότι δεν μπορείτε να πολεμήσετε ενώ το κρατάτε. Φέρτε πανοπλία, τα καλύτερα όπλα σας και πυρσούς για τους σκοτεινούς σωλήνες. Μόλις επωαστεί ή εκκολαφθεί αμέσως με ύπνο, το μυρμήγκι σας θα γίνει ένας γρήγορος σύντροφος ταξιδιού και ένας σύμμαχος στη μάχη.
6. Επιλέξτε Έξυπνα μια Τοποθεσία Βάσης
Το Brook Hollow Park είναι τεράστιο, και το πού οι παίκτες θα χτίσουν τη βάση τους θα επηρεάσει πολύ την επιβίωσή τους. Δεδομένου ότι το Grounded 2 διαθέτει συντονισμένες επιθέσεις εντόμων στο σπίτι σας, η τοποθέτηση είναι κρίσιμη. Η καλύτερη άμυνα είναι το ύψος. Χτίστε τη βάση σας υπερυψωμένη σε βράχους, κούτσουρα ή ανυψωμένες πλατφόρμες. Αυτό περιορίζει την πρόσβαση των εχθρών σε ένα μόνο σημείο εισόδου, κάνοντας την άμυνα πολύ πιο εύκολη.
5. Αναβαθμίστε Πριν από Μαζική Κατασκευή
Ground 2
Είναι εύκολο να ενθουσιαστείτε και να αρχίσετε να κατασκευάζετε μαζικές οχυρώσεις αμέσως, αλλά οι πόροι στο Grounded 2 είναι συνδεδεμένοι με αναβαθμίσεις εργαλείων. Αν βιαστείτε να χτίσετε με υλικά χαμηλού επιπέδου, θα καταλήξετε να τα αντικαθιστάτε αργότερα με ισχυρότερες επιλογές, σπαταλώντας χρόνο και προσπάθεια. Εστιάστε πρώτα στο ξεκλείδωμα όλων των Omnitools, στη συλλογή προχωρημένων οικοδομικών πόρων και στην εξερεύνηση για να ανακαλύψετε καλύτερα σχέδια τοίχων και δαπέδων. Μόλις τα έχετε στα χέρια σας, μπορείτε να αφοσιωθείτε σε μεγαλύτερα, πιο μόνιμα έργα βάσης χωρίς συνεχή ξαναχτίσιμο.
4. Κρατήστε Κοντινά τους Σταθμούς Κατασκευής και τα Σεντούκια
Στο Grounded 2, η κατασκευή τραβάει αυτόματα αντικείμενα από κοντινή αποθήκευση, αλλά μόνο εντός συγκεκριμένης εμβέλειας. Επομένως, είναι σημαντικό να κρατάτε τα σεντούκια σας κοντά στα εργαστήριά σας για να αποφύγετε να τρέχετε μπρος-πίσω για υλικά. Η οργάνωση είναι εξίσου σημαντική. Ονομάστε τα σεντούκια σας στη διεπαφή αποθήκευσης ώστε να μπορείτε να βρείτε γρήγορα τα μέρη που χρειάζεστε. Καθώς το απόθεμα γεμίζει με δεκάδες διαφορετικά τμήματα εντόμων, ίνες και φυτά, θα σώσετε τον εαυτό σας από πολλές απογοητεύσεις μένοντας οργανωμένοι από την αρχή.
3. Γνωρίστε τον Εξοπλισμό σας
Μία από τις μεγαλύτερες αλλαγές στο Grounded 2 είναι το σύστημα πανοπλίας στυλ RPG, όπου κάθε σετ είναι χτισμένο γύρω από έναν συγκεκριμένο ρόλο. Η Πανοπλία Κόκκινου Μυρμηγκιού ενισχύει την πιθανότητα κρίσιμου χτυπήματος και μειώνει το κόστος αντοχής με όπλα βασισμένα σε μυρμήγκια, καθιστώντας την ιδανική για builds τύπου rogue. Η Πανοπλία Πασχαλίτσας αυξάνει τη δημιουργία απειλής και μειώνει την εξάντληση αντοχής κατά τη φραγή, τέλεια για παίκτες tank. Η Πανοπλία Grub αυξάνει τη ζημιά σε αδύναμα σημεία και επιταχύνει τις φορτισμένες επιθέσεις, ταιριάζοντας σε μαχητές ακριβείας. Τέλος, η Πανοπλία Πεταλούδας μειώνει το κόστος αντοχής για επιθέσεις μαγικής ράβδου και δημιουργεί προσωρινές ασπίδες σε τέλειες φραγές, καθιστώντας την μια εξαιρετική επιλογή για παίκτες στυλ μάγου.
2. Προσθέστε Trinkets για Επιπλέον Δύναμη
Τα Trinkets είναι αξεσουάρ που ενισχύουν το επιλεγμένο στυλ παιχνιδιού σας. Μερικά ενισχύουν τις τ
Best Of
Grounded10 Tips Terbaik untuk Pemula
Brook Hollow Park bukanlah sekadar jalan-jalan biasa di taman, apalagi ketika ukuran Anda sebesar semut dan segala sesuatu di sekitar ingin menjadikan Anda santapan. Grounded 2 membangun petualangan bertahan hidup aslinya dengan peta yang lebih besar, sistem baru, dan banyak kejutan. Baik Anda benar-benar baru atau veteran halaman belakang, tips ini akan membantu Anda bertahan, berkembang, dan mungkin bahkan mendapatkan beberapa teman serangga di sepanjang jalan. Berikut adalah 10 tips terbaik untuk pemula.
10. Kuasai Omnitool Sejak Dini
Salah satu peningkatan pertama yang akan Anda dapatkan di Grounded 2 adalah Omnitool, pengganti yang disederhanakan untuk koleksi alat terpisah yang lama. Alih-alih mengelola kapak, palu, sekop, dan kunci inggris, Anda sekarang memiliki satu alat yang mengubah fungsi tergantung pada peningkatannya. Anda akan mulai dengan Omni Axe, yang memungkinkan Anda menebang rumput, rumput kering, dan dandelion untuk bangunan dasar.
Seiring kemajuan, Anda dapat membuka kunci Omni Hammer untuk menghancurkan material yang lebih keras, Omni Shovel untuk menggali, dan akhirnya Omni Wrench untuk memperbaiki. Semua peningkatan terjadi di Ranger Stations, jadi kumpulkan sumber daya dan kunjungi mereka secara teratur. Semakin cepat Anda membuka kunci keempatnya, semakin cepat Anda dapat mengumpulkan material dan mengerjakan proyek-proyek lanjutan.
9. Gunakan Ranger Stations untuk Menganalisis Segalanya
Ranger Stations bukan hanya untuk peningkatan alat; mereka juga menampung Analyzers, yang penting untuk membuka kunci resep baru. Setiap kali pemain dapat memindai sumber daya atau bagian serangga, mereka mendapatkan cetak biru untuk item yang terkait dengan material tersebut. Ini bisa berupa apa saja dari bagian bangunan hingga set baju zirah. Analyzers bekerja dengan sistem isi ulang, memungkinkan Anda memindai empat item saat terisi penuh. Jika satu stasiun kosong, pergilah ke stasiun lain, karena masing-masing mengisi ulang secara independen. Memindai juga meningkatkan kekuatan otak Anda, yang membuka kunci resep penting seiring Anda naik level.
8. Ikuti Misi Utama di Hari Pertama
Sangat menggoda untuk menyimpang begitu Anda memulai, tetapi Grounded 2 tidak kenal ampun jika Anda tidak siap. Di hari pertama Anda, ikuti alur misi utama hingga Anda membuka kunci Omni Axe. Jalur misi akan memandu Anda ke pertemuan awal, NPC penting, dan cakram optik pertama Anda. Salah satu pencapaian awal adalah mencapai Snack Bar Ant Hill dan mengalahkan Red Soldier Ant pertama Anda. Ini menghasilkan Snack Bar Turbo Optical Disc, yang membuka kunci opsi kerajinan penting seperti Hatchery dan Multi-Story Bases. Prioritaskan Hatchery, karena itu adalah langkah pertama Anda untuk menjinakkan pendamping serangga.
7. Dapatkan Buggy Pertama Anda
Buggies adalah fitur baru dan menarik di Grounded 2, dan mereka lebih dari sekadar tunggangan. Mereka dapat membantu Anda bepergian lebih cepat, bertarung bersama Anda, dan bahkan membawa sumber daya. Buggy pertama Anda kemungkinan besar adalah Red Soldier Ant, dan mendapatkannya memerlukan beberapa persiapan.
Pertama, Anda memerlukan cetak biru Hatchery dari cakram optik. Bangun hatchery Anda langsung di tanah (bukan di lantai), dan juga buat sarang semut untuk menyimpan tunggangan Anda. Kemudian, jelajahi Hatchery Ant Hill untuk mengumpulkan Telur Red Soldier Ant. Sekarang inilah tantangannya. Anda harus membawanya keluar dengan tangan, artinya Anda tidak bisa bertarung sambil memegangnya. Bawalah baju zirah, senjata terbaik Anda, dan obor untuk terowongan gelap. Setelah diinkubasi atau langsung menetas dengan tidur, semut Anda akan menjadi pendamping perjalanan yang cepat dan sekutu tempur.
6. Pilih Lokasi Basis dengan Bijak
Brook Hollow Park sangat luas, dan di mana pemain membangun basis mereka akan sangat memengaruhi kelangsungan hidup mereka. Karena Grounded 2 menampilkan serangan serangga terkoordinasi di rumah Anda, posisi sangat penting. Pertahanan terbaik adalah ketinggian. Bangun basis Anda yang ditinggikan di atas batu, kayu gelondongan, atau platform yang ditinggikan. Ini membatasi akses musuh ke satu titik masuk, membuat pertahanan jauh lebih mudah.
5. Tingkatkan Sebelum Konstruksi Besar-besaran
Ground 2
Mudah untuk menjadi bersemangat dan mulai membangun benteng besar-besaran segera, tetapi sumber daya di Grounded 2 terkait dengan peningkatan alat. Jika Anda terburu-buru membangun dengan material level rendah, Anda akhirnya akan menggantinya nanti dengan opsi yang lebih kuat, membuang-buang waktu dan tenaga. Fokuslah terlebih dahulu pada membuka kunci semua Omnitools, mengumpulkan sumber daya bangunan lanjutan, dan menjelajah untuk menemukan cetak biru dinding dan lantai yang lebih baik. Setelah Anda memilikinya, Anda dapat berkomitmen pada proyek basis yang lebih besar dan permanen tanpa pembangunan ulang yang konstan.
4. Jaga Stasiun Kerajinan dan Peti Tetap Dekat
Di Grounded 2, kerajinan menarik item dari penyimpanan terdekat secara otomatis, tetapi hanya dalam jangkauan tertentu. Oleh karena itu, penting untuk menjaga peti Anda dekat dengan meja kerja Anda untuk menghindari bolak-balik mengambil material. Organisasi sama pentingnya. Beri nama peti Anda di antarmuka penyimpanan sehingga Anda dapat dengan cepat menemukan bagian yang Anda butuhkan. Saat inventaris terisi dengan lusinan bagian serangga, serat, dan tanaman yang berbeda, Anda akan menghemat banyak frustrasi dengan tetap terorganisir sejak awal.
3. Kenali Perlengkapan Anda
Salah satu perubahan terbesar di Grounded 2 adalah sistem baju zirah bergaya RPG, di mana setiap set dibangun di sekitar peran tertentu. Red Ant Armor meningkatkan peluang kritik dan mengurangi biaya stamina dengan senjata berbasis semut, menjadikannya ideal untuk build seperti rogue. Ladybug Armor meningkatkan pembangkitan ancaman dan mengurangi pemborosan stamina saat menahan serangan, sempurna untuk pemain tank. Grub Armor meningkatkan kerusakan titik lemah dan mempercepat serangan bermuatan, cocok untuk petarung presisi. Terakhir, Butterfly Armor menurunkan biaya stamina untuk serangan tongkat sihir dan membuat perisai sementara pada blok sempurna, menjadikannya pilihan bagus untuk pemain bergaya penyihir.
2. Tambahkan Trinket untuk Kekuatan Ekstra
Trinket adalah aksesori yang meningkatkan gaya bermain pilihan Anda. Beberapa memperkuat kekuatan Anda saat ini, sementara yang lain menambahkan kemampuan yang sama sekali baru. Misalnya, Volatile Capacitor menambahkan kerusakan kejut ke semua serangan jarak dekat dan dapat membuat kelebihan beban pada serangga tertentu untuk efek ekstra. Waspadai trinket saat Anda menjelajah. Melengkapi yang tepat dapat mengubah build yang baik menjadi yang mematikan, memberi Anda keunggulan dalam pertempuran dan kelangsungan hidup.
1. Bangun Pertahanan Sempurna untuk Basis Anda
Ketika kawanan serangga menyerang basis Anda, dua hal yang akan membuat perbedaan: Omni Wrench untuk perbaikan cepat dan Acorn Turret untuk pertahanan berat. Sekarang, turret membutuhkan pemain untuk mengoperasikannya, tetapi ia merobek gelombang musuh dengan cepat. Untuk cakupan maksimal, tempatkan turret Anda di platform miring sehingga Anda dapat menghujani tembakan pada musuh yang mendekat. Digabungkan dengan basis yang ditinggikan dan satu titik masuk, pertahanan ini dapat menahan bahkan kawanan paling gila sekalipun.
Best Of
Grounded10 Migliori Consigli per Principianti
Brook Hollow Park non è la solita passeggiata nel parco, non quando sei grande come una formica e tutto intorno a te ti vuole per pranzo. Grounded 2 amplia l’avventura di sopravvivenza originale con una mappa più grande, nuovi sistemi e tante sorprese. Che tu sia un novellino o un veterano del giardino, questi consigli ti aiuteranno a sopravvivere, prosperare e forse anche a farti qualche amico insetto lungo il percorso. Ecco i 10 migliori consigli per principianti.
10. Padroneggia l’Omnitool Presto
Uno dei primi potenziamenti che otterrai in Grounded 2 è l’Omnitool, un sostituto semplificato della vecchia collezione di attrezzi separati. Invece di destreggiarti tra asce, martelli, pale e chiavi inglesi, ora hai un unico strumento che cambia funzione in base ai suoi potenziamenti. Inizierai con l’Omni Ascia, che ti permette di tagliare erba, erba secca e denti di leone per le costruzioni di base.
Man mano che avanzi, potrai sbloccare l’Omni Martello per frantumare materiali più resistenti, l’Omni Pala per scavare e infine l’Omni Chiave per riparare. Tutti i potenziamenti avvengono alle Stazioni Ranger, quindi raccogli risorse e visitale regolarmente. Prima sbloccherai tutti e quattro, più velocemente potrai raccogliere materiali e lavorare a progetti avanzati.
9. Usa le Stazioni Ranger per Analizzare Tutto
Le Stazioni Ranger non servono solo per potenziare gli attrezzi; ospitano anche gli Analizzatori, essenziali per sbloccare nuove ricette. Ogni volta che i giocatori possono analizzare una risorsa o una parte di insetto, ottengono progetti per oggetti legati a quel materiale. Può trattarsi di qualsiasi cosa, da parti di costruzione a set di armatura. Gli Analizzatori funzionano con un sistema a carica, permettendoti di analizzare quattro oggetti quando sono completamente carichi. Se una stazione è scarica, dirigiti verso un’altra, perché ognuna si ricarica in modo indipendente. Analizzare aumenta anche il tuo potere cerebrale, che sblocca ricette importanti man mano che sali di livello.
8. Segui la Missione Principale il Primo Giorno
È allettante allontanarsi subito dopo aver iniziato, ma Grounded 2 è spietato se sei impreparato. Nel tuo primo giorno, attieniti alla trama principale finché non sblocchi l’Omni Ascia. Il percorso della missione ti guiderà verso incontri iniziali, PNG importanti e il tuo primo disco ottico. Una prima tappa importante è raggiungere il Formicaio dello Snack Bar e sconfiggere la tua prima Formica Soldato Rossa. Questo ti darà il Disco Ottico Turbo dello Snack Bar, che sblocca opzioni di creazione cruciali come l’Incubatrice e le Basi a Più Piani. Dai priorità all’Incubatrice, poiché è il tuo primo passo verso l’addomesticamento di un compagno insetto.
7. Ottieni il Tuo Primo “Buggy”
I “Buggy” sono una nuova ed entusiasmante caratteristica di Grounded 2, e sono più che semplici cavalcature. Possono aiutarti a viaggiare più velocemente, combattere al tuo fianco e persino trasportare risorse. Il tuo primo buggy sarà probabilmente la Formica Soldato Rossa, e ottenerne uno richiede una certa preparazione.
Innanzitutto, avrai bisogno del progetto dell’Incubatrice dal disco ottico. Costruisci la tua incubatrice direttamente sul terreno (non su un pavimento), e crea anche un nido di formiche per conservare la tua cavalcatura. Quindi, avventurati nel Formicaio dell’Incubatrice per raccogliere un Uovo di Formica Soldato Rossa. Ecco il punto cruciale. Dovrai portarlo fuori a mano, il che significa che non potrai combattere mentre lo tieni. Porta armatura, le tue armi migliori e torce per i tunnel bui. Una volta incubato o schiuso istantaneamente dormendo, la tua formica diventerà un veloce compagno di viaggio e un alleato in combattimento.
6. Scegli con Saggezza la Posizione della Base
Brook Hollow Park è enorme, e dove i giocatori costruiscono la loro base influenzerà notevolmente la loro sopravvivenza. Poiché Grounded 2 presenta attacchi coordinati di insetti alla tua casa, il posizionamento è fondamentale. La migliore difesa è l’altezza. Costruisci la tua base in alto su rocce, tronchi o piattaforme rialzate. Questo limita l’accesso dei nemici a un unico punto di ingresso, rendendo la difesa molto più facile.
5. Potenzia Prima di Costruzioni Massicce
Ground 2
È facile farsi prendere dall’entusiasmo e iniziare subito a costruire fortezze mastodontiche, ma le risorse in Grounded 2 sono legate ai potenziamenti degli attrezzi. Se ti lanci nella costruzione con materiali di basso livello, finirai per sostituirli più tardi con opzioni più resistenti, sprecando tempo e fatica. Concentrati prima sullo sbloccare tutti gli Omnitool, sulla raccolta di risorse da costruzione avanzate e sull’esplorazione per scoprire progetti migliori per muri e pavimenti. Una volta che li avrai in mano, potrai dedicarti a progetti di base più grandi e permanenti senza dover ricostruire continuamente.
4. Tieni Stazioni di Creazione e Casse Vicine
In Grounded 2, la creazione preleva automaticamente gli oggetti dallo stoccaggio vicino, ma solo entro un certo raggio. Pertanto, è importante tenere le tue casse vicine ai tuoi banchi da lavoro per evitare di correre avanti e indietro per i materiali. L’organizzazione è altrettanto importante. Dai un nome alle tue casse nell’interfaccia di stoccaggio in modo da poter trovare rapidamente le parti di cui hai bisogno. Man mano che l’inventario si riempie di dozzine di diverse parti di insetti, fibre e piante, ti risparmierai molta frustrazione rimanendo organizzato fin dall’inizio.
3. Conosci il Tuo Equipaggiamento
Uno dei cambiamenti più grandi in Grounded 2 è il sistema di armature in stile RPG, dove ogni set è costruito attorno a un ruolo specifico. L’Armatura da Formica Rossa aumenta la probabilità di colpo critico e riduce il costo di vigore con le armi basate sulle formiche, rendendola ideale per build da furfante. L’Armatura da Coccinella aumenta la generazione di minaccia e riduce il consumo di vigore durante la parata, perfetta per i giocatori tank. L’Armatura da Larva aumenta i danni ai punti deboli e accelera gli attacchi caricati, adatta ai combattenti di precisione. Infine, l’Armatura da Farfalla riduce il costo di vigore per gli attacchi con il bastone magico e crea scudi temporanei con parate perfette, rendendola un’ottima scelta per i giocatori in stile mago.
2. Aggiungi Ciondoli per Potere Extra
I Ciondoli sono accessori che potenziano il tuo stile di gioco scelto. Alcuni amplificano i tuoi punti di forza attuali, mentre altri aggiungono abilità completamente nuove. Ad esempio, il Capacitore Volatile aggiunge danni da scossa a tutti gli attacchi corpo a corpo e può sovraccaricare certi insetti per effetti extra. Tieni gli occhi aperti per i ciondoli mentre esplori. Equipaggiare quello giusto può trasformare una buona build in una letale, dandoti un vantaggio sia in combattimento che nella sopravvivenza.
1. Costruisci una Difesa Perfetta per la Tua Base
Quando gli sciami di insetti attaccano la tua base, due cose faranno la differenza: un’Omni Chiave per riparazioni veloci e una Torretta Ghianda per una difesa pesante. Ora, la torretta ha bisogno di un giocatore per essere azionata, ma fa a pezzi le ondate nemiche rapidamente. Per una copertura massima, posiziona le tue torrette su piattaforme angolate in modo da poter piovere colpi sui nemici in avvicinamento. Combinate con una base elevata e un unico punto di ingresso, queste difese possono respingere anche gli sciami più folli.
Best Of
Grounded10 Cele Mai Bune Sfaturi pentru Începători
Brook Hollow Park nu este o simplă plimbare în parc, nu atunci când ești de mărimea unei furnici și totul din jur te vrea la masă. Grounded 2 se construiește pe aventura de supraviețuire originală cu o hartă mai mare, sisteme noi și o mulțime de surprize. Fie că ești nou-nouț sau un veteran al curții din spate, aceste sfaturi te vor ajuta să supraviețuiești, să înflorești și poate chiar să-ți faci câțiva prieteni gâzeți pe parcurs. Iată cele 10 cele mai bune sfaturi pentru începători.
10. Stăpânește Omnitool-ul Devreme
Una dintre primele îmbunătățiri pe care le vei primi în Grounded 2 este Omnitool-ul, un înlocuitor simplificat pentru vechea colecție de unelte separate. În loc să jonglezi cu topoare, ciocane, lopeți și chei, acum ai o singură unealtă care își schimbă funcția în funcție de upgrade-urile sale. Vei începe cu Toporul Omni, care îți permite să tai iarba, iarba uscată și păpădile pentru construcții de bază.
Pe măsură ce progresezi, poți debloca Ciocanul Omni pentru a zdrobi materiale mai dure, Lopata Omni pentru săpat și, în cele din urmă, Cheia Omni pentru reparații. Toate upgrade-urile au loc la Stațiile Ranger, așa că adună resurse și vizitează-le regulat. Cu cât deblochezi mai repede toate cele patru, cu atât mai repede poți colecta materiale și lucra la proiecte avansate.
9. Folosește Stațiile Ranger pentru a Analiza Totul
Stațiile Ranger nu sunt doar pentru upgrade-uri de unelte; ele găzduiesc și Analizoare, care sunt esențiale pentru deblocarea de rețete noi. De fiecare dată când jucătorii pot scana o resursă sau o parte de gândac, ei obțin scheme pentru articole legate de acel material. Acestea pot fi orice, de la părți de construcție la seturi de armură. Analizoarele funcționează pe un sistem de încărcare, permițându-ți să scanezi patru articole atunci când sunt complet încărcate. Dacă o stație este goală, mergi la alta, deoarece fiecare se reîncarcă independent. Scanarea îți crește și puterea cerebrală, care deblochează rețete importante pe măsură ce avansezi în nivel.
8. Urmează Misunea Principală în Prima Zi
Este tentant să te rătăcești în momentul în care începi, dar Grounded 2 este neiertător dacă ești nepregătit. În prima zi, ține-te de misiunea principală până când deblochezi Toporul Omni. Calea misiunii te va ghida către întâlniri timpurii, NPC-uri importante și primul tău disc optic. O piatră de hotar timpurie este ajungerea la Mușuroiul de Furnici Snack Bar și înfrângerea primei tale Furnici Roșii Soldat. Aceasta produce Discul Optic Turbo Snack Bar, care deblochează opțiuni cruciale de crafting precum Incubatorul și Bazele cu Etaje Multiple. Prioritizează Incubatorul, deoarece este primul tău pas către îmblânzirea unui companion gândac.
7. Obține-ți Primul Gândac de Companie
Gâzășii sunt o nouă și captivantă caracteristică în Grounded 2, și sunt mai mult decât simple căluțe. Ele te pot ajuta să călătorești mai repede, să lupte alături de tine și chiar să care resurse. Primul tău gândac de companie va fi probabil Furnica Roșie Soldat, iar obținerea unuia necesită o anumită pregătire.
În primul rând, vei avea nevoie de schema Incubatorului de pe discul optic. Construiește-ți incubatorul direct pe pământ (nu pe pardoseală) și creează, de asemenea, un cuib de furnici pentru a-ți stoca căluțul. Apoi, aventură-te în Mușuroiul de Furnici al Incubatorului pentru a colecta un Ou de Furnică Roșie Soldat. Iată însă capcana. Va trebui să-l scoți cu mâna, ceea ce înseamnă că nu poți lupta în timp ce îl ții. Adu-ți armura, cele mai bune arme și torțe pentru tunelurile întunecate. Odată incubat sau eclozat instantaneu prin somn, furnica ta va deveni un companion de călătorie rapid și un aliat în luptă.
6. Alege cu Înțelepciune Locația Bazei
Brook Hollow Park este imens, iar locul în care jucătorii își construiesc baza le va afecta foarte mult supraviețuirea. Deoarece Grounded 2 prezintă atacuri coordonate de gâze asupra casei tale, poziționarea este critică. Cea mai bună apărare este înălțimea. Construiește-ți baza ridicată pe stânci, bușteni sau platforme elevate. Aceasta limitează accesul inamicului la un singur punct de intrare, făcând apărarea mult mai ușoară.
5. Upgrade înainte de Construcții Masive
Ground 2
Este ușor să te entuziasmezi și să începi să construiești fortărețe masive imediat, dar resursele din Grounded 2 sunt legate de upgrade-urile uneltelor. Dacă te grăbești să construiești cu materiale de nivel scăzut, vei ajunge să le înlocuiești mai târziu cu opțiuni mai puternice, risipind timp și efort. Concentrează-te mai întâi pe deblocarea tuturor Omnitool-urilor, colectarea resurselor avansate de construcție și explorarea pentru a descoperi scheme mai bune pentru pereți și podele. Odată ce le ai în mână, te poți angaja în proiecte de bază mai mari și mai permanente fără reconstrucție constantă.
4. Ține Stațiile de Craft și Cuferele Aproape
În Grounded 2, crafting-ul extrage automat articolele din depozitarea din apropiere, dar doar într-o anumită rază. Prin urmare, este important să-ți ții cuferele aproape de bancurile de lucru pentru a evita să alergi încoace și încolo după materiale. Organizarea este la fel de importantă. Denumește-ți cuferele în interfața de depozitare pentru a putea găsi rapid părțile de care ai nevoie. Pe măsură ce inventarul se umple cu zeci de diferite părți de gândaci, fibre și plante, îți vei economisi multă frustrare rămânând organizat de la început.
3. Cunoaște-ți Echipamentul
Una dintre cele mai mari schimbări din Grounded 2 este sistemul de armură în stil RPG, unde fiecare set este construit în jurul unui rol specific. Armura de Furnică Roșie crește șansa de critic și reduce costul de stamina cu arme bazate pe furnici, făcând-o ideală pentru build-uri de tip rogue. Armura de Băbușcă crește generarea de amenințare și reduce epuizarea staminei în timpul blocării, perfectă pentru jucătorii tank. Armura de Larvă crește daunele la punctele slabe și accelerează atacurile încărcate, potrivită pentru luptătorii de precizie. În cele din urmă, Armura de Fluture reduce costul de stamina pentru atacurile cu toiag magic și creează scuturi temporare la blocări perfecte, făcând-o o alegere excelentă pentru jucătorii de stil mage.
2. Adaugă Amulete pentru Putere Suplimentară
Amuletele sunt accesorii care îți îmbunătățesc stilul de joc ales. Unele îți amplifică punctele forte actuale, în timp ce altele adaugă abilități complet noi. De exemplu, Capacitorul Volatil adaugă daune electrice la toate atacurile corp la corp și poate supraîncărca anumite gâze pentru efecte suplimentare. Fii cu ochii în patru după amulete în timp ce explorezi. Echiparea celei potrivite poate transforma un build bun într-unul mortal, oferindu-ți un avantaj atât în luptă, cât și în supraviețuire.
1. Construiește o Apărare Perfectă pentru Baza Ta
Când roiurile de gâze atacă baza ta, două lucruri vor face diferența: o Cheie Omni pentru reparații rapide și un Tun de Glandă pentru apărare grea. Acum, tunul are nevoie de un jucător care să-l opereze, dar el distruge rapid valurile de inamici. Pentru acoperire maximă, plasează-ți tunurile pe platforme înclinate, astfel încât să poți ploua cu foc asupra inamicilor care se apropie. Combinate cu o bază elevată și un singur punct de intrare, aceste apărări pot ține piept chiar și celor mai nebunești roiuri.
Best Of
Grounded10 najboljih savjeta za početnike
Brook Hollow Park nije vaša uobičajena šetnja parkom, pogotovo kad ste veličine mrava i sve oko vas vas želi za ručak. Grounded 2 nadograđuje originalnu pustolovinu preživljavanja s većom mapom, novim sustavima i mnoštvom iznenađenja. Bilo da ste potpuno novi ili veteran dvorišta, ovi savjeti će vam pomoći da preživite, napredujete i možda čak sklopite nekoliko prijateljstava s bubama. Evo 10 najboljih savjeta za početnike.
10. Rano ovladajte Omnitoolom
Jedna od prvih nadogradnji koju ćete dobiti u Grounded 2 je Omnitool, pojednostavljena zamjena za stari skup zasebnih alata. Umjesto da žonglirate sjekirama, čekićima, lopaticama i ključevima, sada imate jedan alat koji mijenja funkciju ovisno o nadogradnjama. Počet ćete s Omni Sjekirom, koja vam omogućuje sječu trave, suhe trave i maslačka za osnovno građenje.
Kako napredujete, možete otključati Omni Čekić za razbijanje tvrđih materijala, Omni Lopaticu za kopanje i na kraju Omni Ključ za popravke. Sve se nadogradnje obavljaju na Ranger Stations, stoga skupljajte resurse i redovito ih posjećujte. Što prije otključate sva četiri, to brže možete skupljati materijale i raditi na naprednim projektima.
9. Koristite Ranger Stations za analizu svega
Ranger Stations nisu samo za nadogradnje alata; oni također sadrže Analizatore, koji su ključni za otključavanje novih recepata. Svaki put kada igrači mogu skenirati resurs ili dio bube, dobivaju nacrte za predmete povezane s tim materijalom. To može biti bilo što, od građevnih dijelova do kompleta oklopa. Analizatori rade na sustavu punjenja, dopuštajući vam da skenirate četiri predmeta kada su potpuno napunjeni. Ako je jedna stanica prazna, idite na drugu, jer se svaka puni neovisno. Skeniranje također povećava vašu moć mozga, što otključava važne recepte kako napredujete u razinama.
8. Pratite glavni zadatak prvog dana
Primamljivo je odmah krenuti u lutnju, ali Grounded 2 je nemilosrdan ako niste pripremljeni. Prvog dana se držite glavne linije zadataka dok ne otključate Omni Sjekiru. Put zadatka će vas voditi do ranih susreta, važnih NPC-ova i vašeg prvog optičkog diska. Jedna od ranih prekretnica je dolazak do Snack Bar Ant Hill i poraz vašeg prvog Crvenog vojnog mrava. To donosi Snack Bar Turbo optički disk, koji otključava ključne opcije izrade poput Hatchery i Multi-Story Bases. Dajte prednost Hatchery, jer je to vaš prvi korak ka pripitomljavanju bube pratitelja.
7. Nabavite svoju prvu bubu
Buge su nova i uzbudljiva značajka u Grounded 2, i one su više od samih jahača. Mogu vam pomoći da putujete brže, bore se uz vas, pa čak i nose resurse. Vaša prva buba će vjerojatno biti Crveni vojni mrav, a njeno dobivanje zahtijeva određenu pripremu.
Prvo, trebat će vam nacrt Hatchery s optičkog diska. Izgradite svoj hatchery izravno na tlu (ne na podu), a također napravite i mravinjak za pohranu vašeg jahača. Zatim, uputite se u Hatchery Ant Hill kako biste prikupili jaje Crvenog vojnog mrava. Evo kvake. Morat ćete ga iznijeti rukom, što znači da se ne možete boriti dok ga držite. Ponesite oklop, svoje najbolje oružje i baklje za tamne tunele. Nakon inkubacije ili trenutnog izleženja spavanjem, vaš će mrav postati brzi putnički pratitelj i borbeni saveznik.
6. Mudro odaberite lokaciju baze
Brook Hollow Park je golem, a mjesto gdje igrači izgrade svoju bazu uvelike će utjecati na njihovo preživljavanje. Budući da Grounded 2 sadrži koordinirane napade buba na vaš dom, pozicioniranje je ključno. Najbolja obrana je visina. Izgradite svoju bazu uzdignutu na stijenama, balvanima ili podignutim platformama. Ovo ograničava pristup neprijatelja na jednu ulaznu točku, što znatno olakšava obranu.
5. Nadogradite prije masovne izgradnje
Ground 2
Lako se uzbuditi i odmah početi graditi masivne tvrđave, ali resursi u Grounded 2 povezani su s nadogradnjom alata. Ako požurite s građenjem s materijalima niske razine, kasnije ćete ih morati zamijeniti jačim opcijama, gubeći vrijeme i trud. Prvo se usredotočite na otključavanje svih Omnitoolova, prikupljanje naprednih građevinskih resursa i istraživanje kako biste otkrili bolje nacrte za zidove i podove. Nakon što ih budete imali u rukama, možete se posvetiti većim, trajnijim projektima baze bez stalnog ponovnog građenja.
4. Držite stanice za izradu i škrinje blizu
U Grounded 2, izrada automatski povlači predmete iz obližnjeg skladišta, ali samo unutar određenog dometa. Stoga je važno držati svoje škrinje blizu radnih stolova kako biste izbjegli trčanje amo-tamo po materijale. Organizacija je jednako važna. Imenujte svoje škrinje u sučelju za pohranu kako biste brzo pronašli dijelove koji su vam potrebni. Kako se inventar puni desecima različitih dijelova buba, vlakana i biljaka, poštedjet ćete se mnogo frustracije ako budete organizirani od samog početka.
3. Upoznajte svoju opremu
Jedna od najvećih promjena u Grounded 2 je RPG-stil sustav oklopa, gdje je svaki set izgrađen oko specifične uloge. Oklop Crvenog mrava povećava šansu za kritični udar i smanjuje trošak izdržljivosti s oružjem na bazi mrava, što ga čini idealnim za izgradnje poput lopova. Oklop Bube mažice povećava generiranje prijetnje i smanjuje trošenje izdržljivosti tijekom blokiranja, savršen za igrače tenkove. Oklop Gruba povećava štetu na slabim točkama i ubrzava napade s punjenjem, što odgovara preciznim borcima. Konačno, Oklop Leptira smanjuje trošak izdržljivosti za napade čarobnim štapom i stvara privremene štitove na savršenim blokovima, što ga čini odličnim izborom za igrače u stilu čarobnjaka.
2. Dodajte sitnice za dodatnu moć
Sitnice su dodaci koji poboljšavaju vaš odabrani stil igre. Neke pojačavaju vaše trenutne snage, dok druge dodaju potpuno nove sposobnosti. Na primjer, Volatile Capacitor dodaje šok štetu svim napadima izbliza i može preopteretiti određene bube za dodatne efekte. Obratite pažnju na sitnice dok istražujete. Opravljanje prave može pretvoriti dobru izgradnju u smrtonosnu, dajući vam prednost i u borbi i u preživljavanju.
1. Izgradite savršenu obranu za svoju bazu
Kada rojevi buba napadnu vašu bazu, dvije stvari će napraviti razliku: Omni Ključ za brze popravke i Acorn Turret za tešku obranu. Sada, top treba igrača za upravljanje, ali brzo rastavlja neprijateljske valove. Za maksimalnu pokrivenost, postavite svoje topove na nagnute platforme kako biste mogli pljuštati hicima na približavajuće neprijatelje. U kombinaciji s uzdignutom bazom i jednom ulaznom točkom, ove obrane mogu odbiti čak i najluđe rojeve.
Best Of
Grounded10 najlepszych porad dla początkujących
Brook Hollow Park to nie jest zwykły spacer po parku, zwłaszcza gdy masz rozmiar mrówki, a wszystko wokół chce cię zjeść na obiad. Grounded 2 rozwija oryginalną przygodę survivalową o większą mapę, nowe systemy i mnóstwo niespodzianek. Niezależnie od tego, czy jesteś nowicjuszem, czy weteranem podwórka, te wskazówki pomogą ci przetrwać, rozwijać się, a może nawet zdobyć kilku owadzich przyjaciół. Oto 10 najlepszych porad dla początkujących.
10. Opanuj Omnitool wcześnie
Jednym z pierwszych ulepszeń, które zdobędziesz w Grounded 2 , jest Omnitool, usprawniona zamiana starego zestawu oddzielnych narzędzi. Zamiast żonglować toporkami, młotami, łopatami i kluczami, masz teraz jedno narzędzie, które zmienia funkcję w zależności od ulepszeń. Zaczniesz od Omni Toporka, który pozwala ci ścinać trawę, suchą trawę i mlecze do podstawowego budowania.
W miarę postępów możesz odblokować Omni Młot do rozbijania twardszych materiałów, Omni Łopatę do kopania i w końcu Omni Klucz do napraw. Wszystkie ulepszenia odbywają się na Stacjach Rangerskich, więc zbieraj zasoby i odwiedzaj je regularnie. Im szybciej odblokujesz wszystkie cztery, tym szybciej będziesz mógł zbierać materiały i pracować nad zaawansowanymi projektami.
9. Używaj Stacji Rangerskich do analizowania wszystkiego
Stacje Rangerskie to nie tylko ulepszenia narzędzi; mieszczą też Analizatory, które są niezbędne do odblokowywania nowych receptur. Za każdym razem, gdy gracze mogą zeskanować surowiec lub część owada, zdobywają schematy przedmiotów powiązanych z tym materiałem. Może to być wszystko, od części budowlanych po zestawy pancerzy. Analizatory działają w systemie ładowania, pozwalając na zeskanowanie czterech przedmiotów przy pełnym naładowaniu. Jeśli jedna stacja jest pusta, udaj się do innej, ponieważ każda ładuje się niezależnie. Skanowanie zwiększa też twoją moc umysłu, która odblokowuje ważne receptury wraz z awansem poziomu.
8. Podążaj za główną misją pierwszego dnia
Kusi, by od razu po rozpoczęciu gry wyruszyć na wędrówkę, ale Grounded 2 jest nieubłagane, jeśli jesteś nieprzygotowany. Pierwszego dnia trzymaj się głównej linii fabularnej, aż odblokujesz Omni Topór. Ścieżka misji poprowadzi cię do wczesnych spotkań, ważnych NPC i twojej pierwszej płyty optycznej. Jednym z wczesnych kamieni milowych jest dotarcie do Mrówczej Góry przy Barze Przekąskowym i pokonanie pierwszej Czerwonej Mrówki Żołnierza. To daje Turbo Płytę Optyczną z baru przekąskowego, która odblokowuje kluczowe opcje rzemieślnicze, takie jak Wylęgarnia i Bazy Wielopoziomowe. Priorytetowo potraktuj Wylęgarnię, ponieważ to twój pierwszy krok do oswojenia owadziego towarzysza.
7. Zdobądź swojego pierwszego Owadka
Owadki to nowa i ekscytująca funkcja w Grounded 2 i są czymś więcej niż tylko wierzchowcami. Mogą pomóc ci szybciej podróżować, walczyć u twojego boku, a nawet przenosić zasoby. Twoim pierwszym owadkiem prawdopodobnie będzie Czerwona Mrówka Żołnierz, a zdobycie go wymaga pewnych przygotowań.
Po pierwsze, będziesz potrzebować schematu Wylęgarni z płyty optycznej. Zbuduj swoją wylęgarnię bezpośrednio na ziemi (nie na podłodze), a także stwórz mrowisko do przechowywania twojego wierzchowca. Następnie wyrusz do Mrówczej Góry Wylęgarni, aby zebrać Jajo Czerwonej Mrówki Żołnierza. Oto haczyk. Będziesz musiał wynieść je na rękach, co oznacza, że nie możesz walczyć, trzymając je. Zabierz pancerz, najlepszą broń i pochodnie do ciemnych tuneli. Po wylęgu lub natychmiastowym wykluciu przez sen twoja mrówka stanie się szybkim towarzyszem podróży i sojusznikiem w walce.
6. Wybierz mądrze lokalizację bazy
Brook Hollow Park jest ogromny, a miejsce, w którym gracze zbudują swoją bazę, znacznie wpłynie na ich przetrwanie. Ponieważ Grounded 2 zawiera skoordynowane ataki owadów na twój dom, pozycjonowanie jest kluczowe. Najlepszą obroną jest wysokość. Zbuduj swoją bazę podniesioną na skałach, kłodach lub podwyższonych platformach. To ogranicza dostęp wroga do jednego punktu wejścia, co znacznie ułatwia obronę.
5. Ulepszaj przed masową konstrukcją
Ground 2
Łatwo się podekscytować i od razu zacząć budować masywne fortece, ale zasoby w Grounded 2 są powiązane z ulepszeniami narzędzi. Jeśli rzucisz się do budowania z materiałami niskiego poziomu, będziesz musiał później zastąpić je mocniejszymi opcjami, marnując czas i wysiłek. Skup się najpierw na odblokowaniu wszystkich Omnitooli, zbieraniu zaawansowanych materiałów budowlanych i eksploracji, aby odkryć lepsze schematy ścian i podłóg. Gdy już je zdobędziesz, możesz poświęcić się większym, bardziej trwałym projektom bazowym bez ciągłego przebudowywania.
4. Trzymaj stacje rzemieślnicze i skrzynie blisko siebie
W Grounded 2 rzemiosło automatycznie pobiera przedmioty z pobliskiego magazynu, ale tylko w określonym zasięgu. Dlatego ważne jest, aby trzymać skrzynie blisko swoich warsztatów, aby uniknąć biegania tam i z powrotem po materiały. Organizacja jest równie ważna. Nazywaj swoje skrzynie w interfejsie przechowywania, aby szybko znaleźć potrzebne części. Gdy ekwipunek wypełni się dziesiątkami różnych części owadów, włókien i roślin, oszczędzisz sobie wiele frustracji, pozostając zorganizowanym od samego początku.
3. Poznaj swój ekwipunek
Jedną z największych zmian w Grounded 2 jest system pancerzy w stylu RPG, gdzie każdy zestaw jest zbudowany wokół określonej roli. Pancerz Czerwonej Mrówki zwiększa szansę na krytyczne trafienie i zmniejsza koszt wytrzymałości przy użyciu broni opartych na mrówkach, co czyni go idealnym dla budów typu łotr. Pancerz Biedronki zwiększa generowanie aggro i zmniejsza drenaż wytrzymałości podczas blokowania, idealny dla graczy-tanków. Pancerz Larwy zwiększa obrażenia od słabych punktów i przyspiesza ataki naładowane, pasując do precyzyjnych wojowników. Wreszcie, Pancerz Motyla obniża koszt wytrzymałości dla ataków magicznej laski i tworzy tymczasowe tarcze przy idealnych blokach, co czyni go doskonałym wyborem dla graczy w stylu maga.
2. Dodaj Talizmany dla dodatkowej mocy
Talizmany to akcesoria, które wzmacniają wybrany styl gry. Niektóre wzmacniają twoje obecne atuty, podczas gdy inne dodają całkowicie nowe umiejętności. Na przykład, Lotny Kondensator dodaje obrażenia od porażenia do wszystkich ataków wręcz i może przeciążyć niektóre owady dla dodatkowych efektów. Miej oczy otwarte na talizmany podczas eksploracji. Wyposażenie się we właściwy może przekształcić dobrą budowę w zabójczą, dając ci przewagę zarówno w walce, jak i przetrwaniu.
1. Zbuduj doskonałą obronę dla swojej bazy
Gdy roje owadów zaatakują twoją bazę, dwie rzeczy zrobią różnicę: Omni Klucz do szybkich napraw i Żołędziowa Wieżyczka Strzelecka do ciężkiej obrony. Wieżyczka potrzebuje gracza do obsługi, ale szybko rozrywa fale wrogów. Dla maksymalnego zasięgu umieść swoje wieżyczki na pochylonych platformach, aby móc zasypać gradem pocisków zbliżających się wrogów. Połączone z podniesioną bazą i jednym punktem wejścia, te obrony mogą odeprzeć nawet najszaleńsze roje.
Best Of
Grounded10 parasta vinkkiä aloittelijoille
Brook Hollow Park ei ole mikään tavallinen puistokävely, varsinkaan kun olet muurahaisen kokoinen ja kaikki ympärilläsi haluaa sinut lounaakseen. Grounded 2 rakentaa alkuperäisen selviytymisseikkailun päälle isommalla kartalla, uusilla järjestelmillä ja monilla yllätyksillä. Olet sitten ihan uusi tai takapihan veteraani, nämä vinkit auttavat sinua selviytymään, kukoistamaan ja ehkä jopa hankkimaan muutamia ötököitä ystäviksesi matkan varrella. Tässä on 10 parasta vinkkiä aloittelijoille.
10. Hallitse Omnitool varhain
Yksi ensimmäisistä päivityksistä, jotka saat Grounded 2:ssa, on Omnitool, suoraviivainen korvike vanhalle erillisten työkalujen kokoelmalle. Kirveiden, vasaroiden, lapioiden ja kiintoavainten sähläämisen sijaan sinulla on nyt yksi työkalu, joka muuttaa toimintoaan päivityksensä mukaan. Aloitat Omni-kirveellä, jonka avulla voit hakata ruohoa, kuivaa ruohoa ja voikukkia perusrakentamista varten.
Edetessäsi voit avata Omni-vasaran kovempien materiaalien murskaamiseen, Omni-lapion kaivamiseen ja lopulta Omni-kiintoavaimen korjauksiin. Kaikki päivitykset tapahtuvat Ranger-asemilla, joten kerää resursseja ja vieraile niissä säännöllisesti. Mitä aikaisemmin avaat kaikki neljä, sitä nopeammin voit kerätä materiaaleja ja työskennellä edistyneiden projektien parissa.
9. Käytä Ranger-asemia kaiken analysointiin
Ranger-asemat eivät ole vain työkalujen päivittämistä varten; niissä on myös Analyysilaitteet, jotka ovat välttämättömiä uusien reseptien avaamiseen. Aina kun pelaajat voivat skannata resurssin tai ötökän osan, he saavat sinillejä esineistä, jotka liittyvät kyseiseen materiaaliin. Tämä voi olla mitä tahansa rakennusosista haarniskoihin. Analyysilaitteet toimivat latausjärjestelmällä, jolloin voit skannata neljä kohdetta täyden latauksen yhteydessä. Jos yksi asema on tyhjä, suuntaa toiseen, koska jokainen latautuu itsenäisesti. Skannaaminen myös lisää aivokapasiteettiasi, mikä avaa tärkeitä reseptejä tasosi noustessa.
8. Seuraa päätarinaa ensimmäisenä päivänä
On houkuttelevaa harhailla heti alussa, mutta Grounded 2 on armoton, jos et ole valmistautunut. Pysy ensimmäisenä päivänäsi päätarinassa, kunnes avaat Omni-kirveen. Tehtäväpolku opastaa sinut varhaisiin kohtaamisiin, tärkeisiin NPC-hahmoihin ja ensimmäiseen optiseen levyysi. Yksi varhainen virstanpylväs on Snack Bar -muurahaispesän saavuttaminen ja ensimmäisen Punaisen Sotilasmuurahaisen voittaminen. Tästä saat Snack Bar Turbo -optisen levyn, joka avaa ratkaisevia valmistusvaihtoehtoja, kuten Hautomo- ja Monikerroksiset Tukikohdat -suunnitelmat. Priorisoi Hautomo, sillä se on ensimmäinen askel ötökän kesyttämiseen.
7. Hanki ensimmäinen Buggy-si
Buggy:t ovat uusi ja jännittävä ominaisuus Grounded 2:ssa, ja ne ovat enemmän kuin vain ratsuja. Ne voivat auttaa sinua liikkumaan nopeammin, taistelemaan rinnallasi ja jopa kantamaan resursseja. Ensimmäinen buggy:si on todennäköisesti Punainen Sotilasmuurahainen, ja sen hankkiminen vaatii jonkin verran valmistelua.
Ensin tarvitset Hautomo-suunnitelman optiselta levyltä. Rakenna hautomosi suoraan maahan (ei lattialle), ja luo myös muurahaispesä ratsusi säilyttämistä varten. Sen jälkeen suuntaa Hautomo-muurahaispesään keräämään Punaisen Sotilasmuurahaisen munan. Tässä on koukku. Sinun täytyy kantaa se ulos käsin, mikä tarkoittaa, että et voi taistella sitä kannettaessa. Ota mukaan haarniska, parhaat aseesi ja soihtuja pimeitä tunneleita varten. Kun se on hautonut tai nukuttuasi välittömästi kuoriutunut, muurahaisestasi tulee nopea matkakumppani ja taisteluliittolainen.
6. Valitse tukikohdan sijainti viisaasti
Brook Hollow Park on valtava, ja siitä, mihin pelaajat rakentavat tukikohtansa, on suuri vaikutus heidän selviytymiseensä. Koska Grounded 2:ssa on koordinoituja ötökkähyökkäyksiä kotiisi, sijainti on ratkaisevan tärkeä. Paras puolustus on korkeus. Rakenna tukikohtasi korkealle kiville, halkoille tai korotetuille alustoille. Tämä rajoittaa vihollisten pääsyn yhteen sisäänkäyntiin, mikä helpottaa puolustusta huomattavasti.
5. Päivitä ennen massiivista rakentamista
Ground 2
On helppo innostua ja alkaa rakentaa massiivisia linnoituksia heti, mutta resurssit Grounded 2:ssa liittyvät työkalujen päivityksiin. Jos ryhdyt rakentamaan matalan tason materiaaleilla, joudut myöhemmin korvaamaan ne vahvemmilla vaihtoehdoilla, tuhlaen aikaa ja vaivaa. Keskity ensin kaikkien Omnitoolien avaamiseen, edistyneiden rakennusmateriaalien keräämiseen ja tutkimiseen löytääksesi parempia seinä- ja lattiasuunnitelmia. Kun nämä ovat hallussasi, voit sitoutua suurempiin, pysyvämpiin tukikohtaprojekteihin ilman jatkuvaa uudelleenrakentamista.
4. Pidä valmistusasemat ja arkut lähellä
Grounded 2:ssa valmistus hakee esineet automaattisesti lähellä olevasta varastosta, mutta vain tietyn etäisyyden sisällä. Siksi on tärkeää pitää arkut lähellä työpöytiäsi välttääksesi materiaalien hakemista edestakaisin. Organisointi on yhtä tärkeää. Nimeä arkusi varastokäyttöliittymässä, jotta löydät tarvitsemasi osat nopeasti. Kun varasto täyttyy kymmenistä erilaisista ötökän osista, kuituista ja kasveista, säästät paljon turhautumista pysymällä organisoituna alusta alkaen.
3. Tunne varusteesi
Yksi suurimmista muutoksista Grounded 2:ssa on RPG-tyylinen haarniskajärjestelmä, jossa jokainen sarja on rakennettu tietyn roolin ympärille. Punainen Muurahais-haarniska lisää kriittisen osuman mahdollisuutta ja vähentää kestävyyskustannuksia muurahaispohjaisilla aseilla, mikä tekee siitä ihanteellisen roguen kaltaisiin hahmoihin. Leppäkerttu-haarniska lisää uhan muodostumista ja vähentää kestävyyden kulutusta torjunnan aikana, mikä on täydellinen tankkiroolille. Toukka-haarniska lisää heikkojen kohtien vahinkoa ja nopeuttaa ladattuja hyökkäyksiä, sopien tarkkuustaistelijoille. Lopuksi Perhonen-haarniska alentaa taikasauvan hyökkäysten kestävyyskustannuksia ja luo väliaikaisia suojakilpiä täydellisillä torjunnilla, mikä tekee siitä loistavan valinnan velho-tyylisille pelaajille.
2. Lisää Trinket-asetuksia ylimääräistä tehoa varten
Trinketit ovat lisävarusteita, jotka parantavat valitsemaasi pelityyliä. Jotkut vahvistavat nykyisiä vahvuuksiasi, kun taas toiset lisäävät täysin uusia kykyjä. Esimerkiksi Volatile Capacitor lisää sähkövahinkoa kaikkiin lähitaisteluhyökkäyksiin ja voi ylikuormittaa tiettyjä ötököitä ylimääräisiä vaikutuksia varten. Pidä silmällä trinket-asetuksia tutkiessasi. Oikean asetuksen varustaminen voi muuttaa hyvän hahmon tappavaksi, antaen sinulle edun sekä taistelussa että selviytymisessä.
1. Rakenna täydellinen puolustus tukikohdallesi
Kun ötökkäparvet hyökkäävät tukikohtaasi, kaksi asiaa ratkaisee: Omni-kiintoavain nopeisiin korjauksiin ja Tammitorni raskaaseen puolustukseen. Torni tarvitsee pelaajan käyttöön, mutta se repii vihollisaaltoja nopeasti. Saadaksesi maksimaalisen peiton, aseta tornisi kulmikkaalle alustalle, jotta voit sataa laukauksia lähestyviin vihollisiin. Yhdistettynä korkeaan tukikohtaan ja yhteen sisäänkäyntiin nämä puolustukset voivat torjua jopa hulluimmat parvet.
Best Of
Grounded10 Best Tips voor Beginners
Brook Hollow Park is niet je gemiddelde wandeling in het park, zeker niet als je zo groot bent als een mier en alles om je heen je als lunch wil. Grounded 2 bouwt voort op het originele survivalavontuur met een grotere kaart, nieuwe systemen en genoeg verrassingen. Of je nu helemaal nieuw bent of een veteraan van de achtertuin, deze tips helpen je om te overleven, te floreren en misschien zelfs een paar insectenvrienden te maken onderweg. Hier zijn de 10 beste tips voor beginners.
10. Beheers de Omnitool vroeg
Een van de eerste upgrades die je krijgt in Grounded 2 is de Omnitool, een gestroomlijnde vervanging voor de oude verzameling aparte gereedschappen. In plaats van te jongleren met bijlen, hamers, scheppen en moersleutels, heb je nu één gereedschap dat van functie verandert afhankelijk van de upgrades. Je begint met de Omni-bijl, waarmee je gras, droog gras en paardenbloemen kunt hakken voor basisbouw.
Naarmate je vordert, kun je de Omni-hamer vrijspelen om hardere materialen te breken, de Omni-schep om te graven en uiteindelijk de Omni-moersleutel om te repareren. Alle upgrades gebeuren bij Ranger Stations, dus verzamel grondstoffen en bezoek ze regelmatig. Hoe eerder je alle vier vrijspeelt, hoe sneller je materialen kunt verzamelen en aan geavanceerde projecten kunt werken.
9. Gebruik Ranger Stations om alles te analyseren
Ranger Stations zijn niet alleen voor gereedschapsupgrades; ze huisvesten ook Analyzers, die essentieel zijn voor het vrijspelen van nieuwe recepten. Elke keer dat spelers een grondstof of insectendeel kunnen scannen, krijgen ze blauwdrukken voor items die aan dat materiaal zijn gekoppeld. Dit kan van alles zijn, van bouwdelen tot pantsersets. Analyzers werken op een oplaadsysteem, waardoor je vier items kunt scannen wanneer ze volledig zijn opgeladen. Als één station leeg is, ga dan naar een ander, want elk station laadt onafhankelijk op. Scannen verhoogt ook je denkkracht, wat belangrijke recepten vrijspeelt naarmate je level stijgt.
8. Volg de hoofdmissie op dag één
Het is verleidelijk om meteen weg te dwalen zodra je begint, maar Grounded 2 is genadeloos als je onvoorbereid bent. Houd je op je eerste dag aan de hoofdmissielijn totdat je de Omni-bijl vrijgespeeld hebt. Het missiepad leidt je naar vroege ontmoetingen, belangrijke NPC’s en je eerste optische schijf. Een vroege mijlpaal is het bereiken van de Snack Bar Mierenhoop en het verslaan van je eerste Rode Soldatenmier. Dit levert de Snack Bar Turbo Optische Schijf op, die cruciale maakopties zoals de Hatchery en Multi-Story Bases vrijspeelt. Geef prioriteit aan de Hatchery, want dit is je eerste stap naar het temmen van een insectenmaatje.
7. Haal je eerste Buggy
Buggies zijn een nieuwe en spannende functie in Grounded 2, en ze zijn meer dan alleen rijdieren. Ze kunnen je helpen sneller te reizen, naast je vechten en zelfs grondstoffen dragen. Je eerste buggy zal waarschijnlijk de Rode Soldatenmier zijn, en het verkrijgen ervan vereist wat voorbereiding.
Ten eerste heb je de Hatchery-blauwdruk van de optische schijf nodig. Bouw je hatchery direct op de grond (niet op vloeren), en maak ook een mierennest om je rijdier op te slaan. Ga dan de Hatchery Mierenhoop in om een Rode Soldatenmier-ei te verzamelen. Maar hier zit een addertje onder het gras. Je moet het er met de hand uit dragen, wat betekent dat je niet kunt vechten terwijl je het vasthoudt. Neem pantser, je beste wapens en fakkels mee voor de donkere tunnels. Zodra het is uitgebroed of direct uitgekomen door te slapen, wordt je mier een snelle reisgenoot en een gevechtsbondgenoot.
6. Kies een basislocatie verstandig
Brook Hollow Park is enorm, en waar spelers hun basis bouwen, heeft grote invloed op hun overleving. Omdat Grounded 2 gecoördineerde insectenaanvallen op je huis kent, is positionering cruciaal. De beste verdediging is hoogte. Bouw je basis verhoogd op rotsen, boomstammen of verhoogde platforms. Dit beperkt de toegang van vijanden tot één toegangspunt, waardoor verdediging veel eenvoudiger wordt.
5. Upgrade voordat je aan massale constructie begint
Ground 2
Het is gemakkelijk om enthousiast te worden en meteen enorme vestingen te gaan bouwen, maar grondstoffen in Grounded 2 zijn gekoppeld aan gereedschapsupgrades. Als je met materialen van laag niveau gaat bouwen, zul je ze later moeten vervangen door sterkere opties, wat tijd en moeite verspilt. Richt je eerst op het vrijspelen van alle Omnitools, het verzamelen van geavanceerde bouwmaterialen en het verkennen om betere muur- en vloerblauwdrukken te ontdekken. Zodra je deze in handen hebt, kun je je toewijden aan grotere, meer permanente basisprojecten zonder constant te hoeven herbouwen.
4. Houd werkstations en kisten dicht bij elkaar
In Grounded 2 haalt maken items automatisch uit nabijgelegen opslag, maar alleen binnen een bepaald bereik. Daarom is het belangrijk om je kisten dicht bij je werkbanken te houden om heen en weer rennen voor materialen te voorkomen. Organisatie is net zo belangrijk. Geef je kisten een naam in de opslaginterface zodat je snel de benodigde onderdelen kunt vinden. Naarmate de inventaris zich vult met tientallen verschillende insectendelen, vezels en planten, bespaar je jezelf veel frustratie door vanaf het begin georganiseerd te blijven.
3. Ken je uitrusting
Een van de grootste veranderingen in Grounded 2 is het RPG-achtige pantsersysteem, waarbij elke set is gebouwd rond een specifieke rol. Het Rode Mierenpantser verhoogt de kritieke kans en vermindert het uithoudingsverbruik met mierengebaseerde wapens, wat het ideaal maakt voor rogue-achtige builds. Het Lieveheersbeestjespantser verhoogt de dreigingsgeneratie en vermindert het uithoudingsverbruik tijdens blokkeren, perfect voor tank-spelers. Made-pantser verhoogt de zwakke-puntschade en versnelt opgeladen aanvallen, geschikt voor precisievechters. Ten slotte verlaagt het Vlinderpantser het uithoudingsverbruik voor magiestafaanvallen en creëert het tijdelijke schilden bij perfecte blokkades, wat het een uitstekende keuze maakt voor magiër-achtige spelers.
2. Voeg Trinkets toe voor extra kracht
Trinkets zijn accessoires die je gekozen speelstijl versterken. Sommige versterken je huidige sterke punten, terwijl andere geheel nieuwe vaardigheden toevoegen. De Volatile Capacitor voegt bijvoorbeeld schokschade toe aan alle melee-aanvallen en kan bepaalde insecten overbelasten voor extra effecten. Houd tijdens het verkennen een oogje in het zeil voor trinkets. Het uitrusten van de juiste kan een goede build in een dodelijke veranderen, wat je een voorsprong geeft in zowel gevecht als overleving.
1. Bouw een perfecte verdediging voor je basis
Wanneer insectenzwermen je basis aanvallen, zullen twee dingen het verschil maken: een Omni-moersleutel voor snelle reparaties en een Acorn Turret voor zware verdediging. De toren heeft een speler nodig om te bedienen, maar hij verscheurt vijandelijke golven snel. Voor maximale dekking plaats je je torens op schuine platforms, zodat je neer kan regenen op naderende vijanden. Gecombineerd met een verhoogde basis en een enkel toegangspunt, kunnen deze verdedigingswerken zelfs de gekste zwermen tegenhouden.
Best Of
Groundedأفضل 10 نصائح للمبتدئين
حديقة بروك هولو ليست نزهة عادية في الحديقة، وخاصة عندما تكون بحجم نملة وكل شيء حولك يريدك لتناول الغداء. Grounded 2 يبني على مغامرة البقاء الأصلية بخريطة أكبر، وأنظمة جديدة، والكثير من المفاجآت. سواء كنت جديدًا تمامًا أو محنكًا في الفناء الخلفي، فإن هذه النصائح ستساعدك على البقاء والازدهار، وربما تكوين بعض الأصدقاء من الحشرات على طول الطريق. إليك أفضل 10 نصائح للمبتدئين.
10. أتقن الأومني تول مبكرًا
أحد أول الترقيات التي ستحصل عليها في Grounded 2 هو الأومني تول، وهو بديل مبسط للمجموعة القديمة من الأدوات المنفصلة. بدلاً من التبديل بين الفؤوس والمطارق والمجارف والمفاتيح، أصبح لديك الآن أداة واحدة تغير وظيفتها اعتمادًا على ترقياتها. ستبدأ بـ Omni Axe، الذي يسمح لك بقطع العشب والعشب الجاف والهندباء للبناء الأساسي.
مع تقدمك، يمكنك فتح Omni Hammer لسحق المواد الأكثر صلابة، وOmni Shovel للحفر، وفي النهاية Omni Wrench للإصلاح. تحدث جميع الترقيات في محطات الحارس (Ranger Stations)، لذا اجمع الموارد وقم بزيارتها بانتظام. كلما أسرعت في فتح الأدوات الأربع، كلما تمكنت من جمع المواد والعمل على المشاريع المتقدمة بشكل أسرع.
9. استخدم محطات الحارس لتحليل كل شيء
محطات الحارس ليست فقط لترقية الأدوات؛ فهي تحتوي أيضًا على أجهزة التحليل (Analyzers)، وهي ضرورية لفتح وصفات جديدة. في كل مرة يمكن للاعبين فيها مسح مورد أو جزء من حشرة، يحصلون على مخططات لعناصر مرتبطة بتلك المادة. يمكن أن يكون هذا أي شيء من أجزاء البناء إلى مجموعات الدروع. تعمل أجهزة التحليل بنظام شحن، مما يسمح لك بمسح أربعة عناصر عند الشحن الكامل. إذا كانت إحدى المحطات فارغة، توجه إلى أخرى، لأن كل واحدة تشحن بشكل مستقل. المسح أيضًا يعزز قوة عقلك، مما يفتح وصفات مهمة مع تقدم مستواك.
8. اتبع المهمة الرئيسية في اليوم الأول
من المغري أن تتجول بمجرد أن تبدأ، لكن Grounded 2 لا يرحم إذا لم تكن مستعدًا. في يومك الأول، التزم بخط المهمة الرئيسية حتى تفتح Omni Axe. سيرشدك مسار المهمة إلى المواجهات المبكرة، والشخصيات المهمة، وأول قرص بصري لك. أحد المعالم المبكرة هو الوصول إلى تل نمل سناك بار وهزيمة أول نملة جندي حمراء لديك. هذا ينتج قرص Snack Bar Turbo Optical Disc، الذي يفتح خيارات حرفية حاسمة مثل Hatchery وMulti-Story Bases. رتب أولوية Hatchery، حيث إنها خطوتك الأولى نحو ترويض رفيق من الحشرات.
7. احصل على أول حشرة مركبة لك
الحشرات المركبة (Buggies) هي ميزة جديدة ومثيرة في Grounded 2، وهي أكثر من مجرد مركبات للركوب. يمكنها مساعدتك على السفر بشكل أسرع، والقتال إلى جانبك، وحتى حمل الموارد. من المرجح أن تكون حشرتك المركبة الأولى هي نملة الجندي الحمراء، والحصول على واحدة يتطلب بعض التحضير.
أولاً، ستحتاج إلى مخطط Hatchery من القرص البصري. ابنِ حاضنتك مباشرة على الأرض (وليس على أرضية)، وأنشئ أيضًا عش نمل لتخزين مركبتك. بعد ذلك، اغامر بالدخول إلى تل نمل Hatchery لجمع بيضة نملة جندي حمراء. الآن إليك الصعوبة. سيتعين عليك حملها باليد، مما يعني أنك لا تستطيع القتال أثناء حملها. أحضر درعًا، وأفضل أسلحتك، ومشاعل للأنفاق المظلمة. بمجرد أن تفقس في الحاضنة أو تفقس على الفور بالنوم، ستصبح نملتك رفيق سفر سريعًا وحليفًا في القتال.
6. اختر موقع قاعدتك بحكمة
حديقة بروك هولو ضخمة، والمكان الذي يبني فيه اللاعبون قاعدتهم سيؤثر بشكل كبير على بقائهم. نظرًا لأن Grounded 2 يتميز بهجمات حشرات منسقة على منزلك، فإن الموقع أمر بالغ الأهمية. أفضل دفاع هو الارتفاع. ابنِ قاعدتك مرتفعة على الصخور أو الجذوع أو المنصات المرفوعة. هذا يحد من وصول العدو إلى نقطة دخول واحدة، مما يجعل الدفاع أسهل بكثير.
5. قم بالترقية قبل البناء الضخم
Ground 2
من السهل أن تتحمس وتبدأ في بناء حصون ضخمة على الفور، لكن الموارد في Grounded 2 مرتبطة بترقيات الأدوات. إذا استعجلت البناء بمواد منخفضة المستوى، فسينتهي بك الأمر إلى استبدالها لاحقًا بخيارات أقوى، مما يهدر الوقت والجهد. ركز أولاً على فتح جميع أدوات الأومني، وجمع موارد بناء متقدمة، واستكشاف لاكتشاف مخططات أفضل للجدران والأرضيات. بمجرد أن تحصل على هذه الأشياء، يمكنك الالتزام بمشاريع قاعدة أكبر وأكثر ديمومة دون إعادة بناء مستمرة.
4. أبقِ محطات الحرف وصناديق التخزين قريبة
في Grounded 2، تسحب الحرفة العناصر من التخزين القريب تلقائيًا، ولكن فقط ضمن نطاق معين. لذلك، من المهم إبقاء صناديقك قريبة من مناضد العمل لتجنب الركض ذهابًا وإيابًا للحصول على المواد. التنظيم بنفس القدر من الأهمية. قم بتسمية صناديقك في واجهة التخزين حتى تتمكن من العثور بسرعة على الأجزاء التي تحتاجها. مع امتلاء المخزين بعشرات الأجزاء المختلفة من الحشرات والألياف والنباتات، ستوفر على نفسك الكثير من الإحباط بالبقاء منظمًا من البداية.
3. اعرف معداتك
أحد أكبر التغييرات في Grounded 2 هو نظام الدروع على طراز ألعاب تقمص الأدوار، حيث تم بناء كل مجموعة حول دور محدد. درع النمل الأحمر يعزز فرصة الضربة الحرجة ويقلل تكلفة التحمل مع أسلحة تعتمد على النمل، مما يجعله مثاليًا للاعبين ذوي أسلوب اللصوص. درع الخنفساء يزيد من توليد التهديد ويقلل استنزاف التحمل أثناء التصدي، وهو مثالي للاعبين ذوي دور الدبابة. درع اليرقة يزيد من ضرر النقاط الضعيفة ويسرع الهجمات المشحونة، مما يناسب مقاتلي الدقة. أخيرًا، درع الفراشة يقلل تكلفة التحمل لهجمات عصا السحر وينشئ دروعًا مؤقتة عند التصدي المثالي، مما يجعله خيارًا رائعًا للاعبين ذوي أسلوب السحرة.
2. أضف التمائم للحصول على قوة إضافية
التمائم (Trinkets) هي إكسسوارات تعزز أسلوب لعبك المختار. بعضها يضخم نقاط قوتك الحالية، بينما يضيف البعض الآخر قدرات جديدة تمامًا. على سبيل المثال، يضيف Volatile Capacitor ضرر الصدمة لجميع الهجمات الجسمانية ويمكنه إفراط تحميل بعض الحشرات لتأثيرات إضافية. ترقب التمائم أثناء استكشافك. ارتداء التميمة المناسبة يمكن أن يحول البنية الجيدة إلى بنية مميتة، مما يمنحك ميزة في كل من القتال والبقاء.
1. ابنِ دفاعًا مثاليًا لقاعدتك
عندما تهاجم أسراب الحشرات قاعدتك، سيكون هناك شيئان سيحدثان الفرق: مفتاح الأومني (Omni Wrench) للإصلاحات السريعة وبرج البلوط (Acorn Turret) للدفاع الثقيل. الآن، يحتاج البرج إلى لاعب لتشغيله، لكنه يمزق موجات العدو بسرعة. للحصول على أقصى تغطية، ضع أبراجك على منصات مائلة حتى تتمكن من إمطار الأعداء المقتربين بوابل من الطلقات. مجتمعة مع قاعدة مرتفعة ونقطة دخول واحدة، يمكن لهذه الدفاعات صد حتى أكثر الأسراب جنونًا.
Best Of
Grounded10 bedste tips til begyndere
Brook Hollow Park er ikke en almindelig gåtur i parken, ikke når du er på størrelse med en myre og alt omkring dig vil have dig til frokost. Grounded 2 bygger videre på det originale overlevelseseventyr med et større kort, nye systemer og masser af overraskelser. Uanset om du er helt ny eller en veteran fra baghaven, vil disse tips hjælpe dig med at overleve, trives og måske endda få et par buggy-venner undervejs. Her er de 10 bedste tips til begyndere.
10. Mestre Omnitool tidligt
En af de første opgraderinger du får i Grounded 2 er Omnitool, en strømlinet erstatning for den gamle samling af separate værktøjer. I stedet for at jonglere med økser, hamre, skovle og skruenøgler, har du nu et enkelt værktøj, der skifter funktion afhængigt af dets opgraderinger. Du starter med Omni Axe, som lader dig hugge græs, tørt græs og mælkebøtter til grundlæggende byggeri.
Efterhånden som du skrider frem, kan du låse Omni Hammer op til at knuse hårdere materialer, Omni Shovel til at grave og til sidst Omni Wrench til reparationer. Alle opgraderinger foregår ved Ranger Stations, så saml ressourcer og besøg dem regelmæssigt. Jo før du låser alle fire op, jo hurtigere kan du indsamle materialer og arbejde på avancerede projekter.
9. Brug Ranger Stations til at analysere alt
Ranger Stations er ikke kun til værktøjsopgraderinger; de huser også Analyzers, som er essentielle for at låse nye opskrifter op. Hver gang spillere kan scanne en ressource eller et insektdel, får de blåtryk til genstande knyttet til det materiale. Dette kan være alt fra bygningsdele til rustningssæt. Analyzers fungerer på et opladningssystem, der lader dig scanne fire genstande, når de er fuldt opladet. Hvis en station er tom, så gå til en anden, for hver enkelt genoplader uafhængigt. Scanning øger også din hjernekraft, som låser vigtige opskrifter op, når du stiger i niveau.
8. Følg hovedopgaven på dag ét
Det er fristende at vandre væjre øjeblikket du starter, men Grounded 2 er ubarmhjertig, hvis du er uforberedt. På din første dag, hold dig til hovedopgaveforløbet, indtil du låser Omni Axe op. Opgaveforløbet vil guide dig til tidlige møder, vigtige NPC’er og din første optiske disk. Et tidligt milepæl er at nå frem til Snack Bar Ant Hill og besejre din første Røde Soldatmyre. Dette giver Snack Bar Turbo Optical Disc, som låser afgørende fremstillingsmuligheder op som Hatchery og Multi-Story Bases. Prioriter Hatchery, da det er dit første skridt mod at tæmme en insektfælle.
7. Få din første Buggy
Buggies er en ny og spændende funktion i Grounded 2, og de er mere end blot mount. De kan hjælpe dig med at rejse hurtigere, kæmpe sammen med dig og endda bære ressourcer. Din første buggy vil sandsynligvis være Røde Soldatmyren, og at få en kræver noget forberedelse.
Først skal du have Hatchery-blåtrykket fra den optiske disk. Byg din hatchery direkte på jorden (ikke på gulv), og lav også et myrerede til at opbevare din mount. Derefter, vove dig ind i Hatchery Ant Hill for at indsamle et Røde Soldatmyreæg. Nu kommer udfordringen. Du skal bære det ud i hånden, hvilket betyder du ikke kan kæmpe, mens du holder det. Medbring rustning, dine bedste våben og fakler til de mørke tunneler. Når det er inkuberet eller øjeblikkeligt udklækket ved at sove, vil din myre blive en hurtig rejsefælle og en kampallieret.
6. Vælg en baselokation klogt
Brook Hollow Park er enorm, og hvor spillere bygger deres base vil i høj grad påvirke deres overlevelse. Da Grounded 2 indeholder koordinerede insektangreb på dit hjem, er placering afgørende. Det bedste forsvar er højde. Byg din base forhøjet på klipper, træstammer eller hævede platforme. Dette begrænser fjendens adgang til et enkelt indgangspunkt, hvilket gør forsvar meget lettere.
5. Opgrader før massiv konstruktion
Ground 2
Det er let at blive begejstret og begynde at konstruere massive fæstninger med det samme, men ressourcerne i Grounded 2 er knyttet til værktøjsopgraderinger. Hvis du skynder dig ud i byggeri med lav-niveau materialer, vil du ende med at erstatte dem senere med stærkere muligheder, hvilket spilder tid og kræfter. Fokuser først på at låse alle Omnitools op, indsamle avancerede byggematerialer og udforske for at opdage bedre væg- og gulvblåtryk. Når du har disse på hånden, kan du forpligte dig til større, mere permanente baseprojekter uden konstant genopbygning.
4. Hold fremstillingsstationer og kister tæt
I Grounded 2 henter fremstilling automatisk genstande fra nærliggende opbevaring, men kun inden for et vist område. Derfor er det vigtigt at holde dine kister tæt på dine arbejdsbænke for at undgå at løbe frem og tilbage efter materialer. Organisation er lige så vigtig. Navngiv dine kister i opbevaringsgrænsefladen, så du hurtigt kan finde de dele, du har brug for. Efterhånden som inventaret fyldes med snesevis af forskellige insektdele, fibre og planter, vil du spare dig for en masse frustration ved at holde dig organiseret fra starten.
3. Kend dit udstyr
En af de største ændringer i Grounded 2 er RPG-stil rustningssystemet, hvor hvert sæt er bygget omkring en specifik rolle. Røde Myrerustningen forøger crit-chance og reducerer udmattelsesomkostning med myre-baserede våben, hvilket gør den ideel til rogue-lignende builds. Mariehønerustningen øger trusselgenerering og reducerer udmattelsesdræn under blokering, perfekt til tank-spillere. Grub Armor øger svagpunktskade og fremskynder opladede angreb, passende til præcisionskæmpere. Endelig, Sommerfuglerustningen sænker udmattelsesomkostningen for magistavangreb og skaber midlertidige skjolde ved perfekte blokeringer, hvilket gør den til et godt valg for mage-stil spillere.
2. Tilføj Trinkets for ekstra kraft
Trinkets er tilbehør, der forbedrer din valgte spilestil. Nogle forstærker dine nuværende styrker, mens andre tilføjer helt nye evner. For eksempel tilføjer Volatile Capacitor støtskade til alle nærkampsangreb og kan overbelaste visse insekter for ekstra effekter. Hold øje med trinkets, mens du udforsker. At udstyre det rigtige kan forvandle et godt build til et dødbringende et, hvilket giver dig en fordel i både kamp og overlevelse.
1. Byg et perfekt forsvar til din base
Når insektsværme angriber din base, vil to ting gøre forskellen: en Omni Wrench til hurtige reparationer og en Acorn Turret til tungt forsvar. Nu, tårnet har brug for en spiller til at betjene det, men det river sig gennem fjendebølger hurtigt. For maksimal dækning, placer dine tårne på skrå platforme, så du kan lade skudene regne ned over nærmerende fjender. Kombineret med en forhøjet base og et enkelt indgangspunkt, kan disse forsvar holde selv de vildeste sværme på afstand.
Best Of
Grounded10 bästa tips för nybörjare
Brook Hollow Park är ingen vanlig promenad i parken, inte när du är stor som en myra och allt omkring dig vill ha dig till lunch. Grounded 2 bygger vidare på det ursprungliga överlevnadsäventyret med en större karta, nya system och gott om överraskningar. Oavsett om du är helt ny eller en veteran från bakgården kommer dessa tips att hjälpa dig att överleva, frodas och kanske till och med skaffa några krypande vänner längs vägen. Här är de 10 bästa tipsen för nybörjare.
10. Behärska Omnitool tidigt
En av de första uppgraderingarna du får i Grounded 2 är Omnitool, ett strömlinjeformat ersättare för den gamla samlingen av separata verktyg. Istället för att jonglera med yxor, hammare, spadar och skiftnycklar har du nu ett enda verktyg som ändrar funktion beroende på dess uppgraderingar. Du börjar med Omni Axe, som låter dig hugga gräs, torrt gräs och maskrosor för grundläggande byggnation.
När du fortskrider kan du låsa upp Omni Hammer för att krossa tuffare material, Omni Shovel för att gräva och så småningom Omni Wrench för reparationer. Alla uppgraderingar sker på Ranger Stations, så samla resurser och besök dem regelbundet. Ju snabbare du låser upp alla fyra, desto snabbare kan du samla material och arbeta med avancerade projekt.
9. Använd Ranger Stations för att analysera allt
Ranger Stations är inte bara för verktygsuppgraderingar; de hyser också Analyzers, som är avgörande för att låsa upp nya recept. Varje gång spelare kan skanna en resurs eller insektsdel får de ritningar för föremål kopplade till det materialet. Detta kan vara allt från byggdelar till rustningsset. Analyzers fungerar med ett laddningssystem, så du kan skanna fyra föremål när de är fulladdade. Om en station är tom, gå till en annan, eftersom var och en laddas upp oberoende. Att skanna ökar också din hjärnkapacitet, vilket låser upp viktiga recept när du går upp i nivå.
8. Följ huvuduppdraget första dagen
Det är frestande att vandra iväg direkt när du börjar, men Grounded 2 är obarmhärtigt om du är oförberedd. Håll dig till huvuduppdragslinjen första dagen tills du låser upp Omni Axe. Uppdragsbanan guidar dig till tidiga möten, viktiga NPC:er och din första optiska skiva. En tidig milstolpe är att nå Snack Bar Ant Hill och besegra din första Röda Soldatmyra. Detta ger Snack Bar Turbo Optical Disc, som låser upp avgörande tillverkningsalternativ som Hatchery och Multi-Story Bases. Prioritera Hatchery, eftersom det är ditt första steg mot att tämja en insektskamrat.
7. Skaffa din första Buggy
Buggies är en ny och spännande funktion i Grounded 2, och de är mer än bara ridjur. De kan hjälpa dig att resa snabbare, slåss vid din sida och till och med bära resurser. Din första buggy kommer troligen att vara Röda Soldatmyran, och att skaffa en kräver lite förberedelse.
Först behöver du Hatchery-ritningen från den optiska skivan. Bygg din hatchery direkt på marken (inte på golv), och skapa också ett myrbo för att förvara ditt ridjur. Sedan, våga dig in i Hatchery Ant Hill för att samla ett Röda Soldatmyra-ägg. Här är haken. Du måste bära ut det för hand, vilket betyder att du inte kan slåss medan du håller det. Ta med rustning, dina bästa vapen och facklor för de mörka tunnlarna. När det är inkuberat eller omedelbart kläckt genom att sova, blir din myra en snabb reskamrat och en stridsallierad.
6. Välj en basplats klokt
Brook Hollow Park är enorm, och var spelare bygger sin bas kommer att påverka deras överlevnad avsevärt. Eftersom Grounded 2 har koordinerade insektsattacker på ditt hem är positionering avgörande. Det bästa försvaret är höjd. Bygg din bas upphöjd på stenar, stockar eller upphöjda plattformar. Detta begränsar fiendens tillgång till en enda ingång, vilket gör försvaret mycket enklare.
5. Uppgradera innan massiv konstruktion
Ground 2
Det är lätt att bli upphetsad och börja bygga massiva fästningar direkt, men resurser i Grounded 2 är kopplade till verktygsuppgraderingar. Om du rusar in i byggande med lågnivåmaterial kommer du att behöva byta ut dem senare med starkare alternativ, vilket slösar tid och ansträngning. Fokusera först på att låsa upp alla Omnitools, samla avancerade byggresurser och utforska för att upptäcka bättre ritningar för väggar och golv. När du har dessa i handen kan du ägna dig åt större, mer permanenta basprojekt utan konstant ombyggnad.
4. Håll tillverkningsstationer och kistor nära
I Grounded 2 hämtar tillverkning automatiskt föremål från närliggande förvaring, men bara inom ett visst avstånd. Därför är det viktigt att hålla dina kistor nära dina arbetsbänkar för att undvika att springa fram och tillbaka efter material. Organisation är lika viktigt. Namnge dina kistor i förvaringsgränssnittet så att du snabbt kan hitta de delar du behöver. När inventariet fylls med dussintals olika insektsdelar, fibrer och växter sparar du dig mycket frustration genom att hålla dig organiserad från början.
3. Känn till din utrustning
En av de största förändringarna i Grounded 2 är det RPG-inspirerade rustningssystemet, där varje set är byggt kring en specifik roll. Röda Myrrustningen ökar kritchansen och minskar uthållighetskostnaden med myrbaserade vapen, vilket gör den idealisk för rogue-liknande byggen. Nyckelpigorustningen ökar hotgenerering och minskar uthållighetsförbrukning vid blockering, perfekt för tank-spelare. Grub Armor ökar svagpunktskador och snabbar på laddade attacker, vilket passar precisionsstridare. Slutligen sänker Fjärilsrustningen uthållighetskostnaden för magistavsattacker och skapar temporära sköldar vid perfekta blockeringar, vilket gör den till ett utmärkt val för magikerliknande spelare.
2. Lägg till smycken för extra kraft
Smycken är accessoarer som förstärker din valda spelstil. Vissa förstärker dina nuvarande styrkor, medan andra lägger till helt nya förmågor. Till exempel lägger Volatile Capacitor till chockskador på alla närstridsattacker och kan överbelasta vissa insekter för extra effekter. Håll utkik efter smycken när du utforskar. Att utrusta rätt smycke kan förvandla ett bra bygge till ett dödligt ett och ge dig ett övertag i både strid och överlevnad.
1. Bygg ett perfekt försvar för din bas
När insektssvärmar attackerar din bas kommer två saker att göra skillnaden: en Omni Wrench för snabba reparationer och en Acorn Turret för tungt försvar. Nu behöver tornet en spelare för att användas, men det river snabbt igenom fiendevågor. För maximal täckning, placera dina torn på vinklade plattformar så att du kan regna ner skott på anfallande fiender. Kombinerat med en upphöjd bas och en enda ingång kan dessa försvar hålla tillbaka även de galnaste svärmarna.
Best Of
Grounded10 beste tips for nybegynnere
Brook Hollow Park er ikke en vanlig tur i parken, ikke når du er på størrelse med en maur og alt rundt deg vil ha deg til lunsj. Grounded 2 bygger videre på det originale overlevelseseventyret med et større kart, nye systemer og mange overraskelser. Enten du er helt ny eller en veteran i bakgården, vil disse tipsene hjelpe deg med å overleve, trives og kanskje til og med få deg noen krypende venner underveis. Her er de 10 beste tipsene for nybegynnere.
10. Mester Omniverktøyet tidlig
En av de første oppgraderingene du får i Grounded 2 er Omniverktøyet, en strømlinjeformet erstatning for den gamle samlingen av separate verktøy. I stedet for å jonglere med økser, hammer, spader og skiftenøkler, har du nå et enkelt verktøy som endrer funksjon avhengig av oppgraderingene. Du starter med Omniøksen, som lar deg hogge gress, tørt gress og løvetann for grunnleggende bygging.
Etter hvert som du kommer lenger, kan du låse opp Omnihammeren for å knuse hardere materialer, Omnispaden for graving, og til slutt Omniskiftenøkkelen for reparasjoner. Alle oppgraderinger skjer på Rangerstasjoner, så samle ressurser og besøk dem regelmessig. Jo før du låser opp alle fire, jo raskere kan du samle materialer og jobbe med avanserte prosjekter.
9. Bruk Rangerstasjoner til å analysere alt
Rangerstasjoner er ikke bare til verktøyoppgraderinger; de huser også Analysatorer, som er avgjørende for å låse opp nye oppskrifter. Hver gang spillere kan skanne en ressurs eller insektdel, får de oppskrifter for gjenstander knyttet til det materialet. Dette kan være alt fra bygningsdeler til rustningssett. Analysatorer fungerer på et ladingssystem, som lar deg skanne fire gjenstander når den er fulladet. Hvis en stasjon er tom, dra til en annen, for hver enkelt lader opp uavhengig. Skanning øker også din hjernekraft, som låser opp viktige oppskrifter når du går opp i nivå.
8. Følg hovedoppdraget på dag én
Det er fristende å vandre av gårde i samme øyeblikk du starter, men Grounded 2 er nådeløs hvis du er uforberedt. På din første dag, hold deg til hovedoppdragslinjen til du låser opp Omniøksen. Oppdragsstien vil lede deg til tidlige møter, viktige NPC-er og din første optiske plate. En tidlig milepæl er å nå Snack Bar-maurtuen og beseire din første Røde Soldatmaur. Dette gir Snack Bar Turbo-optisk plate, som låser opp avgjørende håndverksalternativer som Klekkeriet og Fleretasjes-baser. Prioriter Klekkeriet, da det er ditt første skritt mot å temme et insektfølge.
7. Få din første krypende
Krypende er en ny og spennende funksjon i Grounded 2, og de er mer enn bare rikdyr. De kan hjelpe deg å reise raskere, kjempe sammen med deg, og til og med bære ressurser. Din første krypende vil sannsynligvis være Røde Soldatmaur, og å få en krever litt forberedelse.
Først trenger du Klekkeri-oppskriften fra den optiske platen. Bygg klekkeriet ditt direkte på bakken (ikke på gulv), og lag også et maurrede for å lagre rikdyret ditt. Deretter, dra inn i Klekkeri-maurtuen for å samle et Røde Soldatmaur-egg. Men her er haken. Du må bære det ut for hånd, noe som betyr at du ikke kan kjempe mens du holder det. Ta med rustning, dine beste våpen og fakler for de mørke tunnelene. Når det er klekket eller øyeblikkelig klekket ved å sove, vil mauren din bli et raskt reisefølge og en kampalliert.
6. Velg en baselokasjon klokt
Brook Hollow Park er enorm, og hvor spillere bygger basen sin vil i stor grad påvirke overlevelsen deres. Siden Grounded 2 inneholder koordinerte insektangrep på hjemmet ditt, er posisjonering avgjørende. Den beste forsvaret er høyde. Bygg basen din forhøyet på steiner, stokker eller hevede plattformer. Dette begrenser fiendens tilgang til et enkelt inngangspunkt, noe som gjør forsvar mye enklere.
5. Oppgrader før massiv konstruksjon
Ground 2
Det er lett å bli begeistret og begynne å konstruere massive festninger med en gang, men ressurser i Grounded 2 er knyttet til verktøyoppgraderinger. Hvis du skynder deg inn i bygging med lavnivå-materialer, vil du ende opp med å erstatte dem senere med sterkere alternativer, noe som kaster bort tid og krefter. Fokuser først på å låse opp alle Omniverktøy, samle avanserte byggematerialer, og utforsk for å oppdage bedre vegg- og gulvoppskrifter. Når du har disse i hånden, kan du vie deg til større, mer permanente baseprosjekter uten konstant gjenoppbygging.
4. Hold håndverksstasjoner og kister nærme
I Grounded 2 henter håndverk gjenstander automatisk fra nærliggende lagring, men bare innenfor et visst område. Derfor er det viktig å holde kistene dine nær arbeidsbenkene dine for å unngå å løpe frem og tilbake etter materialer. Organisering er like viktig. Gi kistene dine navn i lagringsgrensesnittet slik at du raskt kan finne delene du trenger. Etter hvert som inventaret fylles med dusinvis av forskjellige insektdeler, fibre og planter, vil du spare deg for mye frustrasjon ved å holde deg organisert fra starten.
3. Kjenn utstyret ditt
En av de største endringene i Grounded 2 er det RPG-inspirerte rustningssystemet, hvor hvert sett er bygget rundt en spesifikk rolle. Rød Maur-rustningen øker kritisk-sjans og reduserer utholdenhetskostnad med maurbaserte våpen, noe som gjør den ideell for rogue-lignende bygg. Marihønerustningen øker trusselgenerering og reduserer utholdenhetstap mens du blokkerer, perfekt for tank-spillere. Larverustningen øker svaktpunktsskade og øker farten på ladede angrep, som passer for presisjonskjempere. Til slutt, Sommerfuglrustningen senker utholdenhetskostnaden for magistavangrep og skaper midlertidige skjold på perfekte blokkeringer, noe som gjør den til et flott valg for mage-stil spillere.
2. Legg til smykker for ekstra kraft
Smykker er tilbehør som forsterker din valgte spillstil. Noen forsterker dine nåværende styrker, mens andre legger til helt nye evner. For eksempel legger Volatile Capacitor til sjokkskade på alle nærkampangrep og kan overbelaste visse insekter for ekstra effekter. Hold øye med smykker mens du utforsker. Å utstyre det riktige kan gjøre et godt bygg om til et dødelig ett, og gi deg en fordel i både kamp og overlevelse.
1. Bygg et perfekt forsvar for basen din
Når insektsvermer angriper basen din, vil to ting utgjøre forskjellen: en Omniskiftenøkkel for raske reparasjoner og en Acorn Turret for tungt forsvar. Nå, tårnet trenger en spiller for å betjene det, men det river gjennom fiendebølger raskt. For maksimal dekning, plasser tårnene dine på skrå plattformer slik at du kan regne ned skudd på nærmende fiender. Kombinert med en forhøyet base og et enkelt inngangspunkt, kan disse forsvarsverkene holde tilbake selv de villeste svermene.
Best Of
Grounded 2: 10 Best Tips for Beginners
Brook Hollow Park isn’t your average stroll in the park, not when you’re the size of an ant and everything around you wants you for lunch. Grounded 2 builds on the original survival adventure with a bigger map, new systems, and plenty of surprises. Whether you’re brand new or a veteran of the backyard, these tips will help you survive, thrive, and maybe even make a few buggy friends along the way. Here are the 10 best tips for beginners.
10. Master the Omnitool Early
One of the first upgrades you’ll get in Grounded 2 is the Omnitool, a streamlined replacement for the old collection of separate tools. Instead of juggling axes, hammers, shovels, and wrenches, you now have a single tool that changes function depending on its upgrades. You’ll start with the Omni Axe, which lets you chop grass, dry grass, and dandelions for basic building.
As you progress, you can unlock the Omni Hammer for smashing tougher materials, the Omni Shovel for digging, and eventually the Omni Wrench for repairing. All upgrades happen at Ranger Stations, so gather resources and visit them regularly. The sooner you unlock all four, the faster you can collect materials and work on advanced projects.
9. Use Ranger Stations to Analyze Everything
Ranger Stations aren’t just for tool upgrades; they also house Analyzers, which are essential for unlocking new recipes. Every time players can scan a resource or bug part, they gain blueprints for items tied to that material. This can be anything from building parts to armor sets. Analyzers work on a charge system, letting you scan four items when fully charged. If one station is empty, head to another, because each one recharges independently. Scanning also boosts your brain power, which unlocks important recipes as you level up.
8. Follow the Main Quest on Day One
It’s tempting to wander off the moment you start, but Grounded 2 is unforgiving if you’re unprepared. On your first day, stick to the main questline until you unlock the Omni Axe. The quest path will guide you to early encounters, important NPCs, and your first optical disc. One early milestone is reaching the Snack Bar Ant Hill and defeating your first Red Soldier Ant. This yields the Snack Bar Turbo Optical Disc, which unlocks crucial crafting options like the Hatchery and Multi-Story Bases. Prioritize the Hatchery, as it’s your first step toward taming a bug companion.
7. Get Your First Buggy
Buggies are a new and exciting feature in Grounded 2, and they’re more than just mounts. They can help you travel faster, fight alongside you, and even carry resources. Your first buggy will likely be the Red Soldier Ant, and getting one requires some preparation.
First, you’ll need the Hatchery blueprint from the optical disc. Build your hatchery directly on the ground (not on flooring), and also create an ant nest to store your mount. Then, venture into the Hatchery Ant Hill to collect a Red Soldier Ant Egg. Now here is the catch. You’ll have to carry it out by hand, meaning you can’t fight while holding it. Bring armor, your best weapons, and torches for the dark tunnels. Once incubated or instantly hatched by sleeping, your ant will become a speedy travel companion and a combat ally.
6. Choose a Base Location Wisely
Brook Hollow Park is massive, and where players build their base will greatly affect their survival. Since Grounded 2 features coordinated bug attacks on your home, positioning is critical. The best defense is height. Build your base elevated on rocks, logs, or raised platforms. This limits enemy access to a single entry point, making defense much easier.
5. Upgrade Before Massive Construction
Ground 2
It’s easy to get excited and start constructing massive fortresses right away, but resources in Grounded 2 are tied to tool upgrades. If you rush into building with low-level materials, you’ll end up replacing them later with stronger options, wasting time and effort. Focus first on unlocking all Omnitools, collecting advanced building resources, and exploring to discover better wall and floor blueprints. Once you have these in hand, you can commit to larger, more permanent base projects without constant rebuilding.
4. Keep Crafting Stations and Chests Close
In Grounded 2, crafting pulls items from nearby storage automatically, but only within a certain range. Therefore, it’s important to keep your chests close to your workbenches to avoid running back and forth for materials. Organization is just as important. Name your chests in the storage interface so you can quickly find the parts you need. As the inventory fills with dozens of different bug parts, fibers, and plants, you’ll save yourself a lot of frustration by staying organized from the start.
3. Know Your Gear
One of the biggest changes in Grounded 2 is the RPG-style armor system, where each set is built around a specific role. The Red Ant Armor boosts crit chance and reduces stamina cost with ant-based weapons, making it ideal for rogue-like builds. The Ladybug Armor increases threat generation and reduces stamina drain while blocking, perfect for tank players. Grub Armor increases weak-point damage and speeds up charged attacks, suiting precision fighters. Finally, Butterfly Armor lowers the stamina cost for magic staff attacks and creates temporary shields on perfect blocks, making it a great choice for mage-style players.
2. Add Trinkets for Extra Power
Trinkets are accessories that enhance your chosen playstyle. Some amplify your current strengths, while others add entirely new abilities. For example, the Volatile Capacitor adds shock damage to all melee attacks and can overload certain bugs for extra effects. Keep an eye out for trinkets as you explore. Equipping the right one can turn a good build into a deadly one, giving you an edge in both combat and survival.
1. Build a Perfect Defense for Your Base
When bug swarms attack your base, two things will make the difference: an Omni Wrench for fast repairs and an Acorn Turret for heavy defense. Now, the turret needs a player to operate, but it tears through enemy waves quickly. For maximum coverage, place your turrets on angled platforms so you can rain down shots on approaching enemies. Combined with an elevated base and a single entry point, these defenses can hold off even the craziest swarms.
Best Of
10 лучших советов для новичков
Brook Hollow Park — это не обычная прогулка по парку, особенно когда ты размером с муравья, а всё вокруг хочет сделать тебя своим обедом. Grounded 2 развивает оригинальное приключение на выживание с более крупной картой, новыми системами и множеством сюрпризов. Независимо от того, новичок вы или ветеран заднего двора, эти советы помогут вам выжить, преуспеть и, возможно, завести пару жучков-друзей. Вот 10 лучших советов для начинающих.
10. Освойте Омниинструмент как можно раньше
Одним из первых улучшений, которые вы получите в Grounded 2, станет Омниинструмент — усовершенствованная замена старому набору отдельных инструментов. Вместо того чтобы жонглировать топорами, молотками, лопатами и гаечными ключами, у вас теперь есть один инструмент, который меняет функцию в зависимости от установленных улучшений. Вы начнёте с Омнитопора, который позволяет рубить траву, сухую траву и одуванчики для базового строительства.
По мере прогресса вы сможете разблокировать Омнимолот для разрушения более прочных материалов, Омнилопату для копания и, в конечном итоге, Омниключ для починки. Все улучшения происходят на Рейнджерских станциях, поэтому собирайте ресурсы и посещайте их регулярно. Чем раньше вы откроете все четыре функции, тем быстрее сможете собирать материалы и работать над продвинутыми проектами.
9. Используйте Рейнджерские станции для анализа всего
Рейнджерские станции предназначены не только для улучшения инструментов; в них также находятся Анализаторы, которые необходимы для разблокировки новых рецептов. Каждый раз, когда игроки могут просканировать ресурс или часть насекомого, они получают чертежи предметов, связанных с этим материалом. Это может быть что угодно: от строительных деталей до комплектов брони. Анализаторы работают по системе зарядов, позволяя просканировать четыре предмета при полном заряде. Если одна станция разряжена, отправляйтесь к другой, потому что каждая перезаряжается независимо. Сканирование также повышает вашу мозговую мощь, что открывает важные рецепты по мере повышения уровня.
8. Следуйте основному сюжету в первый же день
Сразу после начала игры так и тянет отклониться от пути, но Grounded 2 беспощадна, если вы не подготовлены. В свой первый день придерживайтесь основной сюжетной линии, пока не разблокируете Омнитопор. Путь заданий приведёт вас к ранним встречам, важным NPC и вашему первому оптическому диску. Одна из ранних целей — добраться до Муравейника у Закусочной и победить своего первого Красного солдата-муравья. Это даст Турбо-оптический диск из Закусочной, который открывает важные варианты крафта, такие как Инкубатор и Многоэтажные базы. Отдайте приоритет Инкубатору, так как это ваш первый шаг к приручению жучка-компаньона.
7. Заведите своего первого жучка
Жучки — это новая и увлекательная особенность в Grounded 2, и они больше, чем просто средства передвижения. Они могут помочь вам быстрее путешествовать, сражаться вместе с вами и даже переносить ресурсы. Вашим первым жучком, скорее всего, станет Красный солдат-муравей, и для его получения потребуется некоторая подготовка.
Во-первых, вам понадобится чертёж Инкубатора с оптического диска. Постройте свой инкубатор прямо на земле (не на полу), а также создайте муравейник для хранения вашего скакуна. Затем отправляйтесь в Муравейник Инкубатора, чтобы собрать яйцо Красного солдата-муравья. Но вот загвоздка. Вам придётся вынести его вручную, а это значит, что вы не сможете сражаться, держа его. Возьмите броню, лучшее оружие и факелы для тёмных туннелей. После инкубации или мгновенного вылупления при помощи сна ваш муравей станет быстрым спутником для путешествий и боевым союзником.
6. Выбирайте место для базы с умом
Brook Hollow Park огромен, и то, где игроки построят свою базу, сильно повлияет на их выживание. Поскольку в Grounded 2 присутствуют скоординированные атаки насекомых на ваш дом, расположение имеет решающее значение. Лучшая защита — это высота. Стройте свою базу на возвышении: на камнях, брёвнах или приподнятых платформах. Это ограничивает доступ врагов одной точкой входа, что значительно облегчает оборону.
5. Улучшайтесь перед масштабным строительством
Ground 2
Легко увлечься и сразу начать строить массивные крепости, но ресурсы в Grounded 2 привязаны к улучшениям инструментов. Если вы поспешите строить из материалов низкого уровня, позже вам придётся заменять их более прочными вариантами, тратя время и силы впустую. Сначала сосредоточьтесь на разблокировке всех Омниинструментов, сборе продвинутых строительных ресурсов и исследовании, чтобы найти лучшие чертежи стен и полов. Когда они у вас появятся, вы сможете взяться за более крупные и постоянные проекты базы без постоянной перестройки.
4. Держите станции крафта и сундуки рядом
В Grounded 2 крафт автоматически берёт предметы из ближайшего хранилища, но только в определённом радиусе. Поэтому важно держать ваши сундуки близко к верстакам, чтобы избежать беготни туда-сюда за материалами. Организация не менее важна. Назовите свои сундуки в интерфейсе хранения, чтобы быстро находить нужные детали. По мере того как инвентарь будет заполняться десятками различных частей насекомых, волокон и растений, вы сэкономите себе много нервов, если с самого начала будете организованы.
3. Знайте своё снаряжение
Одним из самых больших изменений в Grounded 2 стала RPG-подобная система брони, где каждый набор заточен под определённую роль. Броня Красного Муравья увеличивает шанс крита и снижает затраты выносливости при использовании оружия на основе муравьёв, что делает её идеальной для сборок в стиле разбойника. Броня Божьей Коровки увеличивает генерацию угрозы и снижает затраты выносливости при блокировании, что идеально подходит для игроков-танков. Броня Личинки увеличивает урон по уязвимым точкам и ускоряет заряженные атаки, подходя для бойцов точности. Наконец, Броня Бабочки снижает затраты выносливости на атаки магическим посохом и создаёт временные щиты при идеальных блоках, что делает её отличным выбором для игроков в стиле магов.
2. Добавьте безделушки для дополнительной силы
Безделушки — это аксессуары, которые усиливают выбранный вами стиль игры. Одни усиливают ваши текущие сильные стороны, другие добавляют совершенно новые способности. Например, Нестабильный Конденсатор добавляет урон электричеством ко всем ближним атакам и может перегружать определённых насекомых для дополнительных эффектов. Внимательно следите за безделушками во время исследования. Экипировка подходящей может превратить хорошую сборку в смертоносную, давая вам преимущество как в бою, так и в выживании.
1. Постройте идеальную защиту для своей базы
Когда рои насекомых атакуют вашу базу, две вещи сыграют решающую роль: Омниключ для быстрого ремонта и Жёлудевая Турель для серьёзной обороны. Турель требует, чтобы ею управлял игрок, но она быстро разрывает волны врагов. Для максимального покрытия размещайте свои турели на наклонных платформах, чтобы вы могли обрушивать огонь на приближающихся врагов. В сочетании с базой на возвышении и единственной точкой входа эти защитные сооружения могут сдержать даже самые безумные рои.
Best Of
10 найкращих порад для новачків
Brook Hollow Park — це не звичайна прогулянка парком, особливо коли ти розміром з мурашку, а все навколо бажає тебе на обід. Grounded 2 розвиває оригінальну survival-пригоду завдяки більшій карті, новим системам і безлічі сюрпризів. Чи ти зовсім новачок, чи ветеран заднього двору, ці поради допоможуть тобі вижити, процвітати і, можливо, завести кількох комашкових друзів. Ось 10 найкращих порад для новачків.
10. Опануйте Omnitool якомога раніше
Одним з перших покращень, яке ти отримаєш у Grounded 2, є Omnitool — спрощена заміна старого набору окремих інструментів. Замість того щоб міняти сокири, молотки, лопати та гайкові ключі, тепер у тебе є один інструмент, який змінює функцію залежно від встановлених покращень. Ти почнеш з Omni Axe, який дозволяє рубати траву, суху траву та кульбаби для базового будівництва.
По мірі прогресу ти зможеш розблокувати Omni Hammer для розбивання міцніших матеріалів, Omni Shovel для копання та, зрештою, Omni Wrench для ремонту. Усі покращення відбуваються на Рейнджерських станціях, тому збирай ресурси та відвідуй їх регулярно. Чим швидше ти розблокуєш усі чотири, тим швидше зможеш збирати матеріали та працювати над просунутими проектами.
9. Використовуйте Рейнджерські станції для аналізу всього
Рейнджерські станції призначені не лише для покращення інструментів; вони також містять Аналізатори, які необхідні для розблокування нових рецептів. Кожного разу, коли гравці можуть просканувати ресурс або частину комахи, вони отримують креслення для предметів, пов’язаних із цим матеріалом. Це може бути будь-що: від будівельних елементів до комплектів броні. Аналізатори працюють за системою зарядів, дозволяючи просканувати чотири предмети при повному заряді. Якщо одна станція порожня, йди до іншої, оскільки кожна перезаряджається незалежно. Сканування також підвищує твою розумову силу, що розблоковує важливі рецепти з ростом твого рівня.
8. Дотримуйтесь основного сюжету в перший день
Зазвичай хочеться відразу ж піти досліджувати, але Grounded 2 нещадна, якщо ти не підготувався. У перший день дотримуйся основного сюжету, поки не розблокуєш Omni Axe. Сюжетна лінія проведе тебе через ранні зустрічі, важливих NPC та твій перший оптичний диск. Одна з ранніх цілей — дістатися Мурашника Snack Bar та перемогти свою першу Червоу солдатську мурашку. Це дасть тобі Snack Bar Turbo Optical Disc, який розблокує ключові опції крафтингу, такі як Інкубатор та Багатоповерхові основи. Віддай пріоритет Інкубатору, оскільки це твій перший крок до приручення комахи-компаньйона.
7. Отримайте свого першого “багі”
“Багі” — це нова та захоплива особливість у Grounded 2, і вони є чимось більшим, ніж просто верхові тварини. Вони можуть допомогти тобі швидше пересуватися, битися поруч і навіть переносити ресурси. Твоїм першим “багі”, швидше за все, буде Червона солдатська мурашка, і для її отримання потрібна певна підготовка.
По-перше, тобі знадобиться креслення Інкубатора з оптичного диска. Побудуй свій інкубатор безпосередньо на землі (не на підлозі), а також створи мурашник для зберігання твого верхового комаха. Потім вирушай у Мурашник Інкубатора, щоб зібрати яйце Червоної солдатської мурашки. Ось у чому хитрість. Тобі доведеться винести його в руках, а це означає, що ти не зможеш битися, тримаючи його. Візьми броню, свою найкращу зброю та смолоскипи для темних тунелів. Після інкубації або миттєвого вилуплення через сон твоя мурашка стане швидким компаньйоном для подорожей та союзником у бою.
6. Оберіть місце для бази обережно
Brook Hollow Park величезний, і те, де гравці побудують свою базу, значно вплине на їхнє виживання. Оскільки в Grounded 2 присутні скоординовані атаки комах на ваш дім, розташування є критично важливим. Найкращий захист — це висота. Побудуйте свою базу піднятою на скелях, колодах або підвищених платформах. Це обмежує доступ ворогів до однієї точки входу, значно полегшуючи захист.
5. Покращуйте інструменти перед масштабним будівництвом
Ground 2
Легко захопитися та одразу почати будувати масивні фортеці, але ресурси в Grounded 2 прив’язані до покращень інструментів. Якщо ти поспішиш будувати з матеріалів низького рівня, пізніше доведеться замінювати їх на міцніші варіанти, витрачаючи час та зусилля. Спочатку зосередься на розблокуванні всіх Omnitools, зборі просунутих будівельних ресурсів та дослідженні, щоб знайти кращі креслення стін і підлоги. Коли вони будуть у тебе в руках, ти зможеш взятися за більші, постійніші базові проекти без постійної перебудови.
4. Тримайте верстати для крафтингу та скрині близько
У Grounded 2 крафтинг автоматично витягує предмети з найближчого сховища, але лише в певному радіусі. Тому важливо тримати свої скрині близько до верстатів, щоб уникнути бігання туди-сюди за матеріалами. Організація так само важлива. Називай свої скрині в інтерфейсі сховища, щоб швидко знаходити потрібні деталі. Коли інвентар заповниться десятками різних частин комах, волокон і рослин, ти заощадиш собі багато розчарувань, якщо будеш організованим з самого початку.
3. Знайте свою екіпіровку
Одна з найбільших змін у Grounded 2 — це система броні в стилі RPG, де кожен комплект побудований навколо певної ролі. Броня Червоних мурах підвищує шанс критичної шкоди та знижує витрату витривалості при використанні зброї на основі мурах, що робить її ідеальною для збірок на кшталт розбійника. Броня Сонечка збільшує генерацію загрози та знижує витрату витривалості при блокуванні, ідеально підходячи для танків. Броня Хробака збільшує шкоду по слабким місцям та прискорює заряджені атаки, підходячи для бійців точності. Нарешті, Броня Метелика знижує витрату витривалості для атак чарівного посоха та створює тимчасові щити при ідеальному блокуванні, що робить її чудовим вибором для гравців у стилі мага.
2. Додайте талісмани для додаткової сили
Талісмани — це аксесуари, які посилюють обраний тобою стиль гри. Одні підсилюють твої поточні сильні сторони, інші додають зовсім нові здібності. Наприклад, Вибуховий Конденсатор додає електричну шкоду до всіх ближніх атак і може перевантажувати певних комах для додаткових ефектів. Стеж за талісманами під час дослідження. Обладнання потрібного може перетворити хорошу збірку на смертоносну, даючи тобі перевагу як у бою, так і у виживанні.
1. Побудуйте ідеальну оборону для своєї бази
Коли рії комах атакують твою базу, дві речі матимуть значення: Omni Wrench для швидкого ремонту та Жолудева Турель для потужної оборони. Турель потребує гравця для керування, але вона швидко розбирається з хвилями ворогів. Для максимального покриття розміщуй свої турелі на похилих платформах, щоб ти міг сипати пострілами на наближаючих ворогів. У поєднанні з піднятою базою та єдиною точкою входу ці захисні споруди можуть відбити навіть найбожевільніші рії.
Best Of
10 Mẹo Hay Nhất Cho Người Mới Bắt Đầu
Brook Hollow Park không phải là một buổi dạo chơi bình thường trong công viên, nhất là khi bạn chỉ nhỏ bằng một con kiến và mọi thứ xung quanh đều muốn biến bạn thành bữa trưa. Grounded 2 phát triển dựa trên cuộc phiêu lưu sinh tồn gốc với bản đồ lớn hơn, hệ thống mới và vô số bất ngờ. Dù bạn là người mới toanh hay một cựu binh của sân sau, những mẹo này sẽ giúp bạn sinh tồn, phát triển và thậm chí có thể kết bạn với vài con bọ dọc đường. Đây là 10 mẹo hay nhất cho người mới bắt đầu.
10. Làm Chủ Omnitool Sớm
Một trong những nâng cấp đầu tiên bạn sẽ nhận được trong Grounded 2 là Omnitool, một công cụ tinh gọn thay thế cho bộ công cụ riêng lẻ cũ. Thay vì phải xoay sở với rìu, búa, xẻng và cờ lê, giờ đây bạn có một công cụ duy nhất thay đổi chức năng tùy theo nâng cấp của nó. Bạn sẽ bắt đầu với Omni Axe, cho phép bạn chặt cỏ, cỏ khô và bồ công anh để xây dựng cơ bản.
Khi bạn tiến triển, bạn có thể mở khóa Omni Hammer để đập vỡ vật liệu cứng hơn, Omni Shovel để đào và cuối cùng là Omni Wrench để sửa chữa. Tất cả nâng cấp diễn ra tại các Trạm Kiểm Lâm, vì vậy hãy thu thập tài nguyên và ghé thăm chúng thường xuyên. Bạn càng mở khóa cả bốn công cụ sớm bao nhiêu, bạn càng có thể thu thập nguyên liệu và thực hiện các dự án nâng cao nhanh hơn bấy nhiêu.
9. Dùng Trạm Kiểm Lâm Để Phân Tích Mọi Thứ
Trạm Kiểm Lâm không chỉ dùng để nâng cấp công cụ; chúng còn chứa Máy Phân Tích, thứ thiết yếu để mở khóa công thức chế tạo mới. Mỗi lần người chơi có thể quét một tài nguyên hoặc bộ phận côn trùng, họ sẽ nhận được bản thiết kế cho các vật phẩm liên quan đến nguyên liệu đó. Đây có thể là bất cứ thứ gì từ bộ phận xây dựng đến bộ giáp. Máy Phân Tích hoạt động theo cơ chế nạp, cho phép bạn quét bốn vật phẩm khi được nạp đầy. Nếu một trạm hết năng lượng, hãy đến trạm khác, vì mỗi trạm nạp năng lượng độc lập. Việc quét cũng tăng cường sức mạnh trí não của bạn, từ đó mở khóa các công thức quan trọng khi bạn lên cấp.
8. Theo Dõi Nhiệm Vụ Chính Vào Ngày Đầu Tiên
Rất dễ bị cám dỗ để đi lang thang ngay khi bạn bắt đầu, nhưng Grounded 2 rất tàn nhẫn nếu bạn không chuẩn bị. Vào ngày đầu tiên, hãy bám theo tuyến nhiệm vụ chính cho đến khi bạn mở khóa được Omni Axe. Con đường nhiệm vụ sẽ dẫn bạn đến những cuộc chạm trán ban đầu, các NPC quan trọng và đĩa quang học đầu tiên của bạn. Một cột mốc sớm là đến được Gò Kiến Snack Bar và đánh bại con Kiến Lính Đỏ đầu tiên của bạn. Điều này mang lại Đĩa Quang Học Turbo Snack Bar, mở khóa các tùy chọn chế tạo quan trọng như Trại Ươm và Căn Cứ Nhiều Tầng. Hãy ưu tiên Trại Ươm, vì đó là bước đầu tiên của bạn hướng tới việc thuần hóa một bạn đồng hành là côn trùng.
7. Kiếm Con Bọ Đầu Tiên Của Bạn
Buggies là một tính năng mới và thú vị trong Grounded 2, và chúng không chỉ là vật cưỡi. Chúng có thể giúp bạn di chuyển nhanh hơn, chiến đấu cùng bạn và thậm chí mang theo tài nguyên. Con bọ đầu tiên của bạn có lẽ sẽ là Kiến Lính Đỏ, và để có được một con cần một số chuẩn bị.
Đầu tiên, bạn sẽ cần bản thiết kế Trại Ươm từ đĩa quang học. Xây trại ươm của bạn trực tiếp trên mặt đất (không phải trên sàn), và đồng thời tạo một tổ kiến để chứa vật cưỡi của bạn. Sau đó, mạo hiểm vào Gò Kiến Trại Ươm để thu thập một Quả Trứng Kiến Lính Đỏ. Bây giờ đây là vấn đề. Bạn sẽ phải mang nó ra ngoài bằng tay, nghĩa là bạn không thể chiến đấu khi đang cầm nó. Hãy mang theo giáp, vũ khí tốt nhất của bạn và đuốc cho những đường hầm tối tăm. Sau khi được ấp hoặc nở ngay lập tức bằng cách ngủ, con kiến của bạn sẽ trở thành một bạn đồng hành di chuyển nhanh nhẹn và một đồng minh chiến đấu.
6. Chọn Vị Trí Xây Căn Cứ Một Cách Khôn Ngoan
Brook Hollow Park rất rộng lớn, và nơi người chơi xây căn cứ sẽ ảnh hưởng lớn đến sự sinh tồn của họ. Vì Grounded 2 có tính năng các đợt tấn công phối hợp của côn trùng vào nhà bạn, vị trí đặt căn cứ là rất quan trọng. Phòng thủ tốt nhất là độ cao. Hãy xây căn cứ của bạn ở vị trí cao trên đá, khúc gỗ hoặc các nền tảng được nâng lên. Điều này giới hạn lối vào của kẻ địch chỉ còn một điểm, giúp việc phòng thủ dễ dàng hơn nhiều.
5. Nâng Cấp Trước Khi Xây Dựng Quy Mô Lớn
Ground 2
Rất dễ hào hứng và bắt đầu xây dựng những pháo đài đồ sộ ngay lập tức, nhưng tài nguyên trong Grounded 2 gắn liền với việc nâng cấp công cụ. Nếu bạn vội vàng xây dựng với vật liệu cấp thấp, bạn sẽ phải thay thế chúng sau này bằng các lựa chọn bền chắc hơn, lãng phí thời gian và công sức. Trước tiên hãy tập trung vào việc mở khóa tất cả Omnitools, thu thập tài nguyên xây dựng nâng cao và khám phá để tìm ra các bản thiết kế tường và sàn tốt hơn. Một khi bạn có những thứ này trong tay, bạn có thể bắt tay vào các dự án căn cứ lớn hơn, lâu dài hơn mà không phải liên tục xây lại.
4. Để Bàn Chế Tạo và Rương Ở Gần Nhau
Trong Grounded 2, việc chế tạo sẽ tự động lấy vật phẩm từ kho chứa gần đó, nhưng chỉ trong một phạm vi nhất định. Do đó, việc giữ các rương của bạn gần bàn làm việc là quan trọng để tránh chạy đi chạy lại tìm nguyên liệu. Việc sắp xếp cũng quan trọng không kém. Hãy đặt tên cho các rương của bạn trong giao diện kho chứa để bạn có thể nhanh chóng tìm thấy các bộ phận mình cần. Khi kho đồ đầy lên với hàng chục loại bộ phận côn trùng, sợi và thực vật khác nhau, bạn sẽ tiết kiệm cho mình rất nhiều phiền toái bằng cách giữ mọi thứ ngăn nắp ngay từ đầu.
3. Hiểu Rõ Trang Bị Của Bạn
Một trong những thay đổi lớn nhất trong Grounded 2 là hệ thống giáp kiểu RPG, nơi mỗi bộ được xây dựng xung quanh một vai trò cụ thể. Giáp Kiến Đỏ tăng cường tỷ lệ chí mạng và giảm chi phí thể lực khi sử dụng vũ khí dựa trên kiến, khiến nó lý tưởng cho các build kiểu rogue. Giáp Bọ Rùa tăng khả năng tạo đe dọa và giảm hao thể lực khi chặn, hoàn hảo cho người chơi tank. Giáp Sâu Bọ tăng sát thương điểm yếu và tăng tốc các đòn tấn công tích điện, phù hợp với các chiến binh chính xác. Cuối cùng, Giáp Bướm giảm chi phí thể lực cho các đòn tấn công bằng gậy phép thuật và tạo khiên tạm thời khi chặn hoàn hảo, biến nó thành lựa chọn tuyệt vời cho người chơi kiểu pháp sư.
2. Thêm Bùa May Mắn Để Tăng Sức Mạnh
Trinkets là phụ kiện tăng cường phong cách chơi bạn chọn. Một số khuếch đại điểm mạnh hiện tại của bạn, trong khi những cái khác bổ sung hoàn toàn khả năng mới. Ví dụ, Tụ Điện Bất Ổn thêm sát thương điện vào tất cả các đòn tấn công cận chiến và có thể làm quá tải một số loài bọ để tạo hiệu ứng bổ sung. Hãy để mắt tìm các bùa may mắn khi bạn khám phá. Trang bị đúng bùa có thể biến một build tốt thành một build chết chóc, mang lại cho bạn lợi thế trong cả chiến đấu lẫn sinh tồn.
1. Xây Dựng Hệ Thống Phòng Thủ Hoàn Hảo Cho Căn Cứ Của Bạn
Khi đàn côn trùng tấn công căn cứ của bạn, hai thứ sẽ tạo nên sự khác biệt: một Cờ Lê Omni để sửa chữa nhanh và một Tháp Súng Hạt Dẻ để phòng thủ mạnh mẽ. Bây giờ, tháp súng cần một người chơi vận hành, nhưng nó xé toạc các đợt sóng kẻ địch một cách nhanh chóng. Để có tầm bao phủ tối đa, hãy đặt các tháp súng của bạn trên các nền tảng góc nghiêng để bạn có thể trút đạn xuống kẻ địch đang tiếp cận. Kết hợp với một căn cứ trên cao và một lối vào duy nhất, những hệ thống phòng thủ này có thể cầm chân ngay cả những đàn côn trùng điên cuồng nhất.
Best Of
शुरुआती खिलाड़ियों के लिए 10 सर्वोत्तम टिप्स
Brook Hollow Park कोई आम पार्क में टहलना नहीं है, खासकर तब जब आप एक चींटी के आकार के हों और आपके आस-पास की हर चीज़ आपको अपना दोपहर का भोजन बनाना चाहती हो। Grounded 2 मूल सर्वाइवल एडवेंचर पर एक बड़े मैप, नई सिस्टम और ढेर सारे सरप्राइज के साथ बनता है। चाहे आप बिल्कुल नए हों या बैकयार्ड के अनुभवी, ये टिप्स आपको जीवित रहने, फलने-फूलने और शायद रास्ते में कुछ बगी दोस्त बनाने में मदद करेंगी। यहां शुरुआती खिलाड़ियों के लिए 10 सर्वोत्तम टिप्स दी गई हैं।
10. ओमनीटूल पर जल्दी महारत हासिल करें
Grounded 2 में आपको मिलने वाले पहले अपग्रेड्स में से एक है ओमनीटूल, जो अलग-अलग टूल्स के पुराने संग्रह का एक सुव्यवस्थित प्रतिस्थापन है। कुल्हाड़ी, हथौड़े, फावड़े और रिंच को एक साथ संभालने के बजाय, अब आपके पास एक ही टूल है जो अपने अपग्रेड के आधार पर कार्य बदलता है। आप ओमनी एक्स से शुरुआत करेंगे, जो आपको बुनियादी निर्माण के लिए घास, सूखी घास और डैंडेलायन काटने देता है।
जैसे-जैसे आप आगे बढ़ेंगे, आप कठोर सामग्री तोड़ने के लिए ओमनी हैमर, खुदाई के लिए ओमनी शॉवल और अंततः मरम्मत के लिए ओमनी रिंच अनलॉक कर सकते हैं। सभी अपग्रेड रेंजर स्टेशनों पर होते हैं, इसलिए संसाधन इकट्ठा करें और नियमित रूप से उन पर जाएँ। जितनी जल्दी आप सभी चार अनलॉक कर लेंगे, उतनी ही तेजी से आप सामग्री इकट्ठा कर सकते हैं और उन्नत प्रोजेक्ट पर काम कर सकते हैं।
9. हर चीज़ का विश्लेषण करने के लिए रेंजर स्टेशनों का उपयोग करें
रेंजर स्टेशन सिर्फ टूल अपग्रेड के लिए नहीं हैं; उनमें एनालाइज़र भी होते हैं, जो नई रेसिपी अनलॉक करने के लिए आवश्यक हैं। हर बार जब खिलाड़ी किसी संसाधन या बग के अंग को स्कैन कर सकते हैं, तो उन्हें उस सामग्री से जुड़ी वस्तुओं के लिए ब्लूप्रिंट मिलते हैं। यह बिल्डिंग पार्ट्स से लेकर आर्मर सेट तक कुछ भी हो सकता है। एनालाइज़र एक चार्ज सिस्टम पर काम करते हैं, जो पूरी तरह चार्ज होने पर आपको चार आइटम स्कैन करने देता है। अगर एक स्टेशन खाली है, तो दूसरे पर जाएं, क्योंकि हर एक स्वतंत्र रूप से रिचार्ज होता है। स्कैन करने से आपकी ब्रेन पावर भी बढ़ती है, जो लेवल अप करने पर महत्वपूर्ण रेसिपी अनलॉक करती है।
8. पहले दिन मुख्य क्वेस्ट का पालन करें
शुरू करते ही भटक जाना आकर्षक लगता है, लेकिन Grounded 2 बेरहम है अगर आप तैयार नहीं हैं। अपने पहले दिन, मुख्य क्वेस्टलाइन पर तब तक बने रहें जब तक आप ओमनी एक्स अनलॉक नहीं कर लेते। क्वेस्ट पथ आपको शुरुआती मुठभेड़ों, महत्वपूर्ण एनपीसी और आपके पहले ऑप्टिकल डिस्क तक ले जाएगा। एक शुरुआती मील का पत्थर है Snack Bar Ant Hill तक पहुंचना और अपनी पहली Red Soldier Ant को हराना। इससे Snack Bar Turbo Optical Disc मिलती है, जो Hatchery और Multi-Story Bases जैसे महत्वपूर्ण क्राफ्टिंग विकल्प अनलॉक करती है। Hatchery को प्राथमिकता दें, क्योंकि यह एक बग साथी को वश में करने की दिशा में आपका पहला कदम है।
7. अपना पहला बगी प्राप्त करें
बगी Grounded 2 में एक नई और रोमांचक विशेषता हैं, और वे सिर्फ माउंट से ज्यादा हैं। वे आपको तेजी से यात्रा करने, आपके साथ लड़ने और यहां तक कि संसाधन ले जाने में मदद कर सकते हैं। आपका पहला बगी संभवतः Red Soldier Ant होगा, और इसे प्राप्त करने के लिए कुछ तैयारी की आवश्यकता है।
सबसे पहले, आपको ऑप्टिकल डिस्क से Hatchery ब्लूप्रिंट की आवश्यकता होगी। अपना हैचरी सीधे जमीन पर बनाएं (फर्शिंग पर नहीं), और अपने माउंट को स्टोर करने के लिए एक चींटी का घोंसला भी बनाएं। फिर, Hatchery Ant Hill में जाकर एक Red Soldier Ant Egg इकट्ठा करें। अब यहाँ पकड़ है। आपको इसे हाथ से बाहर ले जाना होगा, मतलब आप इसे पकड़े हुए लड़ नहीं सकते। अंधेरी सुरंगों के लिए कवच, अपने सर्वोत्तम हथियार और मशाल लेकर जाएं। एक बार इनक्यूबेट होने या सोने से तुरंत हैच होने के बाद, आपकी चींटी एक तेज यात्रा साथी और एक युद्ध सहयोगी बन जाएगी।
6. बेस लोकेशन समझदारी से चुनें
Brook Hollow Park विशाल है, और खिलाड़ी जहां अपना बेस बनाएंगे, वह उनके अस्तित्व को बहुत प्रभावित करेगा। चूंकि Grounded 2 में आपके घर पर समन्वित बग हमले की विशेषता है, इसलिए स्थिति महत्वपूर्ण है। सबसे अच्छा बचाव ऊंचाई है। अपना बेस चट्टानों, लट्ठों या ऊंचे प्लेटफार्मों पर ऊंचा बनाएं। यह दुश्मन की पहुंच को एक ही प्रवेश बिंदु तक सीमित कर देता है, जिससे रक्षा करना बहुत आसान हो जाता है।
5. बड़े पैमाने पर निर्माण से पहले अपग्रेड करें
Ground 2
उत्साहित होकर तुरंत विशाल किले बनाना शुरू कर देना आसान है, लेकिन Grounded 2 में संसाधन टूल अपग्रेड से जुड़े हुए हैं। यदि आप कम स्तर की सामग्री के साथ निर्माण में जल्दबाजी करते हैं, तो आप बाद में उन्हें मजबूत विकल्पों से बदल देंगे, जिससे समय और मेहनत बर्बाद होगी। पहले सभी ओमनीटूल अनलॉक करने, उन्नत निर्माण संसाधन इकट्ठा करने और बेहतर दीवार और फर्श ब्लूप्रिंट खोजने के लिए अन्वेषण पर ध्यान दें। एक बार आपके हाथ में ये हो जाएं, तो आप लगातार पुनर्निर्माण के बिना बड़ी, अधिक स्थायी बेस परियोजनाओं के लिए प्रतिबद्ध हो सकते हैं।
4. क्राफ्टिंग स्टेशन और चेस्ट्स को करीब रखें
Grounded 2 में, क्राफ्टिंग आस-पास के स्टोरेज से आइटम्स को स्वचालित रूप से खींचती है, लेकिन केवल एक निश्चित सीमा के भीतर। इसलिए, सामग्री के लिए आगे-पीछे दौड़ने से बचने के लिए अपने चेस्ट्स को अपने वर्कबेंच के करीब रखना महत्वपूर्ण है। संगठन उतना ही महत्वपूर्ण है। स्टोरेज इंटरफेस में अपने चेस्ट्स का नाम दें ताकि आप जरूरत के हिस्से जल्दी ढूंढ सकें। जैसे-जैसे इन्वेंटरी दर्जनों अलग-अलग बग पार्ट्स, फाइबर और पौधों से भरती जाएगी, आप शुरू से ही व्यवस्थित रहकर अपना बहुत सा निराशा बचा लेंगे।
3. अपने गियर को जानें
Grounded 2 में सबसे बड़े बदलावों में से एक आरपीजी-स्टाइल आर्मर सिस्टम है, जहां प्रत्येक सेट एक विशिष्ट भूमिका के इर्द-गिर्द बनाया गया है। Red Ant Armor क्रिट चांस बढ़ाती है और चींटी-आधारित हथियारों के साथ स्टैमिना लागत कम करती है, जिससे यह रोग-जैसे बिल्ड के लिए आदर्श है। Ladybug Armor थ्रेट जनरेशन बढ़ाती है और ब्लॉक करते समय स्टैमिना ड्रेन कम करती है, टैंक खिलाड़ियों के लिए एकदम सही। Grub Armor वीक-पॉइंट डैमेज बढ़ाती है और चार्ज्ड अटैक की गति बढ़ाती है, जो प्रिसिजन फाइटर्स के अनुकूल है। अंत में, Butterfly Armor मैजिक स्टाफ अटैक के लिए स्टैमिना लागत कम करती है और परफेक्ट ब्लॉक पर अस्थायी शील्ड बनाती है, जिससे यह मेज-स्टाइल खिलाड़ियों के लिए एक बढ़िया विकल्प बन जाती है।
2. अतिरिक्त शक्ति के लिए ट्रिंकेट जोड़ें
ट्रिंकेट एक्सेसरीज हैं जो आपके चुने हुए प्लेस्टाइल को बढ़ाते हैं। कुछ आपकी वर्तमान ताकत को बढ़ाते हैं, जबकि अन्य पूरी तरह से नई क्षमताएं जोड़ते हैं। उदाहरण के लिए, Volatile Capacitor सभी मेले अटैक में शॉक डैमेज जोड़ता है और अतिरिक्त प्रभावों के लिए कुछ बग्स को ओवरलोड कर सकता है। अन्वेषण करते समय ट्रिंकेट्स की तलाश में रहें। सही ट्रिंकेट लगाने से एक अच्छा बिल्ड एक घातक बिल्ड में बदल सकता है, जो आपको युद्ध और अस्तित्व दोनों में बढ़त देता है।
1. अपने बेस के लिए एक परफेक्ट डिफेंस बनाएं
जब बग झुंड आपके बेस पर हमला करते हैं, तो दो चीजें फर्क लाएंगी: तेजी से मरम्मत के लिए एक ओमनी रिंच और भारी रक्षा के लिए एक Acorn Turret। अब, टर्रेट को चलाने के लिए एक खिलाड़ी की जरूरत होती है, लेकिन यह दुश्मन की लहरों को जल्दी से फाड़ देता है। अधिकतम कवरेज के लिए, अपने टर्रेट को कोणीय प्लेटफार्मों पर रखें ताकि आप आने वाले दुश्मनों पर गोलियां बरसा सकें। एक ऊंचे बेस और एक ही प्रवेश बिंदु के साथ मिलकर, यह रक्षा सबसे पागल झुंडों को भी रोक सकती है।
Best Of
《Grounded 2》:给新手的10个最佳技巧
布鲁克霍洛公园可不是普通的公园漫步,尤其当你只有蚂蚁大小,而周围的一切都想把你当午餐时。Grounded 2 在原有的生存冒险基础上,带来了更大的地图、新的系统和大量惊喜。无论你是初来乍到还是后院老手,这些技巧都将帮助你生存、发展,甚至在路上结交一些虫虫朋友。以下是给新手的10个最佳技巧。
10. 尽早掌握万能工具
在 Grounded 2 中,你最早获得的升级之一是万能工具,它是旧版各种独立工具的简化替代品。你不再需要同时携带斧头、锤子、铲子和扳手,现在你只需一个工具,其功能会根据升级而改变。你将从万能斧开始,它可以让你砍伐草、干草和蒲公英,用于基础建造。
随着游戏进展,你可以解锁用于粉碎更坚硬材料的万能锤、用于挖掘的万能铲,以及最终用于修理的万能扳手。所有升级都在护林员工作站进行,所以要收集资源并定期访问它们。你越早解锁全部四种工具,就能越快收集材料并开展高级项目。
9. 使用护林员工作站分析一切
护林员工作站不仅用于工具升级;它们还装有分析仪,这对于解锁新配方至关重要。每次玩家可以扫描资源或昆虫部件时,他们就能获得与该材料相关的物品蓝图。这可以是任何东西,从建筑部件到盔甲套装。分析仪采用充能系统,充满电后可以扫描四个物品。如果一个工作站能量耗尽,就去另一个,因为每个工作站都是独立充能的。扫描还能提升你的脑力,随着等级提升,这会解锁重要配方。
8. 在第一天跟随主线任务
一开始就四处闲逛很诱人,但如果你准备不足,Grounded 2 会非常严酷。在你第一天,请坚持主线任务,直到你解锁万能斧。任务路线会引导你进行早期遭遇战、接触重要NPC并获得你的第一张光盘。一个早期里程碑是到达小吃店蚁丘并击败你的第一只红色兵蚁。这会掉落小吃店涡轮光盘,用于解锁关键的制造选项,如孵化场和多层基地。优先建造孵化场,因为这是你驯服虫虫伙伴的第一步。
7. 获得你的第一只虫虫坐骑
虫虫坐骑是 Grounded 2 中一个令人兴奋的新功能,它们不仅仅是坐骑。它们可以帮助你更快旅行、与你并肩作战,甚至携带资源。你的第一只虫虫坐骑很可能是红色兵蚁,获得它需要一些准备。
首先,你需要从光盘中获得孵化场蓝图。将你的孵化场直接建在地面上(不要建在地板上),同时建造一个蚁巢来存放你的坐骑。然后,冒险进入孵化场蚁丘收集一枚红色兵蚁卵。现在有个难点。你必须亲手把它带出来,这意味着你拿着它时无法战斗。带上盔甲、你最好的武器以及用于黑暗隧道的火把。一旦孵化或通过睡觉瞬间孵化,你的蚂蚁将成为快速的旅行伙伴和战斗盟友。
6. 明智选择基地位置
布鲁克霍洛公园非常广阔,玩家在哪里建造基地将极大地影响他们的生存。由于 Grounded 2 具有虫群协调攻击你家园的特性,位置选择至关重要。最佳的防御是高度。将你的基地建在岩石、原木或高架平台上。这能将敌人的入口限制在单一地点,使防御变得容易得多。
5. 在大型建造前先升级
Ground 2
很容易兴奋起来并立即开始建造巨大的堡垒,但 Grounded 2 中的资源与工具升级挂钩。如果你急于用低级材料建造,以后将不得不更换成更坚固的材料,浪费时间和精力。首先专注于解锁所有万能工具、收集高级建造资源,并通过探索发现更好的墙壁和地板蓝图。一旦你掌握了这些,你就可以投入更大、更永久的基地项目,而无需不断重建。
4. 将制作台和箱子放在一起
在 Grounded 2 中,制作会自动从附近存储中提取物品,但仅限于一定范围内。因此,将你的箱子放在靠近工作台的地方非常重要,以避免来回取材料。组织同样重要。在存储界面中为你的箱子命名,以便快速找到所需部件。随着库存中填满数十种不同的昆虫部件、纤维和植物,从一开始就保持条理会为你省去很多麻烦。
3. 了解你的装备
Grounded 2 最大的变化之一是RPG风格的盔甲系统,每套盔甲都围绕特定角色构建。红蚁盔甲提升暴击几率并降低使用蚁类武器的耐力消耗,非常适合潜行者类构筑。瓢虫盔甲增加威胁值生成并降低格挡时的耐力消耗,是坦克玩家的完美选择。蛴螬盔甲增加弱点伤害并加速蓄力攻击,适合精准战士。最后,蝴蝶盔甲降低魔法杖攻击的耐力消耗,并在完美格挡时生成临时护盾,是法师风格玩家的绝佳选择。
2. 添加饰品以获得额外力量
饰品是增强你选定游戏风格的配件。有些会放大你当前的优势,而另一些则会添加全新的能力。例如,不稳定电容器为所有近战攻击附加电击伤害,并能过载某些昆虫以获得额外效果。在探索时留意饰品。装备正确的饰品可以将一个好的构筑变成致命的构筑,让你在战斗和生存中都获得优势。
1. 为你的基地建立完美防御
当虫群攻击你的基地时,两样东西将起到关键作用:用于快速修理的万能扳手和用于强力防御的橡果炮塔。炮塔需要玩家操作,但它能快速撕裂敌人波次。为了获得最大覆盖范围,将你的炮塔放在有角度的平台上,这样你就可以向接近的敌人倾泻火力。结合高架基地和单一入口点,这些防御可以抵挡最疯狂的虫群。
Best Of
Die 10 besten Tipps für Anfänger
Brook Hollow Park ist kein gewöhnlicher Spaziergang im Park, schon gar nicht, wenn man so groß wie eine Ameise ist und alles um einen herum einen zum Mittagessen haben möchte. Grounded 2 baut auf dem ursprünglichen Überlebensabenteuer mit einer größeren Karte, neuen Systemen und vielen Überraschungen auf. Ob du brandneu bist oder ein Veteran des Hinterhofs, diese Tipps helfen dir zu überleben, zu gedeihen und vielleicht sogar ein paar krabbelige Freunde zu finden. Hier sind die 10 besten Tipps für Anfänger.
10. Meistere das Omnitool früh
Eines der ersten Upgrades, die du in Grounded 2 erhältst, ist das Omnitool, ein optimierter Ersatz für die alte Sammlung separater Werkzeuge. Anstatt Äxte, Hämmer, Schaufeln und Schraubenschlüssel jonglieren zu müssen, hast du jetzt ein einziges Werkzeug, das je nach Upgrade seine Funktion ändert. Du beginnst mit der Omni-Axt, mit der du Gras, trockenes Gras und Löwenzahn für den grundlegenden Bau fällen kannst.
Im Laufe des Spiels kannst du den Omni-Hammer zum Zerschlagen härterer Materialien, die Omni-Schaufel zum Graben und schließlich den Omni-Schraubenschlüssel zum Reparieren freischalten. Alle Upgrades erfolgen an Ranger-Stationen, also sammle Ressourcen und besuche sie regelmäßig. Je schneller du alle vier freischaltest, desto schneller kannst du Materialien sammeln und an fortgeschrittenen Projekten arbeiten.
9. Nutze Ranger-Stationen, um alles zu analysieren
Ranger-Stationen sind nicht nur für Werkzeug-Upgrades da; sie beherbergen auch Analyzer, die für das Freischalten neuer Rezepte unerlässlich sind. Jedes Mal, wenn Spieler eine Ressource oder ein Insektenteil scannen können, erhalten sie Baupläne für Gegenstände, die mit diesem Material verbunden sind. Das kann alles sein, von Bauteilen bis hin zu Rüstungssets. Analyzer arbeiten mit einem Ladungssystem und erlauben das Scannen von vier Gegenständen bei voller Ladung. Wenn eine Station leer ist, gehe zu einer anderen, denn jede lädt sich unabhängig auf. Das Scannen steigert auch deine Gehirnleistung, was beim Aufleveln wichtige Rezepte freischaltet.
8. Folge am ersten Tag der Hauptquest
Es ist verlockend, gleich zu Beginn loszuwandern, aber Grounded 2 ist unnachsichtig, wenn man unvorbereitet ist. Halte dich an deinem ersten Tag an die Hauptquestline, bis du die Omni-Axt freigeschaltet hast. Der Quest-Pfad führt dich zu frühen Begegnungen, wichtigen NPCs und deiner ersten optischen Disc. Ein früher Meilenstein ist das Erreichen des Snack Bar Ameisenhügels und die Niederlage deiner ersten Roten Soldatenameise. Dies bringt die Snack Bar Turbo-Optical Disc ein, die entscheidende Herstellungsoptionen wie die Brutstätte und mehrstöckige Basen freischaltet. Priorisiere die Brutstätte, da sie dein erster Schritt zur Zähmung eines Insektengefährten ist.
7. Besorge dir dein erstes Krabbeltier
Krabbeltiere sind eine neue und aufregende Funktion in Grounded 2, und sie sind mehr als nur Reittiere. Sie können dir helfen, schneller zu reisen, an deiner Seite zu kämpfen und sogar Ressourcen zu tragen. Dein erstes Krabbeltier wird wahrscheinlich die Rote Soldatenameise sein, und um eine zu bekommen, bedarf es einiger Vorbereitung.
Zuerst benötigst du den Bauplan für die Brutstätte von der optischen Disc. Baue deine Brutstätte direkt auf dem Boden (nicht auf Bodenbelägen) und erstelle auch ein Ameisennest, um dein Reittier unterzubringen. Dann wage dich in den Brutstätten-Ameisenhügel, um ein Rotes Soldatenameisen-Ei zu sammeln. Hier ist der Haken: Du musst es von Hand heraustragen, was bedeutet, dass du es nicht halten und gleichzeitig kämpfen kannst. Bring Rüstung, deine besten Waffen und Fackeln für die dunklen Tunnel mit. Sobald es ausgebrütet oder durch Schlafen sofort geschlüpft ist, wird deine Ameise zu einem schnellen Reisegefährten und einem Kampfverbündeten.
6. Wähle den Standort deiner Basis mit Bedacht
Brook Hollow Park ist riesig, und wo Spieler ihre Basis bauen, wird ihr Überleben stark beeinflussen. Da Grounded 2 koordinierte Insektenangriffe auf dein Zuhause beinhaltet, ist die Positionierung entscheidend. Die beste Verteidigung ist Höhe. Baue deine Basis erhöht auf Felsen, Baumstämmen oder erhöhten Plattformen. Dies beschränkt den Zugang für Feinde auf einen einzigen Eingangspunkt, was die Verteidigung viel einfacher macht.
5. Upgrade, bevor du massiv baust
Ground 2
Es ist leicht, sich zu begeistern und sofort mit dem Bau massiver Festungen zu beginnen, aber Ressourcen in Grounded 2 sind an Werkzeug-Upgrades gebunden. Wenn du mit niedrigstufigen Materialien zu bauen beginnst, wirst du sie später durch stärkere Optionen ersetzen müssen und verschwendest Zeit und Mühe. Konzentriere dich zuerst darauf, alle Omnitools freizuschalten, fortgeschrittene Baumaterialien zu sammeln und zu erkunden, um bessere Wand- und Bodenbaupläne zu entdecken. Sobald du diese in der Hand hast, kannst du dich größeren, dauerhafteren Basisprojekten widmen, ohne ständig umbauen zu müssen.
4. Halte Werkbänke und Truhen nah beieinander
In Grounded 2 zieht das Herstellen automatisch Gegenstände aus nahegelegenen Lagern, aber nur innerhalb einer bestimmten Reichweite. Daher ist es wichtig, deine Truhen in der Nähe deiner Werkbänke zu halten, um nicht ständig für Materialien hin- und herlaufen zu müssen. Organisation ist genauso wichtig. Benenne deine Truhen im Lagerinterface, damit du die benötigten Teile schnell findest. Wenn sich das Inventar mit Dutzenden verschiedenen Insektenteilen, Fasern und Pflanzen füllt, ersparst du dir viel Frust, indem du von Anfang an organisiert bleibst.
3. Kenne deine Ausrüstung
Eine der größten Änderungen in Grounded 2 ist das RPG-artige Rüstungssystem, bei dem jedes Set auf eine bestimmte Rolle ausgelegt ist. Die Rote Ameisenrüstung erhöht die Krit-Chance und reduziert den Ausdauerverbrauch mit ameisenbasierten Waffen, was sie ideal für schurkenähnliche Builds macht. Die Marienkäferrüstung erhöht die Bedrohungsgenerierung und reduziert den Ausdauerverbrauch beim Blocken, perfekt für Tank-Spieler. Die Madenrüstung erhöht den Schwachstellen-Schaden und beschleunigt geladene Angriffe, was Präisionskämpfern entspricht. Schließlich senkt die Schmetterlingsrüstung den Ausdauerverbrauch für Magiestab-Angriffe und erzeugt bei perfekten Blocks temporäre Schilde, was sie zu einer großartigen Wahl für magieorientierte Spieler macht.
2. Füge Talismane für zusätzliche Kraft hinzu
Talismane sind Accessoires, die deinen gewählten Spielstil verbessern. Einige verstärken deine aktuellen Stärken, während andere völlig neue Fähigkeiten hinzufügen. Der Volatile Capacitor fügt beispielsweise allen Nahkampfangriffen Schockschaden hinzu und kann bestimmte Insekten überladen für zusätzliche Effekte. Halte beim Erkunden Ausschau nach Talismanen. Der richtige Talisman kann einen guten Build in einen tödlichen verwandeln und dir sowohl im Kampf als auch beim Überleben einen Vorteil verschaffen.
1. Baue eine perfekte Verteidigung für deine Basis
Wenn Insektenschwärme deine Basis angreifen, werden zwei Dinge den Unterschied ausmachen: ein Omni-Schraubenschlüssel für schnelle Reparaturen und ein Eichel-Geschützturm für schwere Verteidigung. Der Turm benötigt nun einen Spieler zum Bedienen, aber er zerreißt feindliche Wellen schnell. Für maximale Abdeckung platziere deine Türme auf abgewinkelten Plattformen, damit du auf anrückende Feinde herabregnen kannst. Kombiniert mit einer erhöhten Basis und einem einzigen Eingangspunkt können diese Verteidigungsanlagen sogar die verrücktesten Schwärme abwehren.
Best Of
初心者のための10のベストヒント
ブルック・ホロー・パークは、普通の公園散歩とは訳が違います。特にあなたがアリのサイズで、周りのすべてがあなたを昼食にしようとしているときはね。Grounded 2は、オリジナルのサバイバルアドベンチャーを、より広大なマップ、新しいシステム、そしてたくさんの驚きで進化させています。あなたがまったくの初心者でも、裏庭のベテランでも、これらのヒントが生き残り、繁栄し、道中で虫の友達を数人作る手助けになるでしょう。初心者のための10のベストヒントをご紹介します。
10. オムニツールを早めにマスターする
Grounded 2 で最初に手に入れるアップグレードの一つがオムニツールです。これは、以前の個別のツール一式を合理化した代替品です。斧、ハンマー、シャベル、レンチを手に持って切り替える代わりに、アップグレードによって機能が変化する単一のツールを手にします。最初はオムニアクスから始まり、基本的な建築のために草、枯れ草、タンポポを切ることができます。
進むにつれて、より硬い素材を砕くためのオムニハンマー、掘るためのオムニシャベル、そして最終的には修理のためのオムニレンチをアンロックできます。すべてのアップグレードはレンジャーステーションで行うので、資源を集めて定期的に訪れましょう。4つすべてを早くアンロックすればするほど、素材の収集や高度なプロジェクトに取り組むスピードが上がります。
9. レンジャーステーションで全てを分析する
レンジャーステーションはツールのアップグレードだけのためではありません。新しいレシピをアンロックするために不可欠なアナライザーも備えています。プレイヤーが資源や虫の部位をスキャンするたびに、その素材に関連するアイテムの設計図を獲得します。これは建築パーツから防具セットまで何でもあり得ます。アナライザーはチャージシステムで動作し、フルチャージで4つのアイテムをスキャンできます。あるステーションが空になっていたら、別のステーションに向かいましょう。それぞれが独立して再充電されるからです。スキャンはまた、脳力を高め、レベルアップするにつれて重要なレシピをアンロックします。
8. 初日はメインクエストに従う
始めた瞬間にふらりとどこかへ行きたくなるものですが、準備が整っていない状態ではGrounded 2は容赦ありません。初日は、オムニアクスをアンロックするまでメインクエストラインに従いましょう。クエストの道筋は、初期の遭遇、重要なNPC、そして最初の光学ディスクへと導いてくれます。初期のマイルストーンの一つは、スナックバーアリの巣に到達し、最初のレッドソルジャーアントを倒すことです。これにより、スナックバーターボ光学ディスクが手に入り、孵化場や多層式基地などの重要なクラフトオプションがアンロックされます。孵化場を優先しましょう。虫の仲間を飼いならす最初のステップだからです。
7. 最初のバギーを手に入れる
バギーはGrounded 2の新しくエキサイティングな機能で、単なる乗り物以上のものです。より速く移動するのを助け、戦闘で共に戦い、さらには資源を運ぶことさえできます。最初のバギーはおそらくレッドソルジャーアントになるでしょう。それを手に入れるにはいくつかの準備が必要です。
まず、光学ディスクから孵化場の設計図が必要です。孵化場を地面に直接(床材の上ではなく)建て、また、マウントを保管するためのアリの巣も作成します。次に、孵化場アリの巣に乗り込み、レッドソルジャーアントの卵を集めます。ここで注意点があります。手で持ち出さなければならず、つまり持っている間は戦闘ができません。装甲、最高の武器、暗いトンネルのための松明を持っていきましょう。孵化させるか、睡眠で即座に孵化させると、あなたのアリは速い移動手段かつ戦闘の相棒になります。
6. 拠点の場所を賢く選ぶ
ブルック・ホロー・パークは広大で、プレイヤーが拠点を建てる場所は生存に大きく影響します。Grounded 2では、虫が協調してあなたの家を攻撃するため、配置が重要です。最良の防御は高さです。岩、丸太、または高架式プラットフォームの上に拠点を建てましょう。これにより敵の侵入経路を単一の入口に制限でき、防御がはるかに容易になります。
5. 大規模な建設の前にアップグレードする
Ground 2
すぐに大規模な要塞の建設を始めたくなるのは簡単ですが、Grounded 2では資源はツールのアップグレードに紐づいています。低レベル素材で建設に突入すると、後でより強力なオプションに置き換えることになり、時間と労力を無駄にします。まず、すべてのオムニツールのアンロック、高度な建築資源の収集、探索によるより良い壁や床の設計図の発見に集中しましょう。これらを手に入れたら、絶え間ない建て直しなしに、より大きく、より永続的な拠点プロジェクトに取り組むことができます。
4. クラフトステーションとチェストを近くに置く
Grounded 2では、クラフトは近くのストレージから自動的にアイテムを取り出しますが、一定の範囲内のみです。したがって、素材を取りに何度も行き来しないように、チェストを作業台の近くに置くことが重要です。整理整頓も同じくらい重要です。ストレージインターフェースでチェストに名前を付けて、必要なパーツを素早く見つけられるようにしましょう。数十種類の虫の部位、繊維、植物でインベントリが埋まっていくので、最初から整理しておくことで多くのイライラを防げます。
3. 装備を知る
Grounded 2における最大の変更点の一つは、RPGスタイルの防具システムで、各セットは特定の役割を中心に構築されています。レッドアントアーマーはクリティカル率を上げ、アントベースの武器のスタミナ消費を減らし、ローグのようなビルドに理想的です。テントウムシアーマーは脅威生成を増やし、ブロック中のスタミナ消費を減らし、タンクプレイヤーに最適です。グラブアーマーは弱点ダメージを増やし、チャージ攻撃を速くし、精密な戦士向けです。最後に、バタフライアーマーは魔法の杖攻撃のスタミナ消費を減らし、パーフェクトブロックで一時的なシールドを生成し、メイジスタイルのプレイヤーに最適です。
2. トリンケットでさらなる力を追加する
トリンケットは、選択したプレイスタイルを強化するアクセサリーです。現在の強みを増幅するものもあれば、全く新しい能力を追加するものもあります。例えば、ボラタイルキャパシタは全ての近接攻撃に感電ダメージを追加し、特定の虫を過負荷状態にして追加効果を引き起こせます。探索中にトリンケットに目を光らせておきましょう。適切なものを装備することで、良いビルドを致命的なものに変え、戦闘と生存の両方で優位に立てます。
1. 拠点の完璧な防御を構築する
虫の群れが拠点を攻撃してきたとき、2つのものが違いを生みます。素早い修理のためのオムニレンチと、強力な防御のためのドングリタレットです。さて、タレットはプレイヤーが操作する必要がありますが、敵の波を素早く切り裂きます。最大のカバレッジを得るために、タレットを傾斜したプラットフォームに設置し、接近する敵に雨あられと射撃を浴びせましょう。高所に建てられた拠点と単一の入口と組み合わせることで、これらの防御は最も狂ったような群れさえも食い止めることができます。
Best Of
초보자를 위한 10가지 최고의 팁
Brook Hollow Park는 평범한 공원 산책로가 아닙니다. 특히 당신이 개미만 해졌고 주변의 모든 것들이 당신을 점심으로 삼으려 할 때는 더욱 그렇죠. Grounded 2는 더 큰 맵, 새로운 시스템, 그리고 많은 서프라이즈로 원본 서바이벌 어드벤처를 발전시켰습니다. 당신이 완전히 초보이든 뒷마당의 베테랑이든, 이 팁들은 생존하고 번성하며, 길에서 벌레 친구들을 사귈 수 있도록 도와줄 것입니다. 초보자를 위한 10가지 최고의 팁을 소개합니다.
10. 오므니툴을 일찍 마스터하라
Grounded 2 에서 가장 먼저 얻을 업그레이드 중 하나는 오므니툴입니다. 이는 별도의 도구들을 모아놓은 것을 간소화한 대체품입니다. 도끼, 망치, 삽, 렌치를 따로 들고 다니는 대신, 이제는 업그레이드에 따라 기능이 변하는 단일 도구를 가지게 됩니다. 기본 건축을 위해 풀, 마른 풀, 민들레를 자를 수 있는 오므니 도끼로 시작하게 됩니다.
진행하면서 더 단단한 재료를 부수는 오므니 망치, 땅을 파는 오므니 삽, 그리고 결국 수리를 위한 오므니 렌치를 해금할 수 있습니다. 모든 업그레이드는 레인저 스테이션에서 이루어지므로, 자원을 모으고 정기적으로 방문하세요. 네 가지를 모두 빨리 해금할수록, 재료를 더 빠르게 수집하고 고급 프로젝트에 착수할 수 있습니다.
9. 레인저 스테이션을 활용해 모든 것을 분석하라
레인저 스테이션은 도구 업그레이드만을 위한 곳이 아닙니다. 새로운 레시피를 해금하는 데 필수적인 분석기도 있습니다. 플레이어가 자원이나 벌레 부위를 스캔할 때마다, 그 재료와 연관된 아이템의 청사진을 얻습니다. 이는 건축 부품부터 방어구 세트까지 무엇이든 될 수 있습니다. 분석기는 충전 시스템으로 작동하여, 완전히 충전되면 네 개의 아이템을 스캔할 수 있습니다. 한 스테이션이 비어 있다면 다른 곳으로 가세요. 각 스테이션은 독립적으로 재충전됩니다. 스캔은 또한 당신의 두뇌 파워를 증가시켜, 레벨업하며 중요한 레시피를 해금하게 해줍니다.
8. 첫날에는 메인 퀘스트를 따라가라
시작하자마자 길을 벗어나고 싶은 유혹이 들겠지만, 준비가 안 된 상태라면 Grounded 2는 용서가 없습니다. 첫날에는 오므니 도끼를 해금할 때까지 메인 퀘스트라인을 고수하세요. 퀘스트 경로는 초기 조우, 중요한 NPC, 그리고 첫 번째 광학 디스크로 안내해 줄 것입니다. 초기 이정표 중 하나는 스낵바 개미굴에 도달하고 첫 번째 붉은 병정개미를 처치하는 것입니다. 이는 부화장과 다층 구조 기지와 같은 중요한 제작 옵션을 해금하는 스낵바 터보 광학 디스크를 제공합니다. 벌레 동료를 길들이는 첫걸음인 부화장을 우선시하세요.
7. 첫 번째 버기를 얻어라
버기는 Grounded 2의 새롭고 흥미로운 기능이며, 단순한 탈것 그 이상입니다. 더 빠르게 이동하는 것을 도와주고, 함께 싸우며, 심지어 자원을 운반할 수도 있습니다. 첫 번째 버기는 아마도 붉은 병정개미가 될 것이며, 얻기 위해서는 약간의 준비가 필요합니다.
먼저, 광학 디스크에서 부화장 청사진이 필요합니다. 부화장을 바닥에 직접 건설하고(바닥재 위가 아닌), 탈것을 보관할 개미 둥지도 만드세요. 그런 후, 부화장 개미굴로 들어가 붉은 병정개미 알을 수집하세요. 여기서 주의할 점이 있습니다. 손으로 직접 운반해야 하므로, 알을 들고 있는 동안에는 싸울 수 없습니다. 갑옷, 최고의 무기, 그리고 어두운 터널을 위한 횃불을 가져가세요. 부화시키거나 잠을 자서 즉시 부화시킨 후, 당신의 개미는 빠른 이동 동반자이자 전투 동맹이 될 것입니다.
6. 기지 위치를 현명하게 선택하라
Brook Hollow Park는 거대하며, 플레이어가 기지를 짓는 위치는 생존에 큰 영향을 미칩니다. Grounded 2는 당신의 집을 향한 벌레들의 조직적인 공격을 특징으로 하므로, 위치 선정이 매우 중요합니다. 최고의 방어는 높이입니다. 바위, 통나무, 혹은 높은 플랫폼 위에 기지를 높이 건설하세요. 이는 적의 접근을 단일 진입점으로 제한하여 방어를 훨씬 쉽게 만듭니다.
5. 대규모 건설 전에 업그레이드하라
Ground 2
흥분해서 바로 거대한 요새 건설을 시작하기 쉽지만, Grounded 2의 자원은 도구 업그레이드와 연관되어 있습니다. 낮은 단계의 재료로 건설에 서두르면, 나중에 더 강력한 옵션으로 교체하게 되어 시간과 노력을 낭비하게 됩니다. 먼저 모든 오므니툴 해금, 고급 건축 자원 수집, 그리고 더 나은 벽과 바닥 청사진을 발견하기 위한 탐험에 집중하세요. 이것들을 손에 넣은 후에는, 지속적인 재건축 없이 더 크고 영구적인 기지 프로젝트에 전념할 수 있습니다.
4. 제작대와 상자를 가까이 두라
Grounded 2에서 제작은 일정 범위 내에서 근처 저장소의 아이템을 자동으로 가져오지만, 특정 범위 내에서만 가능합니다. 따라서, 재료를 위해 왔다 갔다 하지 않으려면 상자를 작업대 가까이 두는 것이 중요합니다. 정리도 똑같이 중요합니다. 저장 인터페이스에서 상자에 이름을 붙여 필요한 부품을 빠르게 찾을 수 있게 하세요. 수십 가지의 다양한 벌레 부위, 섬유, 식물로 인벤토리가 채워지면, 처음부터 체계적으로 정리함으로써 많은 스트레스를 덜 수 있을 것입니다.
3. 당신의 장비를 알아두라
Grounded 2의 가장 큰 변화 중 하나는 RPG 스타일의 방어구 시스템으로, 각 세트는 특정 역할을 중심으로 구성되어 있습니다. 붉은개미 방어구는 치명타 확률을 높이고 개미 기반 무기의 스태미나 소모를 줄여, 도적 스타일 빌드에 이상적입니다. 무당벌레 방어구는 위협 생성량을 증가시키고 방어 중 스태미나 소모를 줄여, 탱커 플레이어에게 완벽합니다. 굼벵이 방어구는 약점 피해를 증가시키고 차지 공격 속도를 높여, 정밀 전투원에게 적합합니다. 마지막으로, 나비 방어구는 마법 지팡이 공격의 스태미나 소모를 낮추고 완벽한 방어 시 일시적인 보호막을 생성하여, 마법사 스타일 플레이어에게 훌륭한 선택입니다.
2. 추가 힘을 위해 장신구를 활용하라
장신구는 선택한 플레이 스타일을 강화하는 액세서리입니다. 일부는 현재의 강점을 증폭시키고, 다른 것들은 완전히 새로운 능력을 추가합니다. 예를 들어, 불안정한 축전기는 모든 근접 공격에 전기 피해를 추가하고 특정 벌레들을 과부하시켜 추가 효과를 줄 수 있습니다. 탐험하면서 장신구를 찾아보세요. 적절한 장신구를 장착하는 것은 좋은 빌드를 치명적인 빌드로 바꿔, 전투와 생존 모두에서 우위를 점하게 해줄 수 있습니다.
1. 기지를 위한 완벽한 방어를 구축하라
벌레 떼가 당신의 기지를 공격할 때, 두 가지가 차이를 만들 것입니다: 빠른 수리를 위한 오므니 렌치와 강력한 방어를 위한 도토리 포탑입니다. 이제, 포탑은 작동하기 위해 플레이어가 필요하지만, 적의 물결을 빠르게 찢어발깁니다. 최대의 화력 범위를 위해, 포탑을 경사진 플랫폼 위에 배치하여 접근하는 적들에게 포화를 퍼부을 수 있게 하세요. 높이 올린 기지와 단일 진입점과 결합하면, 이 방어 시설들은 가장 미친 듯한 떼도 막아낼 수 있습니다.
Best Of
10 Melhores Dicas para Iniciantes
O Parque Brook Hollow não é um passeio comum, especialmente quando você tem o tamanho de uma formiga e tudo ao seu redor quer você no almoço. Grounded 2 expande a aventura de sobrevivência original com um mapa maior, novos sistemas e muitas surpresas. Seja você um novato ou um veterano do quintal, estas dicas vão ajudá-lo a sobreviver, prosperar e talvez até fazer alguns amigos insetos pelo caminho. Aqui estão as 10 melhores dicas para iniciantes.
10. Domine a Omni-ferramenta Cedo
Uma das primeiras melhorias que você obterá em Grounded 2 é a Omni-ferramenta, uma substituição simplificada para a antiga coleção de ferramentas separadas. Em vez de alternar entre machados, martelos, pás e chaves de fenda, agora você tem uma única ferramenta que muda de função dependendo de seus upgrades. Você começará com o Machado Omni, que permite cortar grama, grama seca e dentes-de-leão para construções básicas.
Conforme você progride, pode desbloquear o Martelo Omni para quebrar materiais mais resistentes, a Pá Omni para cavar e, eventualmente, a Chave de Fenda Omni para reparos. Todos os upgrades acontecem nas Estações Ranger, então colete recursos e visite-as regularmente. Quanto mais cedo você desbloquear todas as quatro, mais rápido poderá coletar materiais e trabalhar em projetos avançados.
9. Use as Estações Ranger para Analisar Tudo
As Estações Ranger não servem apenas para upgrades de ferramentas; elas também abrigam Analisadores, que são essenciais para desbloquear novas receitas. Sempre que os jogadores podem escanear um recurso ou parte de inseto, eles ganham projetos para itens relacionados a esse material. Isso pode ser qualquer coisa, desde partes de construção até conjuntos de armadura. Os Analisadores funcionam em um sistema de carga, permitindo que você escaneie quatro itens quando totalmente carregados. Se uma estação estiver vazia, vá para outra, porque cada uma recarrega independentemente. Escanear também aumenta seu poder cerebral, que desbloqueia receitas importantes conforme você sobe de nível.
8. Siga a Missão Principal no Primeiro Dia
É tentador sair explorando no momento em que você começa, mas Grounded 2 é impiedoso se você não estiver preparado. No seu primeiro dia, siga a linha de missão principal até desbloquear o Machado Omni. O caminho da missão o guiará a encontros iniciais, NPCs importantes e seu primeiro disco óptico. Um marco inicial é alcançar o Formigueiro do Bar de Lanches e derrotar sua primeira Formiga Soldado Vermelha. Isso rende o Disco Óptico Turbo do Bar de Lanches, que desbloqueia opções de fabricação cruciais, como o Viveiro e as Bases de Múltiplos Andares. Priorize o Viveiro, pois é seu primeiro passo para domar um companheiro inseto.
7. Obtenha Seu Primeiro Inseto Montaria
Insetos montaria são um novo e emocionante recurso em Grounded 2, e eles são mais do que apenas montarias. Eles podem ajudá-lo a viajar mais rápido, lutar ao seu lado e até carregar recursos. Seu primeiro inseto montaria provavelmente será a Formiga Soldado Vermelha, e obter um requer alguma preparação.
Primeiro, você precisará do projeto do Viveiro do disco óptico. Construa seu viveiro diretamente no chão (não em pisos), e também crie um ninho de formigas para armazenar sua montaria. Em seguida, aventure-se no Formigueiro do Viveiro para coletar um Ovo de Formiga Soldado Vermelha. Agora vem o detalhe. Você terá que carregá-lo para fora manualmente, o que significa que não pode lutar enquanto o segura. Leve armadura, suas melhores armas e tochas para os túneis escuros. Uma vez incubado ou instantaneamente chocado ao dormir, sua formiga se tornará uma companheira de viagem rápida e uma aliada de combate.
6. Escolha a Localização da Base com Sabedoria
O Parque Brook Hollow é enorme, e onde os jogadores constroem sua base afetará muito sua sobrevivência. Como Grounded 2 apresenta ataques coordenados de insetos à sua casa, o posicionamento é crítico. A melhor defesa é a altura. Construa sua base elevada em rochas, troncos ou plataformas suspensas. Isso limita o acesso do inimigo a um único ponto de entrada, tornando a defesa muito mais fácil.
5. Faça Upgrades Antes de Construções Massivas
Ground 2
É fácil ficar empolgado e começar a construir fortalezas massivas imediatamente, mas os recursos em Grounded 2 estão vinculados a upgrades de ferramentas. Se você se apressar a construir com materiais de baixo nível, acabará substituindo-os mais tarde por opções mais fortes, desperdiçando tempo e esforço. Concentre-se primeiro em desbloquear todas as Omni-ferramentas, coletar recursos de construção avançados e explorar para descobrir projetos de paredes e pisos melhores. Uma vez que você tiver isso em mãos, poderá se dedicar a projetos de base maiores e mais permanentes sem reconstrução constante.
4. Mantenha Estações de Criação e Baús Próximos
Em Grounded 2, a criação puxa itens do armazenamento próximo automaticamente, mas apenas dentro de um certo alcance. Portanto, é importante manter seus baús perto de suas bancadas de trabalho para evitar correr para lá e para cá em busca de materiais. A organização é igualmente importante. Nomeie seus baús na interface de armazenamento para que você possa encontrar rapidamente as partes de que precisa. Conforme o inventário se enche com dezenas de diferentes partes de insetos, fibras e plantas, você evitará muita frustração ao se manter organizado desde o início.
3. Conheça Seu Equipamento
Uma das maiores mudanças em Grounded 2 é o sistema de armadura no estilo RPG, onde cada conjunto é construído em torno de uma função específica. A Armadura de Formiga Vermelha aumenta a chance de crítico e reduz o custo de vigor com armas baseadas em formiga, tornando-a ideal para builds no estilo ladino. A Armadura de Joaninha aumenta a geração de ameaça e reduz a drenagem de vigor ao bloquear, perfeita para jogadores tanque. A Armadura de Larva aumenta o dano em pontos fracos e acelera ataques carregados, adequando-se a lutadores de precisão. Finalmente, a Armadura de Borboleta reduz o custo de vigor para ataques de cajado mágico e cria escudos temporários em bloqueios perfeitos, tornando-a uma ótima escolha para jogadores no estilo mago.
2. Adicione Amuletos para Poder Extra
Amuletos são acessórios que aprimoram seu estilo de jogo escolhido. Alguns amplificam seus pontos fortes atuais, enquanto outros adicionam habilidades totalmente novas. Por exemplo, o Capacitor Volátil adiciona dano de choque a todos os ataques corpo a corpo e pode sobrecarregar certos insetos para efeitos extras. Fique de olho em amuletos enquanto explora. Equipar o amuleto certo pode transformar uma boa build em uma mortal, dando a você uma vantagem tanto no combate quanto na sobrevivência.
1. Construa uma Defesa Perfeita para Sua Base
Quando enxames de insetos atacam sua base, duas coisas farão a diferença: uma Chave de Fenda Omni para reparos rápidos e uma Torre de Bolota para defesa pesada. Agora, a torre precisa de um jogador para operar, mas ela destrói ondas de inimigos rapidamente. Para cobertura máxima, coloque suas torres em plataformas anguladas para que você possa despejar tiros nos inimigos que se aproximam. Combinadas com uma base elevada e um único ponto de entrada, essas defesas podem conter até os enxames mais loucos.
Best Of
10 Meilleurs Conseils pour les Débutants
Brook Hollow Park n’est pas une simple promenade dans le parc, surtout quand on a la taille d’une fourmi et que tout ce qui vous entoure vous considère comme un déjeuner. Grounded 2 s’appuie sur l’aventure de survie originale avec une carte plus grande, de nouveaux systèmes et plein de surprises. Que vous soyez un nouveau venu ou un vétéran du jardin, ces conseils vous aideront à survivre, à prospérer et peut-être même à vous faire quelques amis insectes en chemin. Voici les 10 meilleurs conseils pour les débutants.
10. Maîtrisez l’Omnitool Tôt
L’une des premières améliorations que vous obtiendrez dans Grounded 2 est l’Omnitool, un remplacement rationalisé de l’ancienne collection d’outils séparés. Au lieu de jongler avec des haches, des marteaux, des pelles et des clés, vous avez désormais un seul outil qui change de fonction selon ses améliorations. Vous commencerez avec la Hache Omni, qui vous permet de couper de l’herbe, de l’herbe sèche et des pissenlits pour la construction de base.
Au fur et à mesure de votre progression, vous pourrez débloquer le Marteau Omni pour briser des matériaux plus résistants, la Pelle Omni pour creuser et éventuellement la Clé Omni pour réparer. Toutes les améliorations se font aux Postes de Ranger, alors collectez des ressources et visitez-les régulièrement. Plus tôt vous débloquerez les quatre, plus vite vous pourrez collecter des matériaux et travailler sur des projets avancés.
9. Utilisez les Postes de Ranger pour Tout Analyser
Les Postes de Ranger ne servent pas seulement aux améliorations d’outils ; ils abritent également des Analyseurs, essentiels pour débloquer de nouvelles recettes. Chaque fois que les joueurs peuvent scanner une ressource ou une partie d’insecte, ils obtiennent des plans pour des objets liés à ce matériau. Cela peut être n’importe quoi, des pièces de construction aux ensembles d’armure. Les Analyseurs fonctionnent sur un système de charges, vous permettant de scanner quatre objets lorsqu’ils sont pleinement chargés. Si un poste est vide, rendez-vous à un autre, car chacun se recharge indépendamment. Le scanner booste également votre puissance cérébrale, ce qui débloque des recettes importantes à mesure que vous montez en niveau.
8. Suivez la Quête Principale le Premier Jour
Il est tentant de s’éloigner dès le début, mais Grounded 2 est impitoyable si vous n’êtes pas préparé. Lors de votre premier jour, suivez la quête principale jusqu’à ce que vous débloquiez la Hache Omni. Le chemin de la quête vous guidera vers les premières rencontres, les PNJ importants et votre premier disque optique. Un jalon précoce est d’atteindre la Fourmilière de la Cantine et de vaincre votre première Fourmi Soldat Rouge. Cela donne le Disque Optique Turbo de la Cantine, qui débloque des options d’artisanat cruciales comme la Poussinière et les Bases à Étage. Priorisez la Poussinière, car c’est votre première étape vers l’apprivoisement d’un compagnon insecte.
7. Obtenez Votre Premier Insecte-Monture
Les Insectes-Montures sont une nouvelle fonctionnalité passionnante dans Grounded 2, et ils sont plus que de simples montures. Ils peuvent vous aider à voyager plus vite, à combattre à vos côtés et même à transporter des ressources. Votre premier insecte-monture sera probablement la Fourmi Soldat Rouge, et en obtenir un nécessite une certaine préparation.
D’abord, vous aurez besoin du plan de la Poussinière provenant du disque optique. Construisez votre poussinière directement sur le sol (pas sur un plancher), et créez également un nid de fourmis pour stocker votre monture. Ensuite, aventurez-vous dans la Fourmilière de la Poussinière pour collecter un Œuf de Fourmi Soldat Rouge. Mais voici le piège. Vous devrez le sortir à la main, ce qui signifie que vous ne pouvez pas combattre en le tenant. Apportez une armure, vos meilleures armes et des torches pour les tunnels sombres. Une fois incubé ou instantanément éclos en dormant, votre fourmi deviendra un compagnon de voyage rapide et un allié au combat.
6. Choisissez Sagement l’Emplacement de Votre Base
Brook Hollow Park est immense, et l’endroit où les joueurs construisent leur base affectera grandement leur survie. Puisque Grounded 2 propose des attaques coordonnées d’insectes sur votre maison, le positionnement est critique. La meilleure défense est la hauteur. Construisez votre base en hauteur sur des rochers, des bûches ou des plates-formes surélevées. Cela limite l’accès des ennemis à un seul point d’entrée, rendant la défense beaucoup plus facile.
5. Améliorez Avant une Construction Massive
Ground 2
Il est facile de s’enthousiasmer et de commencer à construire des forteresses massives tout de suite, mais les ressources dans Grounded 2 sont liées aux améliorations d’outils. Si vous vous précipitez dans la construction avec des matériaux de bas niveau, vous les remplacerez plus tard par des options plus solides, gaspillant temps et efforts. Concentrez-vous d’abord sur le déblocage de tous les Omnitools, la collecte de ressources de construction avancées et l’exploration pour découvrir de meilleurs plans de murs et de sols. Une fois que vous avez ces éléments en main, vous pouvez vous consacrer à des projets de base plus grands et plus permanents sans reconstruction constante.
4. Gardez les Postes d’Artisanat et les Coffres à Proximité
Dans Grounded 2, l’artisanat puise automatiquement les objets dans le stockage à proximité, mais seulement dans une certaine portée. Par conséquent, il est important de garder vos coffres près de vos établis pour éviter d’aller et venir chercher des matériaux. L’organisation est tout aussi importante. Nommez vos coffres dans l’interface de stockage pour trouver rapidement les pièces dont vous avez besoin. Alors que l’inventaire se remplit de dizaines de parties d’insectes, de fibres et de plantes différentes, vous vous épargnerez beaucoup de frustration en restant organisé dès le départ.
3. Connaissez Votre Équipement
L’un des plus grands changements dans Grounded 2 est le système d’armure de style RPG, où chaque ensemble est construit autour d’un rôle spécifique. L’Armure de Fourmi Rouge augmente les chances de coup critique et réduit le coût d’endurance avec les armes à base de fourmi, idéale pour les builds de type voleur. L’Armure de Coccinelle augmente la génération de menace et réduit la perte d’endurance en bloquant, parfaite pour les joueurs tank. L’Armure de Ver Blanc augmente les dégâts sur les points faibles et accélère les attaques chargées, convenant aux combattants de précision. Enfin, l’Armure de Papillon réduit le coût d’endurance des attaques de bâton magique et crée des boucliers temporaires sur des parfaites, en faisant un excellent choix pour les joueurs de style mage.
2. Ajoutez des Babioles pour un Pouvoir Supplémentaire
Les Babioles sont des accessoires qui améliorent votre style de jeu choisi. Certaines amplifient vos forces actuelles, tandis que d’autres ajoutent des capacités entièrement nouvelles. Par exemple, le Condensateur Volatile ajoute des dégâts de choc à toutes les attaques de mêlée et peut surcharger certains insectes pour des effets supplémentaires. Gardez un œil sur les babioles lors de vos explorations. Équiper la bonne peut transformer une bonne construction en une construction mortelle, vous donnant un avantage à la fois au combat et pour la survie.
1. Construisez une Défense Parfaite pour Votre Base
Lorsque des nuées d’insectes attaquent votre base, deux choses feront la différence : une Clé Omni pour des réparations rapides et une Tourelle Gland pour une défense lourde. Maintenant, la tourelle a besoin d’un joueur pour fonctionner, mais elle déchire rapidement les vagues ennemies. Pour une couverture maximale, placez vos tourelles sur des plates-formes inclinées afin de pouvoir faire pleuvoir des tirs sur les ennemis approchants. Combinées à une base surélevée et un point d’entrée unique, ces défenses peuvent repousser même les nuées les plus folles.
Best Of
10 Mejores Consejos para Principiantes
Brook Hollow Park no es un paseo cualquiera por el parque, especialmente cuando tienes el tamaño de una hormiga y todo a tu alrededor te quiere de almuerzo. Grounded 2 amplía la aventura de supervivencia original con un mapa más grande, nuevos sistemas y muchas sorpresas. Ya seas completamente nuevo o un veterano del jardín, estos consejos te ayudarán a sobrevivir, prosperar y quizás incluso hacer algunos amigos insectoides en el camino. Aquí están los 10 mejores consejos para principiantes.
10. Domina el Omnitool Desde el Principio
Una de las primeras mejoras que obtendrás en Grounded 2 es el Omnitool, un reemplazo simplificado de la vieja colección de herramientas separadas. En lugar de lidiar con hachas, martillos, palas y llaves, ahora tienes una sola herramienta que cambia de función según sus mejoras. Comenzarás con el Hacha Omni, que te permite cortar hierba, hierba seca y dientes de león para construcciones básicas.
A medida que progresas, puedes desbloquear el Martillo Omni para romper materiales más duros, la Pala Omni para cavar y, eventualmente, la Llave Omni para reparar. Todas las mejoras se realizan en las Estaciones de Guardabosques, así que recolecta recursos y visítalas regularmente. Cuanto antes desbloquees las cuatro, más rápido podrás recolectar materiales y trabajar en proyectos avanzados.
9. Usa las Estaciones de Guardabosques para Analizar Todo
Las Estaciones de Guardabosques no son solo para mejoras de herramientas; también albergan Analizadores, que son esenciales para desbloquear nuevas recetas. Cada vez que los jugadores pueden escanear un recurso o parte de un insecto, obtienen planos para objetos relacionados con ese material. Esto puede ser cualquier cosa, desde partes de construcción hasta conjuntos de armadura. Los Analizadores funcionan con un sistema de carga, permitiéndote escanear cuatro objetos cuando están completamente cargados. Si una estación está vacía, dirígete a otra, porque cada una se recarga de forma independiente. Escanear también aumenta tu poder cerebral, lo que desbloquea recetas importantes a medida que subes de nivel.
8. Sigue la Misión Principal el Primer Día
Es tentador alejarse en el momento en que comienzas, pero Grounded 2 es implacable si no estás preparado. En tu primer día, sigue la línea de misiones principal hasta que desbloquees el Hacha Omni. El camino de la misión te guiará a encuentros tempranos, NPCs importantes y tu primer disco óptico. Un hito temprano es llegar al Hormiguero de la Cafetería y derrotar a tu primera Hormiga Roja Soldado. Esto produce el Disco Óptico Turbo de la Cafetería, que desbloquea opciones de fabricación cruciales como la Incubadora y las Bases de Múltiples Pisos. Prioriza la Incubadora, ya que es tu primer paso hacia la domesticación de un compañero insectoide.
7. Consigue tu Primer Insectoide
Los Insectoides son una característica nueva y emocionante en Grounded 2, y son más que simples monturas. Pueden ayudarte a viajar más rápido, luchar a tu lado e incluso transportar recursos. Tu primer insectoide probablemente será la Hormiga Roja Soldado, y conseguir uno requiere cierta preparación.
Primero, necesitarás el plano de la Incubadora del disco óptico. Construye tu incubadora directamente en el suelo (no sobre un suelo), y también crea un nido de hormigas para almacenar tu montura. Luego, aventúrate en el Hormiguero de la Incubadora para recolectar un Huevo de Hormiga Roja Soldado. Aquí está el truco. Tendrás que sacarlo a mano, lo que significa que no podrás luchar mientras lo sostienes. Lleva armadura, tus mejores armas y antorchas para los túneles oscuros. Una vez incubado o eclosionado instantáneamente al dormir, tu hormiga se convertirá en un compañero de viaje rápido y un aliado en combate.
6. Elige la Ubicación de tu Base con Cuidado
Brook Hollow Park es enorme, y donde los jugadores construyan su base afectará en gran medida su supervivencia. Dado que Grounded 2 presenta ataques coordinados de insectos a tu hogar, la posición es crítica. La mejor defensa es la altura. Construye tu base elevada sobre rocas, troncos o plataformas elevadas. Esto limita el acceso de los enemigos a un solo punto de entrada, haciendo la defensa mucho más fácil.
5. Mejora Antes de una Construcción Masiva
Ground 2
Es fácil emocionarse y comenzar a construir fortalezas masivas de inmediato, pero los recursos en Grounded 2 están vinculados a las mejoras de herramientas. Si te apresuras a construir con materiales de bajo nivel, terminarás reemplazándolos más tarde con opciones más fuertes, perdiendo tiempo y esfuerzo. Concéntrate primero en desbloquear todos los Omnitools, recolectar recursos de construcción avanzados y explorar para descubrir mejores planos de paredes y suelos. Una vez que los tengas en tus manos, podrás comprometerte con proyectos de base más grandes y permanentes sin tener que reconstruir constantemente.
4. Mantén las Estaciones de Fabricación y los Cofres Cerca
En Grounded 2, la fabricación extrae automáticamente objetos del almacenamiento cercano, pero solo dentro de un cierto rango. Por lo tanto, es importante mantener tus cofres cerca de tus bancos de trabajo para evitar ir y venir por materiales. La organización es igual de importante. Nombra tus cofres en la interfaz de almacenamiento para poder encontrar rápidamente las partes que necesitas. A medida que el inventario se llena con docenas de partes de insectos, fibras y plantas diferentes, te ahorrarás mucha frustración manteniéndote organizado desde el principio.
3. Conoce tu Equipo
Uno de los cambios más grandes en Grounded 2 es el sistema de armadura al estilo RPG, donde cada conjunto está construido alrededor de un rol específico. La Armadura de Hormiga Roja aumenta la probabilidad de crítico y reduce el costo de aguante con armas basadas en hormigas, lo que la hace ideal para construcciones tipo pícaro. La Armadura de Mariquita aumenta la generación de amenaza y reduce el drenaje de aguante al bloquear, perfecta para jugadores tanque. La Armadura de Larva aumenta el daño a puntos débiles y acelera los ataques cargados, adecuada para luchadores de precisión. Finalmente, la Armadura de Mariposa reduce el costo de aguante para los ataques con bastón mágico y crea escudos temporales en bloqueos perfectos, lo que la convierte en una gran elección para jugadores de estilo mago.
2. Añade Amuletos para Poder Extra
Los Amuletos son accesorios que mejoran tu estilo de juego elegido. Algunos amplifican tus fortalezas actuales, mientras que otros añaden habilidades completamente nuevas. Por ejemplo, el Capacitor Volátil añade daño eléctrico a todos los ataques cuerpo a cuerpo y puede sobrecargar ciertos insectos para efectos adicionales. Estate atento a los amuletos mientras exploras. Equipar el correcto puede convertir una buena construcción en una letal, dándote una ventaja tanto en combate como en supervivencia.
1. Construye una Defensa Perfecta para tu Base
Cuando los enjambres de insectos ataquen tu base, dos cosas marcarán la diferencia: una Llave Omni para reparaciones rápidas y una Torreta de Bellota para una defensa pesada. Ahora, la torreta necesita un jugador para operarla, pero destroza rápidamente las oleadas enemigas. Para una cobertura máxima, coloca tus torretas en plataformas en ángulo para poder llover disparos sobre los enemigos que se acercan. Combinadas con una base elevada y un solo punto de entrada, estas defensas pueden repeler incluso los enjambres más locos.