Nieuws
Kingdom Hearts Collection [I–III]: Every Keyblade and How to Unlock It
Every obtainable Keyblade and attack card across Kingdom Hearts Collection [I–III], grouped by game, with unlock requirements, practical tips, and platform bonuses.

 Voeg Gaming.net toe aan je voorkeursbronnen op Google
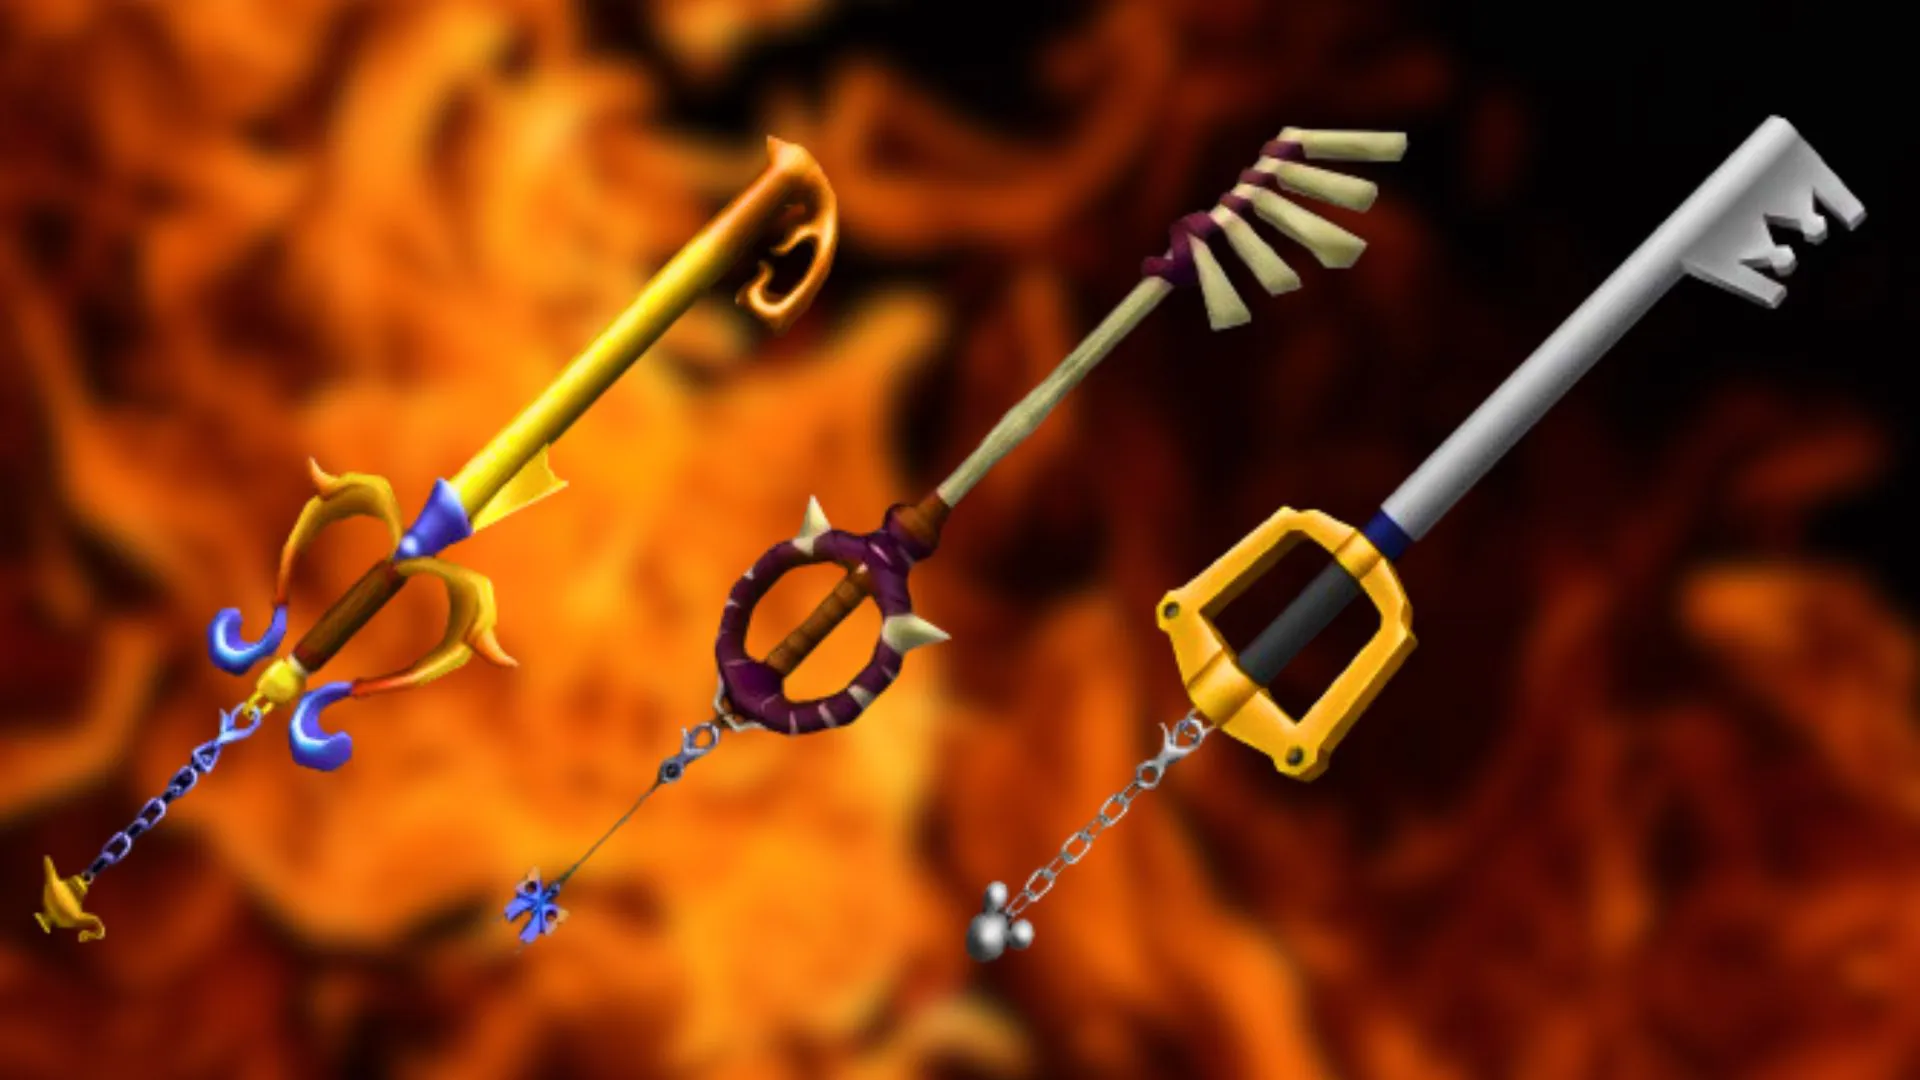
Every Kingdom Hearts game handles Keyblades a little differently. Some arrive when you finish a world, others sit in overlooked chests, and the hardest rewards ask you to clear optional bosses or complete a crafting checklist. This guide lists the obtainable Keyblades and Keyblade attack cards across Kingdom Hearts Collection [I–III], with an unlock route and a practical tip for each.
Spoiler notice: The tables name late-game locations, bosses, and playable characters. Jump to the game you are playing if you want to avoid later-story details.
The compilation headings below follow HD 1.5 ReMIX, HD 2.5 ReMIX, and HD 2.8 Final Chapter Prologue, then III + Re Mind. The first two are bundled together as HD 1.5+2.5 ReMIX in this collection. These are the remastered/Final Mix rules, which can differ from the original PS2, PSP, GBA, or DS releases. Square Enix’s collection page confirms the included packages.
Contents: Jump to a Game
- Kingdom Hearts Final Mix
- Kingdom Hearts Re:Chain of Memories
- Kingdom Hearts 358/2 Days (cinematic entry)
- Kingdom Hearts II Final Mix
- Kingdom Hearts Birth by Sleep Final Mix
- Kingdom Hearts Re:coded (cinematic entry)
- Kingdom Hearts Dream Drop Distance HD
- Kingdom Hearts 0.2 Birth by Sleep – A Fragmentary Passage
- Kingdom Hearts χ Back Cover (cinematic entry)
- Kingdom Hearts III
- Kingdom Hearts III Re Mind
Linked weapon names open reference pages for the individual unlocks; the tips are editorial guidance based on those mechanics.
Kingdom Hearts HD 1.5 ReMIX
Kingdom Hearts Final Mix: All 18 Keyblades
“Seal” means finish the world’s story and lock its Keyhole. Keep Donald and Goofy available for Trinity marks. For progression help alongside this checklist, consult Gaming.net’s Sora build guide and Final Mix ability guide.
| Keyblade | Unlock requirement | Useful guide |
|---|---|---|
| Kingdom Key | Receive it during the opening Heartless attack on Destiny Islands. | Automatic story weapon; practice locking on and dodging before chasing upgrades. |
| Jungle King | Seal Deep Jungle’s Keyhole. | Its reach makes early melee easier; complete the waterfall-area story sequence. |
| Three Wishes | Seal Agrabah’s Keyhole. | A straightforward story upgrade; finish Jafar’s encounters and the Keyhole scene. |
| Crabclaw | Seal Atlantica’s Keyhole. | Its MP bonus supports spells; finish both Ursula encounters and return to the Keyhole. |
| Pumpkinhead | Seal Halloween Town’s Keyhole. | Finish the Oogie Boogie story sequence; try it if you favor physical attacks. |
| Fairy Harp | Seal Neverland’s Keyhole. | The Keyhole is at the Clock Tower, not the pirate ship; finish the flying sequence. |
| Wishing Star | Open the chest in Geppetto’s House, Traverse Town, after completing Monstro and Geppetto’s move there. | Return to the First District; this reward is easy to overlook when leaving Monstro. |
| Spellbinder | Speak to Merlin after learning all seven basic spells: Fire, Blizzard, Thunder, Cure, Gravity, Stop, and Aero. | Base-level spells suffice; use the MP boost for casting rather than expecting high melee damage. |
| Metal Chocobo | Defeat Cloud in the Hercules Cup at Olympus Coliseum. | Finish the Cloud round; weigh its long reach against its MP penalty. |
| Olympia | Open the Lobby chest after winning the Phil, Pegasus, and Hercules Cups. | The cup reward and chest are separate; return to the Lobby after the third cup. |
| Lionheart | Defeat Leon and Cloud in the Hades Cup, seed 20. | Carry healing supplies for the paired fight; focus one opponent rather than splitting damage. |
| Lady Luck | Activate the White Trinity in Wonderland’s Lotus Forest. | Return after unlocking Trinity Detect in Hollow Bastion; explore the upper forest route. |
| Divine Rose | Speak to Belle in Hollow Bastion’s Library after rescuing Kairi. | Talk to Belle on the return visit; this is a strong Final Mix melee option without a superboss. |
| Oathkeeper | Speak to Kairi in Traverse Town’s Secret Waterway after rescuing her. | Follow the story back to Traverse Town; its MP bonus makes it a flexible late-game choice. |
| Oblivion | Open the chest on the upper platform in Hollow Bastion’s Grand Hall. | Return after the first Hollow Bastion climax; check above the stairs instead of only the floor. |
| Ultima Weapon | Synthesize it after making all 30 unique items in Lists I–V. | Use the Final Mix material checklist below; the original PS2 recipe is different. |
| Diamond Dust | Defeat Ice Titan in Olympus Coliseum’s Gold Match. | Return ice projectiles with Guard; avoid using Aero, which changes the projectile behavior unfavorably. |
| One-Winged Angel | Defeat Sephiroth in Olympus Coliseum’s Platinum Match. | Save first and prepare healing shortcuts; unlock this after strengthening Sora for optional bosses. |
If the optional matches are missing, unlock the Gold Match by winning the Phil, Pegasus, Hercules, and Hades Cups. The Platinum Match requires the first three cups to be unlocked and Hollow Bastion’s Keyhole sealed. Talk to Phil to select the unlocked match. Gold Match prerequisites and Platinum Match prerequisites.
Final Mix Ultima Weapon: The Crafting Route
Unlock the Traverse Town synthesis workshop with the Green Trinity in the Accessory Shop. Make each of the 30 different items in Lists I–V to open List VI. Ultima Weapon then requires 5 Thunder Gems, 5 Mystery Goo, 3 Serenity Power, 3 Stormy Stones, and 3 Dark Matter. Keep a checklist of unique creations; repeating a recipe does not replace a missing item. Synthesis reference.
The unusual ingredients come from optional farming: Pink Agaricus provides Serenity Power, Neoshadows provide Stormy Stones, and Mystery Goo can come from special mushroom enemies. Finish the story’s traversal upgrades before returning for missed chests and Trinity marks. Gaming.net’s Final Mix leveling guide can help plan the preparation.
Kingdom Hearts Re:Chain of Memories: All 23 Keyblade Attack Cards
These are cards in Sora’s deck, not equipped weapon swaps. The number printed on a card governs card breaks; a powerful name with a low number can still lose to a higher enemy card. “World loot” below means the card enters that world’s drops, treasure, and Moogle Shop availability when you enter the world; it does not promise an immediate copy.
A Room of Rewards needs a Key to Rewards map card plus the door’s other requirements. A Bounty chest is created with a Calm, Guarded, or False Bounty map card. Obtain the first special card before relying on random packs for duplicates. Map-card reference.
| Keyblade | Unlock requirement | Useful guide |
|---|---|---|
| Kingdom Key | Available from the start of Sora’s story. | Keep useful high-number copies even after finding stronger card types. |
| Three Wishes | World loot after entering Agrabah. | Visit a Moogle Room and compare card values before spending your Moogle Points. |
| Crabclaw | World loot after entering Atlantica. | Keep high-number copies; its quick break recovery helps if attacks are interrupted. |
| Pumpkinhead | World loot after entering Halloween Town. | Check your deck’s CP limit before replacing cheaper cards. |
| Fairy Harp | World loot after entering Neverland. | Its fast swing is useful for normal attacks; still prioritize the value needed for your sleights. |
| Wishing Star | World loot after entering Monstro. | Search breakable scenery and treasure rooms while building a higher-value deck. |
| Spellbinder | Open the chest at Tigger’s Playground in 100 Acre Wood. | Lightning attacks are enemy-dependent; keep a physical alternative for resistant targets. |
| Metal Chocobo | Open the Olympus Coliseum Room of Rewards chest. | Its neutral damage can bypass physical defenses; save a Key to Rewards for this room. |
| Olympia | World loot after entering Olympus Coliseum. | A reliable physical card; check attack values rather than assuming every copy is stronger. |
| Lionheart | Open the Traverse Town Room of Rewards chest. | Fire damage is useful selectively; avoid using it against fire-absorbing enemies. |
| Lady Luck | World loot after entering Wonderland. | Use copies with the values your chosen sleights require. |
| Divine Rose | World loot after entering Hollow Bastion. | Its strong first hit suits normal combos; manage the card’s CP cost. |
| Oathkeeper | Story reward after Darkside and the following Naminé scene. | Its strong thrust supports regular combos; the story sequence gives the initial copy. |
| Oblivion | Story reward after the later Larxene battle and Naminé scene. | Neutral damage helps against physical defenses; do not confuse this with the Hollow Bastion chest in KH1. |
| Ultima Weapon | Clear Reverse/Rebirth, complete Sora’s first Marluxia battle, then open a Castle Oblivion Bounty chest. | Return to Sora’s save after Riku’s ending; this is a map-card reward, not synthesis. |
| Diamond Dust | Loot/shop availability after Sora’s first Marluxia battle. | Ice damage can be resisted; check new attack-card packs after that milestone. |
| One-Winged Angel | Loot/shop availability after Sora’s first Marluxia battle. | Its strength is concentrated in the combo finish; fire-resistant enemies require another card. |
| Star Seeker | After the HD 358/2 Days completion bonus, open the additional Castle Oblivion Room of Rewards chest. | See the bonus checklist below; this card is not unlocked by KH2’s Valor Form here. |
| Bond of Flame | After the HD 358/2 Days completion bonus, open the additional Halloween Town Room of Rewards chest. | Keep fire resistance in mind; budget CP before replacing your physical attack cards. |
| Total Eclipse | After the HD 358/2 Days completion bonus, open the additional Olympus Coliseum Room of Rewards chest. | This HD bonus replaces Monochrome from older Re:Chain versions; it deals neutral damage. |
| Midnight Roar | After the HD 358/2 Days completion bonus, open the additional Neverland Room of Rewards chest. | A strong thrust card; use the correct room rather than searching ordinary Neverland loot. |
| Maverick Flare | After the HD 358/2 Days completion bonus, open a Traverse Town Bounty chest. | This reward uses Bounty, not Room of Rewards; older guides may call it Hidden Dragon. |
| Two Become One | After the HD 358/2 Days completion bonus, open the additional Destiny Islands Room of Rewards chest. | This HD bonus replaces Photon Debugger; it is not a reward for fighting Roxas in this game. |
How to Activate the HD Bonus Cards
Complete all scenes in the 358/2 Days HD movie in the same compilation, then open/read all Roxas’s Diary, Secret Reports, and Character Files entries so the completion bonus is registered. Return to Re:Chain of Memories and revisit the listed reward rooms; the bonus cards are additional rewards, not automatic deck additions. For a first story playthrough, postpone this movie until after Kingdom Hearts II to avoid revealing its mysteries. HD bonus reference.
The original-version cards Monochrome, Follow the Wind, Hidden Dragon, and Photon Debugger are replaced by Total Eclipse, Midnight Roar, Maverick Flare, and Two Become One in the HD release. Riku’s Reverse/Rebirth campaign uses fixed Soul Eater cards, so there is no separate collectible Keyblade deck for him. The generic Keyblade card in Bumble-Rumble is a minigame tool, not a permanent weapon unlock. Version comparison.
Kingdom Hearts 358/2 Days: Cinematic Entry
The collection contains the HD cutscene movie, not the playable DS game. There are no equipable Days Keyblades to unlock inside this movie; its completion bonus supplies the six Re:Chain cards listed above.
Kingdom Hearts HD 2.5 ReMIX
Kingdom Hearts II Final Mix: All 24 Keyblades
Several worlds have a second story visit, so clearing the first visit is not enough for every reward. Equipped Keyblade abilities matter as much as attack stats. Gaming.net’s Sora build guide for II Final Mix and II Final Mix ability guide offer related setup advice.
| Keyblade | Unlock requirement | Useful guide |
|---|---|---|
| Kingdom Key | Sora and Roxas receive it automatically during their opening story sections. | No optional task; learn Guard and reaction commands before optimizing equipment. |
| Star Seeker | Receive new clothes and Valor Form from the fairies at Yen Sid’s Tower. | It initially occupies Valor’s second weapon slot; obtain another Keyblade to free it for normal use. |
| Oathkeeper | Complete the Gate event during Sora’s return visit to Twilight Town. | Its Form Boost extends Drive Form duration; follow the main Twilight Town revisit. |
| Hidden Dragon | Defeat Shan-Yu in the Land of Dragons’ first visit. | MP Rage helps restore MP when damaged, but avoid deliberately taking dangerous hits. |
| Hero’s Crest | Defeat the Hydra in Olympus Coliseum’s first visit. | Air Combo Boost favors airborne combo finishers; use reaction commands during the Hydra fight. |
| Monochrome | Finish Timeless River, including the Pete battles. | Item Boost is useful for healing-item setups; complete the portal story through Disney Castle. |
| Follow the Wind | Defeat Barbossa in Port Royal’s first visit. | Draw improves pickup range; keep enemies in moonlight during the Barbossa encounter. |
| Circle of Life | Speak with Simba at the Oasis in the Pride Lands. | This arrives before the world’s final battle; MP Haste helps shorten MP recharge. |
| Photon Debugger | Defeat the Hostile Program in Space Paranoids’ first visit. | Thunder Boost supports lightning casting; do not wait for the second Tron visit. |
| Gull Wing | Speak to the Gullwings at Hollow Bastion’s Postern after the 1,000 Heartless battle and collect their reward. | Experience Boost works at low HP; save first and avoid risking a death merely for extra EXP. |
| Rumbling Rose | Reunite with Beast after the Ballroom Nobody fight on the second Beast’s Castle visit. | Finishing Plus adds a finisher; this is obtained before the second visit’s final boss. |
| Guardian Soul | Defeat Hades on the second Olympus Coliseum visit. | Reaction Boost improves reaction-command damage; useful when fights offer those commands. |
| Wishing Lamp | Defeat Jafar on Agrabah’s second visit. | Jackpot increases dropped munny and recovery orbs; use it for resource collection. |
| Decisive Pumpkin | Defeat the Experiment on Halloween Town’s second visit. | Combo Boost strengthens ground finishers; a useful physical alternative to Ultima Weapon. |
| Sweet Memories | Finish The Expotition in 100 Acre Wood. | In Final Mix it has Drive Converter, not the original release’s Lucky Lucky; use it for Drive-orb farming. |
| Mysterious Abyss | Complete Ursula’s Revenge in Atlantica. | Blizzard Boost is its purpose; revisit when the story’s musical prerequisites are met. |
| Sleeping Lion | Speak to Leon before entering Space Paranoids for the second story visit. | Combo Plus lengthens ground combos; consider whether a quicker finisher better suits your target. |
| Bond of Flame | Finish the Nobody battle with Axel in Betwixt and Between. | Fire Boost supports Firaga setups; this is a story reward on the route to the final world. |
| Two Become One | Defeat Roxas in the World That Never Was. | Light & Darkness affects Drive transformations; use it deliberately when unlocking Final Form. |
| Fatal Crest | Win the Goddess of Fate Cup in the Underworld. | Berserk Charge prevents normal finishers during MP Charge; avoid it when a finisher is needed to end a boss. |
| Fenrir | Defeat Sephiroth at Dark Depths, tell Cloud in the Marketplace, then return to Dark Depths for Tifa’s reward scene. | Do all three steps; Negative Combo shortens combos and can help finisher-based challenges. |
| Ultima Weapon | Obtain the Ultimate Recipe and synthesize it with a level-2-or-higher Moogle and an Energy Crystal. | Follow the seven Orichalcum+ checklist below; its MP Hastega speeds recharge. |
| Winner’s Proof | Meet the required score for Mushrooms I–XII, then activate Mushroom XIII at the Great Maw. | This is all mushroom challenges, not merely defeating them; No Experience stops EXP while equipped. |
| Oblivion | Reunite with Riku in the World That Never Was. | Automatic late-story reward; Drive Boost can support Drive recovery during MP Charge. |
The Goddess of Fate Cup opens after winning the Pain and Panic, Cerberus, and Titan Cups and defeating Xemnas for the first time. Return to the Underworld to enter it; winning grants both Fatal Crest and an Orichalcum+. Cup prerequisites.
II Final Mix Ultima Weapon: All Seven Orichalcum+ Sources
Find the Ultimate Recipe in the Mansion’s Basement Corridor, Twilight Town. Raise the Moogle to at least level 2 so an Energy Crystal can reduce the displayed requirement from 13 Orichalcum+ to the seven available. The Final Mix recipe also lists 1 Orichalcum, 1 Mythril Crystal, 1 Dense Crystal, 1 Twilight Crystal, and 3 Serenity Crystals before material reductions. II Final Mix synthesis guide.
Collect the seven Orichalcum+ rewards: the Central Computer Mesa chest in Space Paranoids; Sunset Terrace chest in Twilight Town; Brink of Despair chest in the World That Never Was; finish Starry Hill in 100 Acre Wood; complete Atlantica’s A New Day is Dawning; win the Goddess of Fate Cup; and deliver every synthesis material type to the Moogle. Final Mix’s material collection includes its added materials, so an original KH2 checklist is insufficient. Orichalcum reference.
Kingdom Hearts Birth by Sleep Final Mix: All 24 Keyblade Types
Terra, Ventus, and Aqua have separate saves, inventories, and Mirage Arena progress. “All three” means earn the reward separately on each character’s file. The shared unlock condition stays the same, but weapon reach differs by wielder. Character-specific rewards are labeled in each row.
| Keyblade / wielder | Unlock requirement | Useful guide |
|---|---|---|
| Earthshaker — Terra | Terra’s starting Keyblade. | No side task; compare later weapons against your Strength and command setup. |
| Wayward Wind — Ventus | Ventus’s starting Keyblade. | No side task; its short reach makes positioning important. |
| Rainfell — Aqua | Aqua’s starting Keyblade. | No side task; support Aqua’s spell deck with later Magic-focused upgrades. |
| Treasure Trove — all three | Finish Dwarf Woodlands on the relevant character’s save. | Complete that character’s world story; rewards do not transfer between saves. |
| Stroke of Midnight — all three | Finish Castle of Dreams on the relevant character’s save. | An early critical-hit option; follow each character’s different Cinderella storyline. |
| Fairy Stars — all three | Finish Enchanted Dominion on the relevant character’s save. | Its Magic bonus suits a developing spell deck. |
| Victory Line — all three | Finish first in the Castle Circuit Rumble Racing course. | Replay the Disney Town race, use shortcuts, and aim for first place rather than simply finishing. |
| Mark of a Hero — all three | Finish Olympus Coliseum on the relevant character’s save. | Strength-focused reward; finish the character’s story tournament. |
| Hyperdrive — all three | Finish Deep Space on the relevant character’s save. | Balanced Strength/Magic makes it useful for mixed command decks. |
| Pixie Petal — all three | Finish Neverland on the relevant character’s save. | High Magic compensates for short reach; favor spells when enemies stay out of melee range. |
| Sweetstack — all three | Make every ice-cream recipe available to that character at Disney Town’s ice-cream shop. | Farm ingredient Prize Pods and check the character-specific recipe list; its melee hits always crit. |
| Ultima Weapon — all three | Win Villains’ Vendetta in the Mirage Arena; available at Arena Level 25 in Final Mix. | Build Arena Level on each save; this is a combat reward rather than a synthesis recipe. |
| Void Gear — all three | Defeat Vanitas Remnant in the Keyblade Graveyard’s Badlands. | Unlock the postgame encounter through the Final Episode clear; save and prepare before entering. |
| No Name — all three | Defeat the Unknown/Mysterious Figure at the Land of Departure after Vanitas Remnant. | This reward belongs to the optional boss, not the story villain’s own weapon; prioritize survival commands. |
| Royal Radiance — all three | Win Peering into Darkness against No Heart at Mirage Arena Level 30. | Track Arena requirements; this Final Mix reward has excellent stats and faster command-gauge filling. |
| Darkgnaw — Terra | Win Dead Ringer in the Mirage Arena, available at Arena Level 5. | The boss encounter ends the arena match; its Strength gain trades away reach. |
| Ends of the Earth — Terra | Complete Terra’s meeting with Riku on Destiny Islands. | Automatic story reward; continue the world map sequence after Neverland. |
| Chaos Ripper — Terra | Defeat Master Eraqus at the Land of Departure. | High Strength comes with a Magic penalty; swap away if your deck depends on damaging spells. |
| Frolic Flame — Ventus | Complete Ventus’s meeting with Lea in Radiant Garden. | Automatic story reward; this is not obtained in Disney Town. |
| Lost Memory — Ventus | Complete Ventus’s meeting with Vanitas on Destiny Islands. | Automatic late-story reward; good reach and critical performance support melee commands. |
| Destiny’s Embrace — Aqua | Complete Aqua’s meeting with Kairi in Radiant Garden. | Automatic story reward; its critical-hit tendency suits physical attacks. |
| Stormfall — Aqua | Complete Aqua’s meeting with Sora and Riku on Destiny Islands. | Automatic late-story reward; a balanced option for mixed commands. |
| Brightcrest — Aqua | Start the Final Episode after unlocking it with all three completed stories and all Xehanort Reports. | Load the new Final Episode save; its Magic bonus suits Aqua’s spells. |
| Master’s Defender — Aqua | Start the Secret Episode after meeting its difficulty-dependent requirements. | Used in this separate episode; see the checklist below rather than searching ordinary-world chests. |
Birth by Sleep Episode and Arena Checklist
For the Final Episode, keep completed Terra, Ventus, and Aqua saves and collect every Xehanort Report; Terra’s missing report often comes from the Keepers of the Arena match. The game then offers a separate Final Episode save. Do not overwrite your three character clears. Final Episode reference.
The Secret Episode in Final Mix requires the Final Episode clear plus difficulty conditions: Critical needs the clear; Proud additionally needs all three completed Sticker Albums; Standard adds Keyslinger; Beginner also needs In the Munny and Power Walker. Complete each album to its full 140-point reward, not just sticker collection. Keyslinger tracks 9,999 Unversed, In the Munny 33,333 munny, and Power Walker 99,999 steps. These are in-game trophy requirements. Secret-ending requirements.
Arena rewards can require racing, Command Board, medal, and battle milestones to raise Arena Level. Final Mix puts Villains’ Vendetta at level 25; guides listing level 30 describe the earlier version. Royal Radiance remains a level-30 reward. Unlock each mission on the character who needs its Keyblade. Villains’ Vendetta requirements and No Heart mission.
Kingdom Hearts Re:coded: Cinematic Entry
Re:coded is also a movie in this collection. Its DS weapon upgrades and System Sector unlocks cannot be earned here. Do not spend time looking for the DS game’s Zero/One or Metal Chocobo rewards in the HD movie menu.
Kingdom Hearts HD 2.8 Final Chapter Prologue
Kingdom Hearts Dream Drop Distance HD: All 15 Keyblade Types
Sora and Riku earn most rewards separately. Unless a row specifies one character, complete the condition with both to add the weapon to both inventories. Special Portals and Secret Portals are different challenges; completing one set does not award the other set’s Keyblade.
| Keyblade / wielder | Unlock requirement | Useful guide |
|---|---|---|
| Kingdom Key — Sora | Sora’s starting Keyblade. | Automatic; its replacement rewards stay in Sora’s inventory. |
| Way to the Dawn — Riku | Riku’s starting Keyblade. | Automatic; Riku’s prologue Soul Eater is a sword, not another collectible Keyblade. |
| Skull Noise — both | Finish Traverse Town’s first visit as each character. | Clear each character’s own world boss; one character’s reward does not unlock the other’s. |
| Guardian Bell — both | Finish La Cité des Cloches as each character. | A story reward; compare its Magic advantage with your current commands. |
| Ferris Gear — Sora | Finish Sora’s Prankster’s Paradise story. | Sora-only; do not search Riku’s version of the world for it. |
| Ocean’s Rage — Riku | Finish Riku’s Prankster’s Paradise story. | Riku-only; a Magic-oriented alternative to Sora’s Ferris Gear. |
| Dual Disc — both | Finish The Grid as each character. | Its Strength bonus suits attack commands; complete both separate stories. |
| Knockout Punch — both | Finish Traverse Town’s second visit as each character. | Return when the second visit opens; the first Traverse Town clear is insufficient. |
| All for One — both | Finish Country of the Musketeers as each character. | A useful Magic-focused story upgrade; keep progressing both campaigns. |
| Counterpoint — both | Finish Symphony of Sorcery as each character. | Long reach and high Magic suit late-story mixed combat. |
| Sweet Dreams — both | Win round 5 of the Secret Cup in Flick Rush as the character receiving the reward. | Flick Rush cup progress is shared; switch characters and replay the final Secret Cup round for the second copy. |
| Divewing — both | Earn an A rank in every Dive session for the relevant character. | Replay dives from the world map; improving Sora’s ranks does not complete Riku’s checklist. |
| End of Pain — both | Clear every Special Portal as the relevant character. | Check the forecast and cycle Drops to find missing portal variants; bonus objectives are not required for this unlock. |
| Unbound — both | Clear every Secret Portal as the relevant character. | These are postgame boss rematches; keep their checklist separate from Special Portals. |
| Ultima Weapon — both | Defeat Julius in Traverse Town’s Fountain Plaza as the relevant character after clearing the game. | Save before entering the plaza; defeating him as Sora does not award Riku’s copy. |
For End of Pain, keep separate Sora/Riku records of the numbered Special Portals in each world. For Unbound, finish the main game, then find the Secret Portals near the relevant world boss arenas. Sora’s Nightmare’s End and Riku’s Mirage Split create a Combined Keyblade during a Dual Link; that temporary attack is not a sixteenth equipable Keyblade. Portal reference.
Kingdom Hearts 0.2 Birth by Sleep – A Fragmentary Passage
| Keyblade / wielder | Unlock requirement | Useful guide |
|---|---|---|
| Master’s Defender — Aqua | Aqua begins the episode with it. | There are no alternate collectible Keyblades; focus on objectives, accessories, and mastering Spellweaver. |
Kingdom Hearts χ Back Cover: Cinematic Entry
Back Cover is a film, so its characters’ Keyblades are story props rather than unlockable equipment. The playable mobile/browser games’ weapon progression is outside this collection.
Kingdom Hearts III + Re Mind
All 16 Standard Sora Keyblades
III lets Sora equip three Keyblades and upgrade them at the Keyblade Forge. Compare weapons at similar upgrade levels rather than treating their starting stats as permanent. Formchanges often determine which weapon fits an encounter. Gaming.net’s Kingdom Hearts III weapon guide provides related weapon discussion.
| Keyblade | Unlock requirement | Useful guide |
|---|---|---|
| Kingdom Key | Sora’s default weapon. | Second Form remains usable as you upgrade it; no optional unlock is required. |
| Hero’s Origin | Finish Olympus. | Counter Shield rewards well-timed blocks; practice guarding before retaliating. |
| Shooting Star | Finish Twilight Town’s opening story visit. | Double Arrowguns offers ranged attacks; useful when closing on enemies is inconvenient. |
| Favorite Deputy | Finish Toy Box. | Lucky Strike supports material farming; Hyper Hammer handles groups of nearby enemies. |
| Ever After | Finish the Kingdom of Corona. | Mirage Staff offers mobile magic attacks; keep it in a Magic-focused loadout. |
| Happy Gear | Finish Monstropolis. | Agile Claws and Twin Yo-Yos suit aggressive crowd combat; watch enemy attacks while committing to combos. |
| Crystal Snow | Finish Arendelle. | Freeze Protection is useful against freezing attacks; Blizzard Claws and Blades offer mobile offense. |
| Hunny Spout | Finish 100 Acre Wood’s story/minigames. | Visit Merlin in Twilight Town when the book event opens; its ranged forms complement melee weapons. |
| Nano Gear | Finish San Fransokyo. | Stun Protection helps against stunning attacks; its Nano Arms form offers varied melee tools. |
| Wheel of Fate | Finish The Caribbean. | Highwind and Storm Flag favor physical combat; the world’s story clear, not ship upgrades alone, awards it. |
| Starlight | Defeat the Demon Tide at the Badlands during the Keyblade Graveyard story. | You do not need the discontinued Union χ bonus-code challenge; the main story awards it. |
| Grand Chef | Raise Le Grand Bistrot in Twilight Town to five stars. | Earn Excellent on all 20 Classic Menu dishes; Special Menu dishes do not raise this star rank. |
| Classic Tone | Record a score in every one of the 23 Classic Kingdom games. | Collect missing games from posters/chests, then play each; no demanding universal score threshold is needed. |
| Ultima Weapon | Unlock its recipe with 58 different synthesis materials, then synthesize it. | Use the recipe and seven Orichalcum+ checklist below; this grants Ultimate Form. |
| Oathkeeper | Photograph all 90 Lucky Emblems, clear the main game, then exchange Proof of Promises at a Moogle Shop. | 80 emblems are enough for one crafting reward, but not this Keyblade; check every world’s emblem count. |
| Oblivion | Clear the main game on Critical Mode, then exchange Proof of Times Past at a Moogle Shop. | Re Mind purchase alone does not unlock it; use the Critical clear save and visit the shop. |
III Ultima Weapon: Recipe and All Seven Orichalcum+ Rewards
Collect 58 different synthesis material types to unlock the recipe in the workshop’s collection goals. Craft it with 7 Orichalcum+, 2 Wellspring Crystals, 2 Lucid Crystals, and 2 Pulsing Crystals. This is a type-count requirement, not 58 pieces of the same material. Ultima Weapon recipe.
The seven Orichalcum+ sources are: the Exile Island chest in The Caribbean; the Final World chest accessible on a return visit; 80 Lucky Emblems; the reward threshold in all seven Flantastic Seven minigames; all 10 Frozen Slider treasures; defeating Omega Machina in The Eclipse; and a random Prize Postcard reward from the Twilight Town mailbox. Keep the postcard result until it awards the material; it is not guaranteed on the first mailing.
For the Flantastic Seven, score above these thresholds: Cherry/Olympus 20,000, Strawberry/Toy Box 17,000, Orange/Corona 23,000, Banana/Monstropolis 20,000, Grape/Arendelle 20,000, Watermelon/Caribbean 28,000, and Honeydew/San Fransokyo 15,000. For Omega Machina, clear the surrounding Eclipse Gummi boss encounters to open its fight, then prepare a combat-capable ship.
Platform and Purchase Bonuses: Seven Additional Keyblade Variants
These variants depend on the edition or storefront. They are not a seven-weapon side quest available on every platform. The current collection’s platform list is on Square Enix’s official page; distinguish the native Switch 2 game from the older Switch cloud version.
| Keyblade | Unlock requirement | Useful guide |
|---|---|---|
| Midnight Blue | Available from the start in the PS5 edition. On PS4, tied to its preorder/DLC entitlement. | PlayStation-specific; check installed add-ons if using the older PS4 release. |
| Phantom Green | Available from the start in the Xbox Series X and Series S edition. On Xbox One, tied to its preorder/DLC entitlement. | Xbox-specific; completing a world on another platform will not unlock it. |
| Long Night | Available from the start in the Nintendo Switch 2 edition of the collection. | This is the Switch 2 bonus; it is different from Advent Red in the older cloud release. |
| Dead of Night | Available from the start in the Steam edition of III. | Steam-specific; no synthesis or preorder challenge is needed in that version. |
| Elemental Encoder | Available from the start in the Epic Games Store edition of III. | Epic-specific; owning a different PC storefront version does not grant it. |
| Advent Red | Available from the start in the original Nintendo Switch cloud edition of III. | Legacy cloud-edition bonus; do not list it as the native Switch 2 reward. |
| Dawn Till Dusk | Legacy PS4/Xbox One retailer-preorder bonus or separately owned DLC entitlement. | Check that older edition’s add-ons; it is not a boss reward or a promised bonus in every new collection edition. |
Re:Mind and Temporary Character Keyblades
Re Mind adds playable character segments and challenging encounters, but it does not turn the other characters’ weapons into collectible Sora Keychains. Oathkeeper and Oblivion are main-game proof rewards from the free update; they do not require clearing the Limitcut data battles or the secret boss.
| Keyblade / wielder | Unlock requirement | Useful guide |
|---|---|---|
| Way to the Dawn — Riku | Automatically equipped during Riku’s early main-game playable encounter. | No inventory hunt; use Riku’s supplied commands and defend before counterattacking. |
| Braveheart — Riku | Automatically supplied in Riku’s later playable main-game/Re Mind segments. | It cannot be transferred to Sora; use the character’s available defensive tools. |
| Master’s Defender — Aqua | Automatically supplied in Aqua’s playable main-game/Re Mind segments. | Use Aqua’s own magic and movement; this is not an additional Sora weapon. |
| Oathkeeper and Oblivion — Roxas | Automatically supplied when choosing/controlling Roxas in his Re Mind battle segment. | The paired weapons are fixed for Roxas; they do not grant Sora’s proof rewards. |
| Destiny’s Embrace — Kairi | Automatically supplied when choosing/controlling Kairi in her Re Mind battle segment. | Use her supplied attacks and healing; no separate chest or synthesis unlock exists. |
Mickey’s Kingdom Key D/Star Cluster, Lea’s Bond of the Blaze, Ventus’s Wayward Wind, and Xion’s Replica Kingdom Key appear in character/story or group battle roles. They are not additional permanent Sora equipment unlocks. The same distinction applies to enemy Keyblades such as the Keyblade of heart in KH1 and the χ-blade: seeing a weapon in a cutscene does not create an inventory reward. III character-weapon reference.
A Useful Collection-Wide Unlock Plan
Finish each game’s main story before treating its optional weapons as a completion checklist. Then revisit NPC rewards and chests, handle minigames and synthesis, and leave superboss rewards until your abilities and healing setup are ready. In Birth by Sleep and Dream Drop Distance, keep a checklist per character so a reward earned on one route does not look like a missing unlock on another.
Choose a Keyblade for its job: Magic and MP support for casting, reach for awkward melee targets, elemental effects for susceptible enemies, and abilities or Formchanges for specific encounters. A later unlock is not automatically better for every build. Gaming.net’s ranked Keyblade feature offers further series context once you are comfortable with spoilers.